
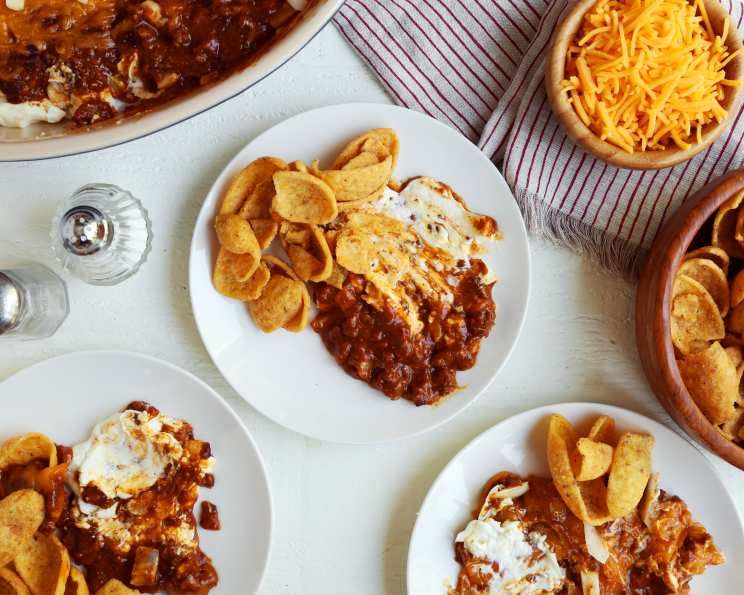
Skyline Chili Dip: A Cincinnati Party Staple
My first taste of Skyline Chili wasn’t over spaghetti, but melted into a creamy, cheesy dip at a friend’s college apartment. The aroma alone sparked a frenzy, and within minutes, the dish was completely devoured, leaving behind only the faintest scent of cinnamon and a chorus of satisfied sighs. It was love at first bite, a culinary handshake introducing me to a Cincinnati tradition I’ve cherished ever since. This Skyline Chili Dip recipe brings back those memories with every warm, savory scoop.
Recipe Overview
- Prep Time: 5 minutes
- Cook Time: 10 minutes
- Total Time: 15 minutes
- Servings: 8-10
- Yield: About 4 cups
- Dietary Type: Varies based on chili choice (can be gluten-free)
Ingredients
- 1 (8 ounce) package cream cheese, softened
- 1 (13 ounce) package frozen chili or 1 (15 ounce) can Skyline Chili
- 1 (8 ounce) package shredded cheddar cheese
- ¼ cup onion, diced (optional)
Equipment Needed
- Casserole dish (approximately 8×8 inches)
- Microwave-safe bowl or baking dish
- Spatula or spoon for spreading
Instructions
- Preheat your oven to 350°F (175°C) if using a conventional oven. Alternatively, prepare your microwave-safe dish.
- Spread the softened cream cheese evenly on the bottom of your casserole dish. It’s crucial that the cream cheese is softened to ensure a smooth and even layer. This creates the base for a decadent, creamy experience.
- If desired, sprinkle the diced onions over the cream cheese layer. This adds a subtle bite that cuts through the richness of the other ingredients. If you are not a fan of onions, this step can be easily omitted.
- Pour the Skyline Chili or thawed frozen chili over the cream cheese and onions (if using). Ensure the chili is evenly distributed to guarantee consistent flavor in every bite. If using frozen chili, make sure it’s thoroughly thawed before this step.
- Generously cover the chili layer with the shredded cheddar cheese. The more cheese, the better! This creates a golden, bubbly crust that adds the perfect textural contrast to the creamy layers beneath.
- Conventional Oven: Bake at 350°F (175°C) until the cheese is melted and bubbling, but not brown, approximately 10 minutes. Keep a close eye on it to prevent burning.
- Microwave Oven: Heat on high for 2 minutes, or until the cheese is melted. Microwave times may vary depending on your appliance, so check frequently.
- Remove from the oven or microwave and let cool for a minute before serving.
- Serve warm with your favorite dippers!
Expert Tips & Tricks
- Softening the Cream Cheese: For the smoothest possible base, allow the cream cheese to sit at room temperature for at least 30 minutes, or microwave it for 15-20 seconds (unwrapped) until softened. Be careful not to overheat it!
- Chili Consistency: If your chili is too thick, add a tablespoon or two of water to thin it out slightly before pouring it over the cream cheese.
- Cheese Distribution: For even melting, use freshly shredded cheese instead of pre-shredded. Pre-shredded cheese often contains cellulose, which can inhibit melting.
- Browning Prevention: To prevent the cheese from browning too quickly in the oven, you can tent the dish loosely with foil for the first 5 minutes of baking.
- Spice it Up: For a spicier kick, add a pinch of cayenne pepper to the chili layer before adding the cheese.
- Make Ahead: Prepare the dip completely, cover, and refrigerate for up to 24 hours before baking. You may need to add a few extra minutes to the baking time if starting from cold.
Serving & Storage Suggestions
Serve this Skyline Chili Dip warm with a variety of dippers such as corn chips, Fritos corn chips, tortilla chips, pretzels, or even vegetable sticks. For a true Cincinnati experience, opt for the corn chips!
Leftovers can be stored in an airtight container in the refrigerator for up to 3 days. Reheat in the microwave or a low oven until warmed through. The texture might change slightly upon reheating, but the flavor will still be delicious.
It is not recommended to leave this dip at room temperature for more than 2 hours due to the dairy content. Freezing is not recommended, as the cream cheese and cheese can become grainy upon thawing.
Nutritional Information
| Nutrient | Amount per Serving | % Daily Value |
|---|---|---|
| Calories | 421.7 kcal | N/A |
| Calories from Fat | 312 g | 74% |
| Total Fat | 34.7 g | 53% |
| Saturated Fat | 20.1 g | 100% |
| Cholesterol | 110.3 mg | 36% |
| Sodium | 815.8 mg | 33% |
| Total Carbohydrate | 11.3 g | 3% |
| Dietary Fiber | 3.3 g | 13% |
| Sugars | 2.6 g | 10% |
| Protein | 18.2 g | 36% |
Nutritional information is an estimate and may vary based on specific ingredients and serving sizes.
Variations & Substitutions
- Vegetarian Option: Use a vegetarian chili in place of Skyline Chili.
- Dairy-Free: Substitute the cream cheese with a plant-based cream cheese alternative, and use dairy-free cheddar shreds.
- Spicy Version: Add a pinch of cayenne pepper or a dash of hot sauce to the chili layer.
- Layered Dip: Add a layer of refried beans beneath the cream cheese for a heartier dip.
- Italian Twist: Use Italian seasoning and mozzarella cheese for a different flavor profile.
FAQs (Frequently Asked Questions)
Q: Can I make this dip ahead of time?
A: Yes, you can assemble the dip ahead of time and store it in the refrigerator for up to 24 hours before baking.
Q: Can I use a different type of cheese?
A: Absolutely! Monterey Jack, Colby Jack, or a blend of cheeses would work well.
Q: Is Skyline Chili gluten-free?
A: Skyline Chili itself is not gluten-free. However, some canned or frozen chili brands offer gluten-free options that can be substituted.
Q: Can I use a slow cooker for this dip?
A: Yes, you can. Layer the ingredients in the slow cooker and cook on low for 1-2 hours, or until the cheese is melted and bubbly.
Q: What if I don’t have a casserole dish?
A: You can use any oven-safe or microwave-safe dish. A pie plate or even a skillet would work in a pinch.
Final Thoughts
This Skyline Chili Dip is more than just a recipe; it’s a taste of Cincinnati, a connection to good times, and a guaranteed crowd-pleaser. Don’t be surprised when it disappears in minutes! I encourage you to gather your friends, put on some music, and enjoy this savory delight. Feel free to share your own variations and feedback – I’m always excited to hear how you make this recipe your own. For a truly authentic experience, serve this dip with a cold local beer and watch the smiles spread!