
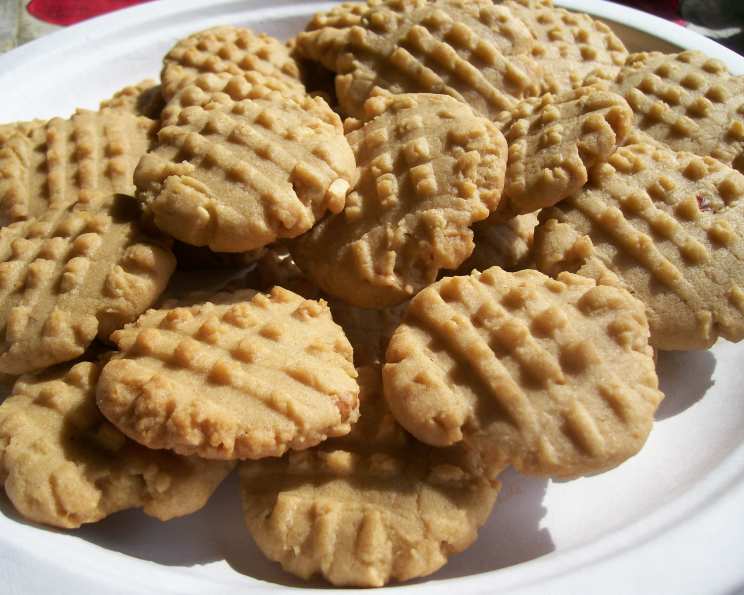
Slice and Bake Peanut Butter Cookies: A Nostalgic Treat
The scent of peanut butter cookies baking in the oven is more than just an aroma; it’s a time machine. I can instantly be transported back to my grandmother’s kitchen, where a simple batch of these cookies could turn an ordinary afternoon into a magical event. The slightly crisp edges, the soft, chewy center, the unmistakable peanut butter flavor—these cookies are a testament to the enduring power of simple, homemade goodness. Now, I am thrilled to share a version of this cherished classic with you, a slice-and-bake recipe that captures all the comforting flavors of childhood, with the convenience of modern living.
Recipe Overview
- Prep Time: 30 minutes
- Cook Time: 8-10 minutes per batch
- Total Time: 3 hours 30 minutes (includes chilling time)
- Yields: Approximately 144 cookies (12 dozen)
- Serves: 144
- Dietary Type: Vegetarian
Ingredients
- 2 cups vegetable shortening
- 2 cups granulated sugar
- 2 cups packed light brown sugar
- 2 cups creamy peanut butter (or chunky, if preferred)
- 2 teaspoons vanilla extract
- 4 eggs
- 5 cups all-purpose flour
- 4 teaspoons baking soda
- Cinnamon sugar (optional, for rolling)
Equipment Needed
- Large mixing bowl
- Separate mixing bowl
- Electric mixer (stand or hand-held)
- Measuring cups and spoons
- Four 14-inch by 12-inch sheets of waxed paper
- Four 14-inch by 12-inch sheets of aluminum foil
- Cookie sheets
- Cooling racks
- Fork
Instructions
- Prepare the Wraps: Cut four 14-inch by 12-inch pieces of waxed paper and four sheets of aluminum foil of the same size. Set them aside; these will be used to wrap the cookie dough logs.
- Cream the Wet Ingredients: In a large mixing bowl, cream together the vegetable shortening, granulated sugar, and light brown sugar. Use an electric mixer to achieve a light and fluffy consistency.
- Add Peanut Butter and Vanilla: Beat in the peanut butter (creamy or chunky, depending on your preference) and vanilla extract until well combined.
- Incorporate the Eggs: Add the eggs one at a time, beating well after each addition. The mixture should be light and fluffy.
- Combine Dry Ingredients: In a separate bowl, whisk together the all-purpose flour and baking soda. This ensures even distribution of the baking soda throughout the flour.
- Gradually Add Dry Ingredients to Wet: Gradually beat the flour mixture into the creamed mixture until just combined. Be careful not to overmix, as this can result in tough cookies.
- Divide and Shape the Dough: Divide the dough into 4 equal pieces. On a lightly floured surface, shape each piece into an 8 to 10-inch roll.
- Wrap and Freeze: Wrap each roll individually in wax paper, then in aluminum foil. This double wrapping helps prevent freezer burn and keeps the dough fresh.
- Label and Freeze: Label each roll with the date and contents. Freeze for up to 6 months. Properly stored, the dough will be ready whenever you need a peanut butter cookie fix.
- Thaw the Dough: When ready to bake, place the dough in the refrigerator and thaw overnight. It’s essential that the dough is pliable but still cold.
- Preheat the Oven: Preheat your oven to 350 degrees Fahrenheit (175 degrees Celsius).
- Slice the Dough: Slice the thawed dough into 1-inch thick slices.
- Prepare the Cookie Slices: Cut each slice into fourths, forming small wedges. Roll each wedge into a ball.
- Optional: Cinnamon Sugar Coating: If desired, roll the cookie balls in cinnamon sugar before baking. This adds a warm, spiced sweetness to the cookies.
- Arrange on Cookie Sheets: Place the cookie dough balls about 1 1/2 inches apart on ungreased cookie sheets.
- Flatten with a Fork: Flatten each cookie in a crisscross pattern using the tines of a fork. This creates the classic peanut butter cookie design and helps the cookies bake evenly.
- Bake the Cookies: Bake in the preheated 350-degree F oven for 8 to 10 minutes, or until lightly browned around the edges. Keep a close eye on them, as baking times can vary depending on your oven.
- Cool and Enjoy: Remove the cookies from the oven and allow them to stand on the cookie sheets for a few minutes before transferring them to cooling racks to cool completely.
Expert Tips & Tricks
- Freezing for Later: These cookies are fantastic for making ahead. The dough freezes exceptionally well, so you can always have freshly baked cookies on hand.
- Chunky vs. Creamy: Experiment with different types of peanut butter. Chunky peanut butter adds texture, while creamy provides a smoother, more uniform cookie.
- Even Baking: For even baking, use an oven thermometer to ensure your oven is accurately calibrated. Rotate the cookie sheets halfway through baking.
- Preventing Spreading: If your cookies tend to spread too much, try chilling the dough for an additional 30 minutes before slicing and baking.
- Soft vs. Crispy: For softer cookies, bake for the shorter end of the time range (8 minutes). For crispier cookies, bake for the longer end (10 minutes).
Serving & Storage Suggestions
These peanut butter cookies are best enjoyed fresh, but they also store well. Store cooled cookies in an airtight container at room temperature for up to 5 days. For longer storage, freeze baked cookies in a freezer-safe container for up to 2 months.
To serve, arrange the cookies on a platter for a delightful treat. They pair perfectly with a glass of cold milk, a cup of hot coffee, or a scoop of vanilla ice cream.
Nutritional Information
| Nutrient | Amount per Serving | % Daily Value |
|---|---|---|
| Calories | 86.5 kcal | N/A |
| Calories from Fat | 43 g | 50% |
| Total Fat | 4.8 g | 7% |
| Saturated Fat | 1.2 g | 6% |
| Cholesterol | 5.2 mg | 1% |
| Sodium | 54.4 mg | 2% |
| Total Carbohydrate | 9.8 g | 3% |
| Dietary Fiber | 0.3 g | 1% |
| Sugars | 6.1 g | 24% |
| Protein | 1.5 g | 3% |
Variations & Substitutions
- Gluten-Free: Substitute the all-purpose flour with a gluten-free all-purpose blend for a gluten-free version.
- Dairy-Free: Ensure the vegetable shortening is dairy-free for a dairy-free option.
- Chocolate Chips: Add 1 cup of chocolate chips to the dough for a chocolate peanut butter twist.
- Different Extracts: Experiment with other extracts like almond or maple for a unique flavor profile.
- Add Sprinkles: Before baking, sprinkle the flattened cookies with colored sprinkles for a festive touch.
FAQs (Frequently Asked Questions)
Q: Can I use natural peanut butter in this recipe?
A: Yes, you can, but be aware that natural peanut butter tends to be oilier. Make sure to stir it very well before using and consider adding a tablespoon or two of extra flour if the dough seems too wet.
Q: How do I prevent the cookies from becoming too dry?
A: Avoid overbaking the cookies. Bake them just until they are lightly browned around the edges. Also, ensure your oven is accurately calibrated.
Q: Can I freeze the baked cookies?
A: Yes, you can freeze the baked cookies in an airtight container for up to 2 months. Thaw them at room temperature before serving.
Q: What if I don’t have time to thaw the dough overnight?
A: You can try thawing the dough in the microwave on a low setting, but be very careful not to melt it. Thawing in the refrigerator is the preferred method for best results.
Q: Can I make these cookies without an electric mixer?
A: Yes, but it will require more effort. Make sure the shortening is soft and cream the ingredients thoroughly by hand.
Final Thoughts
These Slice and Bake Peanut Butter Cookies are more than just a recipe; they are a delightful journey back to simpler times, filled with the comforting flavors and aromas of home. I wholeheartedly encourage you to try this recipe and share the joy of homemade cookies with your loved ones. Feel free to experiment with variations and make them your own. Whether you’re baking for a special occasion or simply craving a sweet treat, these cookies are sure to bring a smile to your face. And if you do bake them, please let me know what you think! Your feedback helps me continue to refine and share recipes that bring joy to kitchens everywhere. Pair these cookies with a cold glass of milk or a warm cup of coffee for the ultimate comforting experience. Happy baking!