
Slice and Bake Peanut Butter Cookies: A Nostalgic Treat
The scent of peanut butter cookies baking always takes me back to my grandmother’s kitchen. She had a knack for making the simplest things taste extraordinary, and these slice-and-bake cookies were a constant presence during holidays and family gatherings. I remember being mesmerized as she sliced the perfectly formed logs, each disc promising a burst of nutty sweetness. It wasn’t just the taste; it was the warmth and love that went into every batch. Now, I carry on that tradition, bringing a little piece of her kitchen into my own home with each delightful cookie.
Recipe Overview
- Prep Time: 25 minutes
- Cook Time: 8-10 minutes
- Total Time: 33-35 minutes (plus overnight thawing)
- Yield: Approximately 144 cookies (from 4 logs)
- Dietary Type: Vegetarian
Ingredients
- 2 cups vegetable shortening
- 2 cups granulated sugar
- 2 cups packed light brown sugar
- 2 cups creamy peanut butter (or chunky peanut butter)
- 2 teaspoons vanilla extract
- 4 eggs
- 5 cups all-purpose flour
- 4 teaspoons baking soda
- Cinnamon sugar (optional)
Equipment Needed
- Large mixing bowl
- Separate mixing bowl
- Electric mixer (handheld or stand mixer)
- Measuring cups and spoons
- Four 14×12 inch sheets of waxed paper
- Four 14×12 inch sheets of aluminum foil
- Cookie sheets
- Cooling racks
- Fork
Instructions
- Begin by preparing your workstation. Cut four pieces of waxed paper measuring 14 inches by 12 inches, and also cut four pieces of aluminum foil to the same size. Set these aside; they will be used to wrap and freeze the cookie dough logs.
- In a large mixing bowl, cream together the vegetable shortening, granulated sugar, and light brown sugar. Use an electric mixer to beat these ingredients until the mixture is light and fluffy. This step is crucial for achieving a tender cookie.
- Add the peanut butter to the creamed mixture and continue to beat until well combined. Whether you choose creamy or chunky peanut butter is a matter of personal preference. Chunky will add a bit of texture to the finished cookies.
- Beat in the vanilla extract, ensuring it’s evenly distributed throughout the mixture. Vanilla enhances the overall flavor profile of the cookies.
- Add the eggs, one at a time, beating well after each addition. This helps to emulsify the ingredients and create a smooth batter. Make sure to scrape down the sides of the bowl periodically to ensure everything is thoroughly mixed.
- In a separate bowl, whisk together the all-purpose flour and baking soda. This ensures that the baking soda is evenly distributed throughout the flour, which is important for proper leavening.
- Gradually add the dry ingredients to the wet ingredients, beating on low speed until just combined. Be careful not to overmix the dough, as this can result in tough cookies.
- Divide the dough into four equal portions.
- Shape each portion of dough into a log, approximately 8 to 10 inches in length. Aim for a uniform diameter for even slicing later on.
- Wrap each log individually in wax paper, then wrap it again in aluminum foil. This double wrapping helps to prevent freezer burn and maintain the dough’s quality.
- Label each wrapped log with the date and contents. This is especially helpful if you’re preparing multiple batches of different cookies. Freeze the logs for up to 6 months.
- When you’re ready to bake the cookies, transfer a dough log from the freezer to the refrigerator. Allow it to thaw overnight. This will ensure that the dough is pliable enough to slice easily.
- Preheat your oven to 350 degrees Fahrenheit (175 degrees Celsius).
- Slice the thawed dough into 1-inch thick slices. Then, cut each slice into fourths, creating bite-sized pieces.
- Gently roll each piece into a ball. This step is optional, but it helps to create a more uniform and visually appealing cookie.
- If desired, roll the cookie dough balls in cinnamon sugar before baking. This adds a touch of warmth and sweetness to the cookies.
- Place the dough balls on ungreased cookie sheets, spacing them about 1 1/2 inches apart. This will allow the cookies to spread evenly as they bake.
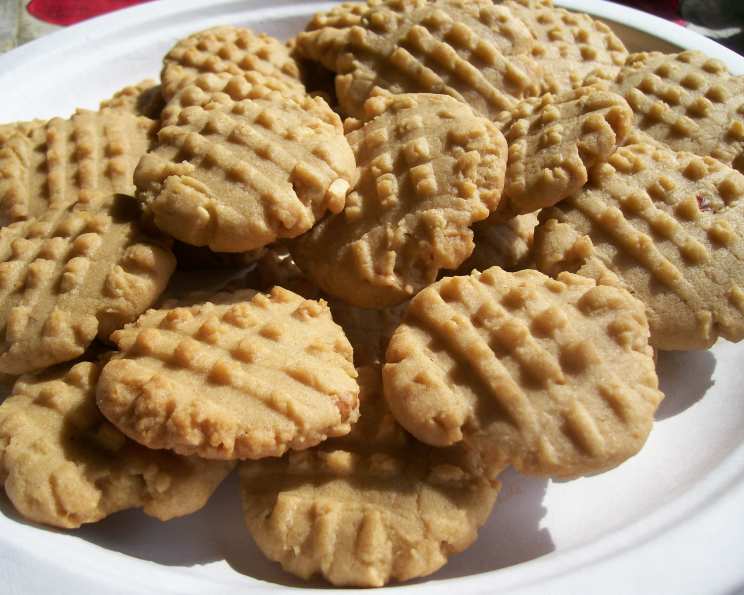
- Flatten each cookie dough ball in a crisscross pattern using the tines of a fork. This not only creates a decorative effect but also helps to ensure that the cookies bake evenly.
- Bake in the preheated oven for 8 to 10 minutes, or until the edges are lightly browned. Keep a close eye on the cookies, as they can burn easily.
- Remove the cookie sheets from the oven and allow the cookies to stand on the sheets for a few minutes before transferring them to cooling racks. This will prevent them from breaking apart.
- Allow the cookies to cool completely on the cooling racks before serving or storing.
Expert Tips & Tricks
- Room temperature ingredients: Make sure your shortening and eggs are at room temperature for optimal mixing and a smoother batter.
- Don’t overbake: Peanut butter cookies can dry out easily. Bake just until the edges are lightly golden for a soft and chewy center.
- Freezing baked cookies: Baked cookies can also be frozen for up to 3 months. Store them in an airtight container to prevent freezer burn.
- Adjusting for altitude: If you live at a high altitude, you may need to adjust the baking time slightly. Start by reducing the baking time by a minute or two and check the cookies frequently.
Serving & Storage Suggestions
These cookies are perfect on their own, served with a glass of cold milk, or alongside a scoop of vanilla ice cream. For a festive touch, arrange them on a decorative platter.
Store cooled cookies in an airtight container at room temperature for up to a week. They can also be stored in the refrigerator for up to two weeks. For longer storage, freeze the cookies in an airtight container for up to three months. Thaw them at room temperature before serving.
Nutritional Information
| Nutrient | Amount per Serving (estimated) | % Daily Value (approximate) |
|---|---|---|
| Calories | 87 kcal | 4% |
| Total Fat | 5g | 6% |
| Saturated Fat | 1g | 5% |
| Cholesterol | 5mg | 2% |
| Sodium | 54mg | 2% |
| Total Carbohydrate | 10g | 3% |
| Dietary Fiber | 0g | 1% |
| Sugars | 6g | N/A |
| Protein | 2g | 4% |
Note: Nutritional information is an estimate and may vary based on specific ingredients and serving sizes.
Variations & Substitutions
- Gluten-Free: Substitute the all-purpose flour with a gluten-free blend. Be sure to add a binder like xanthan gum to help hold the cookies together.
- Different Nut Butters: Try almond butter, cashew butter, or sunflower seed butter for a unique flavor.
- Chocolate Chips: Add chocolate chips to the dough for a peanut butter chocolate chip cookie.
- Sea Salt: Sprinkle a pinch of sea salt on top of the cookies before baking for a sweet and salty treat.
FAQs (Frequently Asked Questions)
Q: Can I use a different type of shortening?
A: Yes, you can substitute butter or margarine for the vegetable shortening. However, keep in mind that this may slightly alter the texture and flavor of the cookies.
Q: Can I freeze the baked cookies?
A: Yes, baked cookies can be frozen for up to 3 months in an airtight container. Thaw them at room temperature before serving.
Q: What if my dough is too crumbly?
A: If your dough is too crumbly, try adding a tablespoon or two of milk or water to help it come together.
Q: Why are my cookies flat?
A: Flat cookies can be caused by using too much butter or sugar, or by not chilling the dough for long enough. Make sure to use the correct measurements and chill the dough before slicing and baking.
Q: Can I use natural peanut butter?
A: Natural peanut butter (the kind that separates) can be used, but make sure to stir it well before adding it to the recipe. The cookies might be a bit more crumbly.
Final Thoughts
These Slice and Bake Peanut Butter Cookies are a testament to the simple joys of baking. They’re convenient, delicious, and perfect for any occasion. So, gather your ingredients, preheat your oven, and get ready to create a batch of cookies that will bring smiles to the faces of your loved ones. Don’t hesitate to experiment with variations and substitutions to make them your own. Happy baking!