
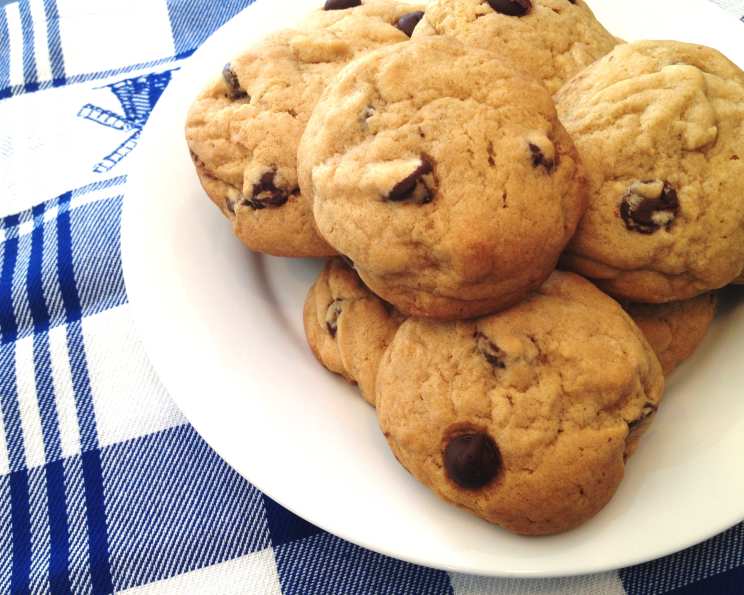
Slice & Bake Chocolate Chip Cookies: Homemade Convenience
There’s a specific scent that instantly transports me back to childhood – the warm, buttery aroma of chocolate chip cookies baking in the oven. My grandmother, a true matriarch of the kitchen, always had a stash of slice-and-bake cookie dough tucked away in her freezer. It was her secret weapon for impromptu visits, after-school treats, and those inevitable “I’m bored!” moments. She’d pull out a log, slice off a few rounds, and within minutes, the house would be filled with that irresistible, comforting fragrance. It’s a simple joy, but one that represents love, care, and the magic of homemade goodness.
Recipe Overview
- Prep Time: 20 minutes
- Cook Time: 10 minutes
- Total Time: 30 minutes (plus freezing time)
- Servings: Varies (approx. 48 cookies, depending on slice thickness)
- Yield: 4 logs of cookie dough
- Dietary Type: Vegetarian
Ingredients
- 2 cups butter, softened
- 1 ⅓ cups sugar
- 1 ⅔ cups brown sugar, packed
- 1 tablespoon vanilla extract
- 4 large eggs
- 2 teaspoons salt
- 2 teaspoons baking soda
- 5 ½ cups all-purpose flour
- 2 cups chocolate chips (semi-sweet or your favorite type)
Equipment Needed
- Large mixing bowl
- Electric mixer (stand or hand-held)
- Measuring cups and spoons
- Spatula
- Wax paper or parchment paper
- Freezer bags
- Baking sheets
Instructions
- Cream together the butter and sugars: In a large mixing bowl, using an electric mixer, cream together the softened butter, sugar, and brown sugar until light and fluffy. This step is crucial for achieving a tender cookie. Don’t rush it; aim for a smooth and well-combined mixture.
- Beat in the vanilla and eggs: Add the vanilla extract and eggs to the creamed mixture. Beat well after each addition to ensure everything is fully incorporated. The batter should look smooth and emulsified.
- Stir in dry ingredients: In a separate bowl, whisk together the flour, salt, and baking soda. Gradually add the dry ingredients to the wet ingredients, mixing on low speed until just combined. Be careful not to overmix, as this can result in tough cookies.
- Add chocolate chips: Gently fold in the chocolate chips until they are evenly distributed throughout the dough.
- Divide into four balls: Divide the cookie dough into four equal portions.
- Roll each into an 8 to 10-inch roll: On a lightly floured surface, roll each portion of dough into a log that is approximately 8 to 10 inches long. Shape them as evenly as possible for consistent cookie sizes.
- Wrap in waxed paper, then put in freezer bags: Wrap each log tightly in wax paper or parchment paper. This prevents freezer burn and helps the dough maintain its shape. Then, place each wrapped log into a freezer bag, removing as much air as possible before sealing.
- Freeze: Freeze the cookie dough logs for at least 2 hours, or until solid. They can be stored in the freezer for up to 3 months.
- When needed, pull out of the freezer, slice, and bake: When you’re ready to bake, preheat your oven to 350 degrees F (175 degrees C). Remove a cookie dough log from the freezer and let it sit at room temperature for a few minutes to soften slightly (about 5 minutes). Using a sharp knife, slice the dough into 1/4-inch thick rounds.
- Bake: Place the cookie slices on ungreased baking sheets, leaving about 2 inches between each cookie. Bake for 8-10 minutes, or until the edges are golden brown and the centers are still slightly soft.
- Cool and Enjoy: Let the cookies cool on the baking sheets for a few minutes before transferring them to a wire rack to cool completely.
Expert Tips & Tricks
- Softened Butter is Key: Make sure your butter is properly softened – not melted, but soft enough to easily cream with the sugars. This creates air pockets in the dough, leading to a lighter, more tender cookie.
- Chill for Better Results: While freezing is part of the process, chilling the dough in the refrigerator for even 30 minutes before rolling can also improve the texture of the cookies. This helps prevent them from spreading too thin during baking.
- Experiment with Chocolate: Don’t be afraid to get creative with your chocolate chips! Try using a mix of dark, milk, and white chocolate chips, or add chopped nuts, dried fruit, or even toffee bits for a unique twist.
- Perfectly Round Cookies: For perfectly round cookies, use a round cookie cutter that is slightly larger than your cookie slices. Immediately after baking, gently nudge the cutter around each cookie to reshape them.
- Preventing Freezer Burn: Double-wrapping the cookie dough logs in plastic wrap before placing them in freezer bags offers an extra layer of protection against freezer burn and ensures the dough stays fresh longer.
Serving & Storage Suggestions
These slice-and-bake chocolate chip cookies are best served warm, straight from the oven. They pair perfectly with a cold glass of milk, a scoop of vanilla ice cream, or a steaming cup of coffee.
- Storage: Store baked cookies in an airtight container at room temperature for up to 3 days.
- Freezing Baked Cookies: You can also freeze baked cookies for up to 2 months. Let them cool completely before placing them in a freezer-safe container or bag.
- Reheating: To reheat frozen cookies, thaw them at room temperature for a few minutes or warm them in a low oven (300 degrees F) for a few minutes.
Nutritional Information
| Nutrient | Amount per Serving | % Daily Value |
|---|---|---|
| Calories | 210.8 kcal | N/A |
| Calories from Fat | 92 g | 44% |
| Total Fat | 10.3 g | 15% |
| Saturated Fat | 6.2 g | 31% |
| Cholesterol | 35.8 mg | 11% |
| Sodium | 226.1 mg | 9% |
| Total Carbohydrate | 28.5 g | 9% |
| Dietary Fiber | 0.8 g | 3% |
| Sugars | 16.9 g | 67% |
| Protein | 2.4 g | 4% |
Note: Nutritional information is an estimate and may vary based on specific ingredients and portion sizes.
Variations & Substitutions
- Gluten-Free: Substitute the all-purpose flour with a gluten-free blend. Ensure the blend contains xanthan gum or add it separately for binding.
- Vegan: Replace the butter with a vegan butter substitute and the eggs with flax eggs (1 tablespoon flaxseed meal mixed with 3 tablespoons water per egg).
- Nutty Delight: Add ½ cup of chopped walnuts, pecans, or macadamia nuts to the dough for added texture and flavor.
- Spiced Cookies: Mix in ½ teaspoon of ground cinnamon, nutmeg, or cardamom for a warm, spiced flavor.
- Double Chocolate: Use dark chocolate chips or chunks and add 2 tablespoons of unsweetened cocoa powder to the dry ingredients for an extra chocolatey treat.
FAQs (Frequently Asked Questions)
Q: How long can I store the cookie dough in the freezer?
A: The cookie dough can be stored in the freezer for up to 3 months. Be sure to wrap it tightly to prevent freezer burn.
Q: Can I bake the cookies directly from frozen?
A: While you can bake the cookies directly from frozen, letting the dough thaw slightly for about 5 minutes makes it easier to slice and ensures more even baking.
Q: What if my cookie dough is too crumbly?
A: If your dough is too crumbly, it may be due to overmixing or using cold butter. Try adding a tablespoon of milk or water to the dough to help bind it together.
Q: Why are my cookies spreading too thin?
A: Cookies spreading too thin can be caused by using melted butter or not chilling the dough adequately. Make sure your butter is softened, not melted, and chill the dough before slicing and baking.
Q: Can I use a different type of sugar?
A: While this recipe calls for a combination of granulated and brown sugar, you can experiment with using other types of sugar, such as coconut sugar or maple sugar, for a slightly different flavor profile. Keep in mind that this may affect the texture and browning of the cookies.
Final Thoughts
Homemade slice & bake chocolate chip cookies offer the ultimate convenience without sacrificing the taste and quality of scratch-baked treats. The simple act of slicing and baking a few cookies can brighten any day, fill your home with a delightful aroma, and bring a touch of homemade love to your table. I urge you to give this recipe a try; the joy of fresh, warm cookies is truly worth the effort. Share your creations with friends and family, and don’t hesitate to put your own personal spin on the recipe. Happy baking!