
The Art of the Slow-Rise Pizza: A King Arthur Flour Classic
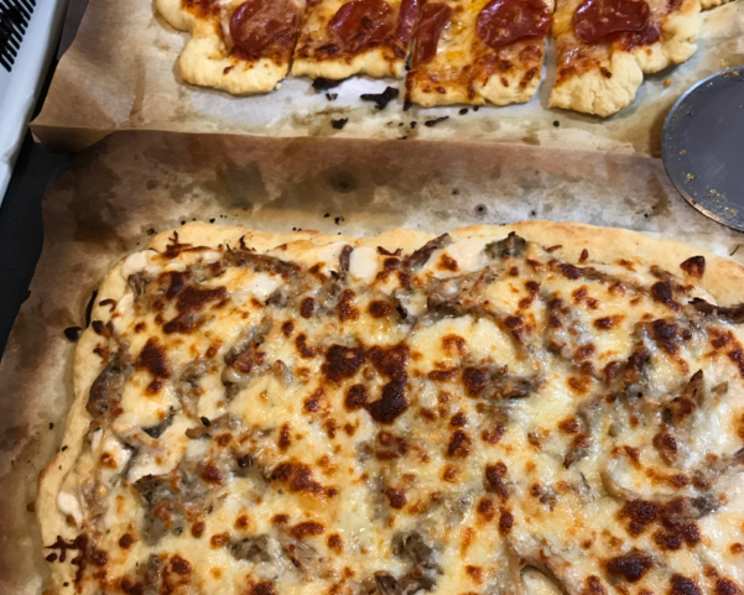
My first encounter with truly remarkable pizza crust wasn’t in a bustling Italian trattoria, but in my own humble kitchen. I had just received my first King Arthur Flour catalog, its pages filled with promises of baking perfection. Flipping through, I landed on a recipe for a slow-rise pizza crust. Intrigued by the promise of enhanced flavor through a long, cold fermentation, I decided to give it a try. The resulting pizza, adorned with simple tomato sauce, fresh mozzarella, and basil, was a revelation. The crust had a depth of flavor and a satisfying chewiness that I hadn’t thought possible to achieve at home. It’s been a staple ever since, a testament to the power of patience and quality ingredients.
Recipe Overview
- Prep Time: 15 minutes
- Cook Time: 10 minutes
- Total Time: 4 hours 55 minutes (minimum, including rise and refrigeration)
- Servings: 6-8
- Yield: 1 12-14 inch pizza crust
- Dietary Type: Vegetarian
Ingredients
- 1 3/4 cups all-purpose flour
- 1 1/4 cups semolina (or substitute more all-purpose flour)
- 1 teaspoon instant yeast
- 1 1/2 teaspoons salt
- 2 tablespoons olive oil
- 1 1/4 – 1 1/3 cups water (enough to make a smooth, soft dough)
- 2 tablespoons dough enhancer (optional)
- Olive oil, for brushing (optional)
Equipment Needed
- Large mixing bowl
- Measuring cups and spoons
- Pizza stone or greased pizza pan
- Plastic wrap
Instructions
- In a large mixing bowl, combine the all-purpose flour, semolina (or additional flour), instant yeast, and salt.
- Add the olive oil and the lesser amount of water (1 1/4 cups). Begin to mix the ingredients together.
- Gradually add more water, a tablespoon at a time, until the dough comes together into a smooth, soft ball. You want it to be cohesive but not overly sticky. The amount of water needed can vary depending on the humidity and the flour used.
- If using, add the dough enhancer.
- Turn the dough out onto a lightly floured surface.
- Knead the dough until it is smooth and soft. This doesn’t require extensive kneading; a few minutes will suffice. The dough should hold together well but may still look a little rough on the surface. Do not over-knead.
- Place the dough in a lightly oiled bowl, turning to coat all sides.
- Cover the bowl with plastic wrap and let the dough rise in a warm place for 45 minutes. This initial rise allows the yeast to activate and begin developing flavor.
- After the initial rise, refrigerate the dough for a minimum of 4 hours, and up to 36 hours. This slow, cold fermentation is key to developing the deep, complex flavor of the crust. The longer the dough rests in the refrigerator, the more flavorful it will become.
- When ready to bake, remove the dough from the refrigerator and let it rest at room temperature for about 30 minutes to make it easier to handle.
- Preheat your oven to 400°F (200°C). If using a pizza stone, place it in the oven while it preheats.
- On a lightly floured surface, shape the dough into a 12-14 inch circle. You can use a rolling pin, but gently stretching the dough by hand will result in a better texture.
- Transfer the shaped dough to a pizza stone or a greased pizza pan.
- If desired, brush the crust lightly with olive oil.
- Bake the crust for about 10 minutes, or until it is just beginning to turn golden brown. This par-baking step will ensure that the crust is crisp and sturdy enough to support your toppings.
- Remove the crust from the oven and top it with your desired toppings.
- Bake the pizza for another 10-15 minutes, or until the toppings are cooked and the cheese is melted and bubbly.
- Let the pizza cool slightly before slicing and serving.
Expert Tips & Tricks
- Dough Enhancer: If you don’t have dough enhancer, you can omit it. It helps relax the dough, but the long, cold fermentation will also contribute to a more relaxed and extensible dough.
- Semolina: Semolina flour adds a delightful texture and slightly nutty flavor to the crust. However, if you don’t have it on hand, you can simply substitute more all-purpose flour.
- Cold Fermentation is Key: Don’t rush the refrigeration process. The longer the dough rests in the refrigerator, the more complex the flavor will be. A minimum of 4 hours is recommended, but 24-36 hours is ideal.
- Par-Baking for Crispier Crust: Par-baking the crust before adding toppings helps to prevent a soggy bottom.
- Pizza Stone Power: If you have a pizza stone, definitely use it! It helps to create a crispy, evenly cooked crust.
- Handling Sticky Dough: If the dough is too sticky to handle, lightly flour your hands and the work surface. Avoid adding too much flour, as this can make the crust tough.
- Stretch, Don’t Roll: Whenever possible, stretch the dough by hand instead of using a rolling pin. This helps to preserve the air pockets in the dough, resulting in a lighter, airier crust.
Serving & Storage Suggestions
Serve the pizza immediately after baking for the best flavor and texture. Garnish with fresh herbs, such as basil or oregano, for added visual appeal and flavor.
Leftover pizza can be stored in the refrigerator for up to 3 days. To reheat, preheat your oven to 350°F (175°C) and bake for 5-10 minutes, or until heated through. You can also reheat individual slices in a skillet over medium heat.
For longer storage, you can freeze leftover pizza slices. Wrap them tightly in plastic wrap and then in aluminum foil. Frozen pizza can be stored for up to 2 months. To reheat, bake from frozen at 375°F (190°C) for 10-15 minutes, or until heated through.
Nutritional Information
| Nutrient | Amount per Serving | % Daily Value |
|---|---|---|
| Calories | 299.7 kcal | N/A |
| Calories from Fat | 47 g | 16% |
| Total Fat | 5.2 g | 8% |
| Saturated Fat | 0.7 g | 3% |
| Cholesterol | 0 mg | 0% |
| Sodium | 583.9 mg | 24% |
| Total Carbohydrate | 53.4 g | 17% |
| Dietary Fiber | 2.5 g | 9% |
| Sugars | 0.1 g | 0% |
| Protein | 8.4 g | 16% |
Note: Nutritional information is an estimate and may vary based on specific ingredients and portion sizes.
Variations & Substitutions
- Gluten-Free Pizza Crust: Substitute the all-purpose flour and semolina with a high-quality gluten-free all-purpose flour blend. You may need to adjust the amount of water to achieve the desired dough consistency.
- Whole Wheat Pizza Crust: Replace up to half of the all-purpose flour with whole wheat flour for a nuttier, more wholesome flavor.
- Herb-Infused Crust: Add 1-2 tablespoons of dried herbs, such as oregano, basil, or rosemary, to the dough for an extra layer of flavor.
- Garlic Pizza Crust: Add 1-2 cloves of minced garlic to the dough for a savory, aromatic crust.
- Spicy Pizza Crust: Add a pinch of red pepper flakes to the dough for a subtle kick.
FAQs (Frequently Asked Questions)
Q: Can I use bread flour instead of all-purpose flour?
A: While you can, all-purpose flour is recommended for this recipe. Bread flour has a higher protein content, which can result in a tougher crust when using the no-knead method.
Q: Can I make this dough in a bread machine?
A: It’s not recommended. The bread machine’s kneading action may overwork the dough, resulting in a less tender crust.
Q: How long can I keep the dough in the refrigerator?
A: You can refrigerate the dough for up to 36 hours. The longer it sits, the more flavorful it will become.
Q: Can I freeze the pizza dough?
A: Yes, you can freeze the dough after the initial 45-minute rise. Wrap it tightly in plastic wrap and then in aluminum foil. Thaw the dough in the refrigerator overnight before shaping and baking.
Q: My pizza crust is tough. What did I do wrong?
A: Over-kneading the dough or adding too much flour can result in a tough crust. Also, make sure you are not using bread flour.
Final Thoughts
This slow-rise pizza crust recipe from King Arthur Flour is a game-changer for homemade pizza enthusiasts. The long, cold fermentation process unlocks a depth of flavor that is simply unmatched. Don’t be intimidated by the seemingly long rising time; the hands-on effort is minimal, and the results are well worth the wait. Gather your favorite toppings, preheat your oven, and get ready to experience pizza perfection in your own kitchen. I encourage you to experiment with different variations and toppings to create your own signature pizza masterpiece. And please, let me know how yours turns out! Share your experiences and any creative tweaks you’ve made – I am excited to hear from you and learn about your own pizza-making adventures!