
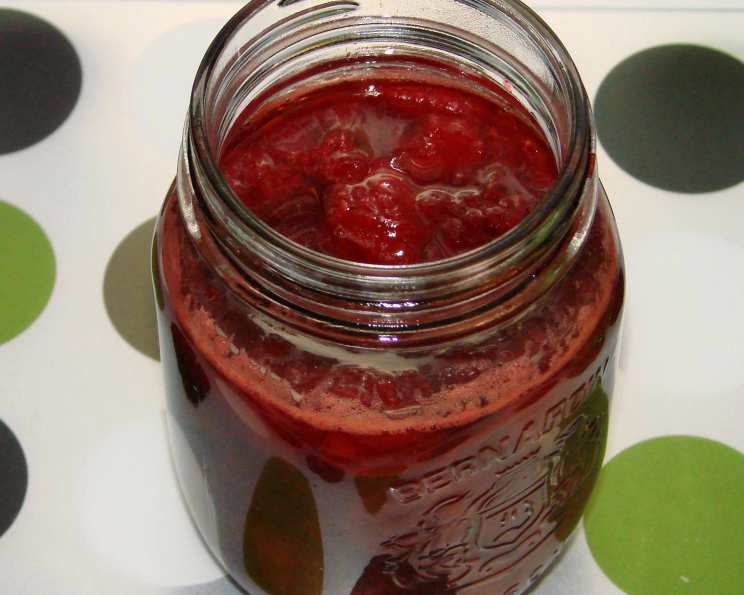
Small Batch Fresh Strawberry Jam
The scent of strawberries always takes me back to my grandmother’s sun-drenched garden. As a child, I’d spend hours picking plump, juicy berries, my fingers stained crimson and sticky. But the best part? Watching Grandma transform those simple berries into jars of vibrant, ruby-red jam, a taste of summer captured and preserved for the colder months. Her love and patience were poured into every batch, and I try to keep that in mind with every batch I make now.
Recipe Overview
- Prep Time: 15 minutes
- Cook Time: 8-10 minutes
- Total Time: Approximately 30 minutes (including cooling)
- Yields: About 1 1/2 cups
- Dietary Type: Vegetarian, Gluten-Free, Dairy-Free, Vegan
Ingredients
- 3 cups fresh strawberries, sliced
- 1 cup sugar
- 2 tablespoons fresh lemon juice
Equipment Needed
- 10 or 12 inch wide skillet (stainless steel or non-stick)
- Measuring cups and spoons
- Wooden spoon or spatula
- Jars or containers for storage
- Ladle (optional, for transferring jam)
Instructions
- Prepare the strawberries: Wash the strawberries thoroughly and remove the stems. Slice them into even pieces. This ensures even cooking and helps release their natural juices.
- Combine ingredients: In the wide skillet, combine the sliced strawberries, sugar, and lemon juice. The wide pan is crucial here, as it allows for greater surface area, facilitating faster evaporation and gelling of the jam.
- Bring to a boil: Place the skillet over medium-high heat. Stir the mixture occasionally to prevent sticking and ensure the sugar dissolves evenly. Bring the mixture to a boil.
- Reduce heat and simmer: Once the mixture is boiling, reduce the heat to medium to maintain a gentle simmer. Continue to cook, stirring constantly, to prevent scorching.
- Skim the foam: As the jam cooks, foam will form on the surface. This foam consists of impurities released from the fruit. Use a spoon to skim it off as needed. Skimming helps to achieve a clearer, more visually appealing jam.
- Check for doneness: The cooking time will be approximately 8 to 10 minutes. The mixture is ready when it begins to look syrupy and thicken slightly. A simple way to test for doneness is to place a small spoonful of jam on a chilled plate. If it sets up slightly and wrinkles when you push it with your finger, it is ready. Remember, the jam will continue to thicken as it cools.
- Cool and store: Remove the skillet from the heat and allow the jam to cool to room temperature before serving or transferring it to jars. Transfer the cooled jam to sterilized jars or airtight containers. Refrigerate immediately.
Expert Tips & Tricks
- Strawberry Selection: Use ripe, but not overripe, strawberries for the best flavor and texture. Overripe berries can result in a jam that is too soft or mushy.
- Sugar Ratio: The sugar in this recipe not only adds sweetness but also acts as a preservative and aids in the gelling process. While you can experiment with reducing the sugar slightly, be aware that it may affect the jam’s set and shelf life.
- Lemon Juice: The lemon juice not only brightens the flavor of the jam but also helps to activate the pectin naturally present in the strawberries, contributing to the gelling process. Freshly squeezed lemon juice is always preferred for the best flavor.
- Foam Control: A tiny knob of butter (about 1/2 teaspoon) added at the beginning of cooking can help reduce the amount of foam that forms. However, be sure to skim off any remaining foam for the clearest jam.
- Jam Consistency: Remember that this jam is designed to have a soft set, making it ideal for spreading on toast or scones. If you prefer a firmer set, you can cook the jam for a slightly longer period, but be careful not to overcook it, as this can result in a tough jam.
- Skillet Size Matters: Using a skillet that is too small will significantly increase the cooking time and may result in a less vibrant color.
- Sterilizing Jars: To sterilize jars, wash them in hot, soapy water and rinse thoroughly. Place the jars upside down on a baking sheet and heat in a preheated oven at 250°F (120°C) for 10 minutes. Boil the lids for 10 minutes to sterilize.
Serving & Storage Suggestions
This Small Batch Fresh Strawberry Jam is delicious served warm or cold on toast, scones, biscuits, or muffins. It also makes a delightful topping for yogurt, ice cream, or oatmeal. It’s perfect for spreading on pancakes or waffles.
- Storage: Store the jam in sterilized jars or airtight containers in the refrigerator.
- Shelf Life: Refrigerated jam will last for up to 2-3 weeks.
- Freezing: For longer storage, you can freeze the jam in freezer-safe containers for up to 3 months. Thaw in the refrigerator before serving.
- Serving: Serve at room temperature or slightly chilled.
Nutritional Information
Note: Nutritional information is an estimate and may vary based on specific ingredients and portion sizes.
| Nutrient | Amount per Serving | % Daily Value |
|---|---|---|
| Calories | ~150 kcal | ~8% |
| Total Fat | ~0g | ~0% |
| Saturated Fat | ~0g | ~0% |
| Cholesterol | ~0mg | ~0% |
| Sodium | ~1mg | ~0% |
| Total Carbohydrate | ~38g | ~13% |
| Dietary Fiber | ~1g | ~4% |
| Sugars | ~36g | ~72% |
| Protein | ~0g | ~0% |
Variations & Substitutions
- Other Berries: Feel free to experiment with other types of berries, such as raspberries, blueberries, or blackberries. You may need to adjust the cooking time slightly depending on the water content of the fruit.
- Spice Infusion: Add a pinch of ground cinnamon, nutmeg, or cardamom to the jam for a warm and spicy twist.
- Vanilla Extract: Stir in a teaspoon of vanilla extract after removing the jam from the heat for a richer flavor.
- Balsamic Strawberry Jam: Add a tablespoon of balsamic vinegar along with the lemon juice for a sophisticated flavor profile.
- Spicy Strawberry Jam: Add a pinch of red pepper flakes while cooking for a sweet and spicy jam.
- Honey or Maple Syrup: While the recipe is specifically written for sugar, you could experiment with substituting a portion of the sugar with honey or maple syrup. Start by replacing 1/4 to 1/2 of the sugar and adjust to taste. Keep in mind this may affect the set and shelf life.
FAQs (Frequently Asked Questions)
Q: Why is my jam not setting?
A: Several factors can prevent jam from setting, including undercooking, insufficient sugar or acid (lemon juice), or using overripe fruit. Make sure to cook the jam until it reaches the proper consistency and use the correct ratio of ingredients.
Q: Can I use frozen strawberries?
A: Yes, you can use frozen strawberries, but keep in mind that they will release more liquid during cooking, which may require a slightly longer cooking time. Be sure to thaw them completely before starting the recipe.
Q: Do I need to sterilize the jars?
A: Sterilizing the jars is highly recommended to prevent the growth of mold and bacteria, which can spoil the jam.
Q: How do I know when the jam is done?
A: The jam is ready when it begins to look syrupy and thicken slightly. You can also use the chilled plate test – place a small spoonful of jam on a chilled plate and see if it sets up slightly and wrinkles when you push it with your finger.
Q: Can I double this recipe?
A: While this recipe is designed as a small batch, you can double it. However, be sure to use a larger skillet to accommodate the increased volume and maintain a good surface area for evaporation. You may need to adjust the cooking time slightly.
Final Thoughts
Making your own fresh strawberry jam is a rewarding experience that brings the taste of summer to your table any time of year. This small-batch recipe is perfect for beginners and experienced cooks alike, offering a simple and delicious way to enjoy the vibrant flavor of fresh strawberries. Don’t be afraid to experiment with variations and find your own signature twist. I hope this jam brings you as much joy as it has brought to me and my family over the years. Enjoy!