
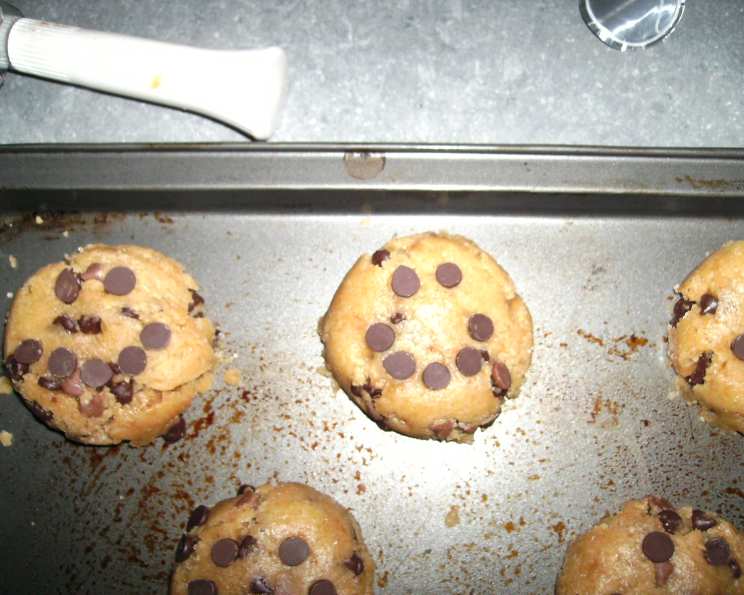
Smiley Chewy Chocolate Chip Cookies: A Recipe for Happiness
I remember one particularly gloomy afternoon during culinary school. The skies were grey, the rain was relentless, and my experimental soufflé had just collapsed (again). Discouraged, I wandered into a nearby bakery, the aroma of warm sugar and melting chocolate beckoning me in. There, nestled amongst the perfectly piped pastries and towering cakes, were these cheerful, slightly wonky chocolate chip cookies. Each one sported a “smiley face” of strategically placed chocolate chips. That simple, sweet gesture lifted my spirits instantly, proving that sometimes, the smallest treats can make the biggest difference. These cookies, a recreation of that bakery find, are my go-to recipe for sharing a little joy.
Recipe Overview
- Prep Time: 20 minutes
- Cook Time: 8-10 minutes
- Total Time: 1 hour 20 minutes (includes chilling)
- Yields: Approximately 1 1/2 dozen
- Serves: 18
- Dietary Type: Not specified (contains gluten, dairy, and eggs)
Ingredients
- 2 cups all-purpose flour
- 1/2 teaspoon baking soda
- 1/4 teaspoon salt
- 3/4 cup (1 1/2 sticks) unsalted butter, melted
- 1 cup brown sugar, packed
- 1/2 cup granulated sugar
- 1 tablespoon vanilla extract
- 1 egg
- 1 egg yolk
- 1-2 cups semi-sweet chocolate chips (more for decoration if desired)
Equipment Needed
- Mixing Bowls (medium and large)
- Measuring cups and spoons
- Sifter (optional, but recommended)
- Cookie sheets
- Parchment paper or silicone baking mats (optional)
- Wire cooling rack
- Wooden spoon or spatula
- Mixer (hand or stand mixer)
Instructions
-
Preheat your oven to 325 degrees F (165 degrees C). This lower temperature helps the cookies bake evenly and maintain their chewy texture. Grease your cookie sheets lightly with butter and sprinkle with a little flour, or line them with parchment paper or silicone baking mats. This prevents the cookies from sticking.
-
In a medium bowl, sift together the 2 cups of all-purpose flour, 1/2 teaspoon of baking soda, and 1/4 teaspoon of salt. Sifting ensures that the dry ingredients are evenly distributed and helps prevent lumps. Set this mixture aside.
-
In a large bowl, cream together the 3/4 cup of melted butter, 1 cup of brown sugar, and 1/2 cup of granulated sugar until well blended. The mixture should be smooth and creamy. Using melted butter contributes to the chewy texture of the final cookie.
-
Beat in the 1 tablespoon of vanilla extract, 1 egg, and 1 egg yolk until the mixture is light and creamy. The extra egg yolk adds richness and contributes to the chewy texture.
-
Gradually add the sifted dry ingredients to the wet ingredients, mixing until just blended. Be careful not to overmix; overmixing can develop the gluten in the flour, resulting in tougher cookies.
-
Stir in 1 to 2 cups of semi-sweet chocolate chips by hand using a wooden spoon or spatula. Again, avoid overmixing.
-
Cover the dough tightly with plastic wrap and refrigerate for at least one hour, or even longer (up to 24 hours). This is a crucial step! Chilling the dough allows the gluten to relax, prevents the cookies from spreading too thin in the oven, and intensifies the flavor. The longer the chill, the better the flavor will develop.
-
Once the dough is thoroughly chilled, drop rounded 1/4 cup portions of cookie dough onto the prepared cookie sheets, leaving about 3 inches between each cookie.
-
Gently flatten the cookies slightly with the palm of your hand or the back of a spoon. This helps them bake evenly. If you want to create the “smiley face” effect, now is the time to press additional chocolate chips into the dough to form eyes and a smile.
-
Bake for 8-10 minutes, or until the edges are golden brown and the centers still look slightly soft and underbaked. This is key for achieving that perfect chewy texture. They will continue to firm up as they cool.
-
Cool the cookies on the baking sheets for a few minutes before transferring them to a wire rack to cool completely. This prevents them from breaking while they are still soft.
Expert Tips & Tricks
- Room temperature ingredients are crucial. While the butter is melted, the eggs should be at room temperature for better emulsification and a smoother batter.
- Don’t skip the chilling step! It’s essential for preventing flat, greasy cookies. If you’re short on time, even 30 minutes of chilling is better than none.
- Undercook, don’t overcook. The cookies should be slightly soft in the center when you remove them from the oven. They will continue to bake as they cool.
- For extra chewy cookies: Substitute bread flour for half of the all-purpose flour. Bread flour has a higher protein content, which results in a chewier texture.
- If your cookies are too soft after cooling: Pop them back into the oven for 3-5 minutes to firm them up. Watch them closely to prevent burning.
- Experiment with different types of chocolate chips: Try milk chocolate, dark chocolate, white chocolate, or even a mix of all three.
- Add other mix-ins: Consider adding chopped nuts, dried fruit, or sprinkles to the dough for extra flavor and texture.
- For even baking: Rotate the cookie sheets halfway through baking.
Serving & Storage Suggestions
Serve these Smiley Chewy Chocolate Chip Cookies warm or at room temperature with a glass of cold milk, a cup of hot coffee, or a scoop of vanilla ice cream. They make a wonderful afternoon treat, a delightful dessert, or a thoughtful gift.
To store, keep them in an airtight container at room temperature for up to 3 days. For longer storage, you can freeze the cookies for up to 2 months. Let them thaw completely before serving. You can also freeze the cookie dough before baking. Scoop the dough into individual portions and freeze them on a baking sheet. Once frozen, transfer them to a freezer bag. When you’re ready to bake, simply bake the frozen dough for a few extra minutes.
Nutritional Information
(Note: Nutritional information is an estimate and may vary based on specific ingredients and serving size.)
| Nutrient | Amount per Serving | % Daily Value |
|---|---|---|
| Calories | 240 kcal | 12% |
| Total Fat | 11g | 17% |
| Saturated Fat | 7g | 35% |
| Cholesterol | 40mg | 13% |
| Sodium | 78mg | 3% |
| Total Carbohydrate | 34g | 11% |
| Dietary Fiber | 1g | 4% |
| Sugars | 23g | N/A |
| Protein | 2g | 4% |
Variations & Substitutions
- Gluten-Free: Substitute a gluten-free all-purpose flour blend for the regular all-purpose flour. Look for a blend that contains xanthan gum for best results.
- Dairy-Free: Use a dairy-free butter alternative and dairy-free chocolate chips.
- Nut-Free: Ensure that all ingredients are nut-free, especially the chocolate chips.
- Spiced Cookies: Add 1/2 teaspoon of cinnamon, nutmeg, or ginger to the dry ingredients for a warm, spiced flavor.
- Peanut Butter Chocolate Chip: Substitute 1/2 cup of the butter with peanut butter.
- Oatmeal Chocolate Chip: Substitute 1/2 cup of the flour with rolled oats.
FAQs (Frequently Asked Questions)
Q: Why do I need to chill the dough?
A: Chilling the dough prevents the cookies from spreading too thin in the oven and allows the flavors to develop. It also results in a chewier texture.
Q: Can I use salted butter instead of unsalted?
A: Yes, but reduce the amount of salt you add to the dry ingredients to 1/8 teaspoon.
Q: My cookies are flat and greasy. What did I do wrong?
A: The most common causes are using warm butter instead of melted, not chilling the dough long enough, or overmixing the dough.
Q: How do I know when the cookies are done?
A: The edges should be golden brown, and the centers should still look slightly soft and underbaked. They will continue to firm up as they cool.
Q: Can I freeze the cookie dough?
A: Yes! Scoop the dough into individual portions and freeze them on a baking sheet. Once frozen, transfer them to a freezer bag. Bake from frozen for a few extra minutes.
Final Thoughts
So there you have it – a recipe for cookies that are not only delicious but also guaranteed to bring a smile to your face. Don’t be afraid to experiment with different variations and make them your own. Baking is all about creativity and having fun in the kitchen. Share these cookies with your loved ones and spread a little happiness! These cookies pair perfectly with a simple glass of milk or a scoop of vanilla ice cream. I hope you enjoy baking and eating these Smiley Chewy Chocolate Chip Cookies!