
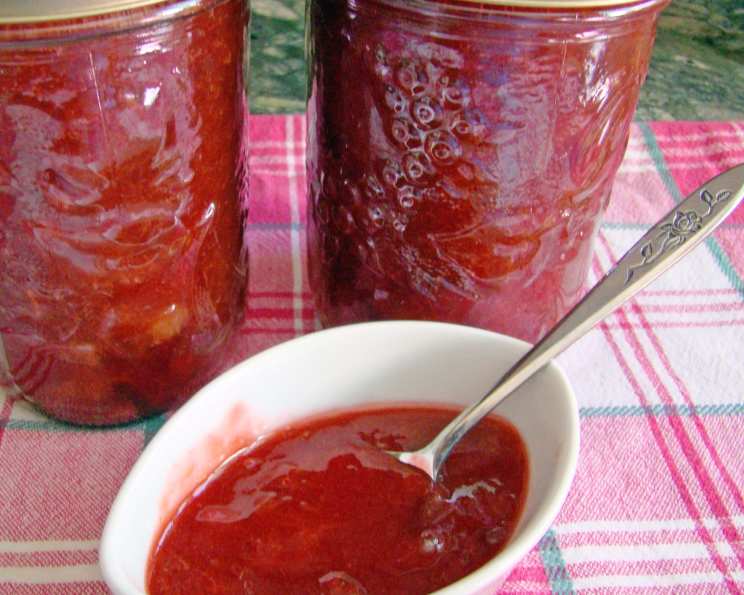
The Sweet Simplicity of Smooth Plum Jam
The first time I tasted homemade plum jam, I was a child visiting my grandmother’s orchard. The late summer sun warmed the purple skins of the ripening plums, and the air hummed with the industrious buzz of bees. I remember the sticky sweetness of that first bite, the jam spread thick on a slice of her homemade bread, a taste that perfectly captured the essence of those sun-drenched days. Every batch I make is a little reminder of her and the simple joy of transforming nature’s bounty into something truly special.
Recipe Overview
- Prep Time: 15 minutes
- Cook Time: 35-40 minutes
- Total Time: 50-55 minutes
- Servings: Varies
- Yield: 6 (8oz) jars
- Dietary Type: Vegan, Gluten-Free
Ingredients
- 4 cups plums, mashed (pitted and chopped, leave skins on, approximately 3 pounds or 24 plums)
- 1 1/2 cups sugar
- 1/4 cup lemon juice
- 3 teaspoons pectin
Ingredient Notes:
- I prefer using organic red or purple skin plums for their vibrant color and rich flavor.
- You can adjust the amount of sugar slightly to your taste, depending on the sweetness of the plums.
- Low-sugar pectin can be used if you prefer a jam with less sugar.
- Freshly squeezed lemon juice provides the best flavor and helps with the setting process.
Equipment Needed
- Large, heavy-bottomed pan or pot
- Potato masher or immersion blender (optional)
- Measuring cups and spoons
- Mixing bowl
- Jars (6 x 8oz)
- Jar lifter
- Canning pot with rack, or a large pot deep enough to submerge the jars by 1-2 inches.
- Ladle
- Magnetic lid lifter (optional, but helpful)
- Clean kitchen towels
Instructions
-
Prepare the Plums: Thoroughly wash the plums. Remove the pits, then chop the plums into smaller pieces. Place the chopped plums in your large pan. Using a potato masher or an immersion blender (if you prefer a smoother jam), mash the plums until they reach a chunky consistency. Don’t over-blend if you want a bit of texture in your final jam.
-
Initial Cooking: Place the pan with the mashed plums over medium heat on your stovetop. Add the lemon juice. Cook the mixture, stirring occasionally to prevent sticking, until it reaches a full rolling boil. A “full rolling boil” means that the mixture continues to boil even when stirred.
-
Reduce and Cook: Once the plum mixture is at a rolling boil, reduce the heat slightly to maintain a gentle boil, and continue to cook for approximately 30 minutes, stirring occasionally. This will help to soften the plums and reduce some of the excess liquid. Watch the mixture closely to prevent burning, especially towards the end of this step.
-
Prepare the Sugar and Pectin: While the plums are cooking, prepare the sugar and pectin mixture. In a separate mixing bowl, combine the sugar and pectin. Mix thoroughly to ensure the pectin is evenly distributed throughout the sugar. This step is crucial to prevent clumping when you add it to the hot plums.
-
Add Sugar and Pectin: After the plums have cooked for 30 minutes, slowly add the sugar/pectin mixture to the pan. Stir continuously to incorporate it evenly into the hot plum mixture.
-
Final Boil: Increase the heat back to medium and bring the mixture back to a rolling boil. Continue to cook, stirring constantly, for another 5 to 10 minutes. It is extremely important to stir continuously to prevent the sugar from burning and sticking to the bottom of the pan.
-
Check for Doneness: To test if the jam is ready, place a small spoonful of the hot jam onto a chilled plate. Let it sit for about 30 seconds, then gently push it with your finger. If the surface wrinkles, the jam is ready. If it remains runny, continue to cook for a few more minutes and test again.
-
Remove from Heat: Once the jam has reached the desired consistency, remove the pan from the heat.
-
Prepare Jars: While the jam is cooking, prepare your jars. Wash your jars, lids, and rings in hot, soapy water. Rinse well. To sterilize them, you can either boil the jars for 10 minutes, run them through a sanitizing cycle in your dishwasher, or place them in a 200°F oven for 10 minutes. Keep the jars hot until ready to fill. Place the lids in a small saucepan with water and simmer over low heat until ready to use. Do not boil the lids.
-
Fill Jars: Using a ladle, carefully fill the hot, sterilized jars with the hot jam, leaving about 1/4 inch of headspace (the space between the top of the jam and the rim of the jar).
-
Remove Air Bubbles: Use a non-metallic spatula or utensil to gently press down on the jam to release any trapped air bubbles.
-
Wipe Rims and Seal: Wipe the rims of the jars clean with a damp cloth to remove any spills or drips. This ensures a good seal. Place the lids on the jars, and screw on the bands until they are fingertip tight (not too tight).
-
Process in Hot Water Bath: Carefully lower the sealed jars into a hot water bath (at 200 degrees or boiling water) using a jar lifter. Make sure the jars are completely submerged by at least 1-2 inches of water. Bring the water to a boil and process the jars for 10 minutes.
-
Cool and Check Seals: After processing, carefully remove the jars from the hot water bath and place them on a towel-lined surface to cool completely. As the jars cool, you should hear a “pop” sound as the lids seal. After the jars have cooled completely (usually takes 12-24 hours), check the seals by pressing down on the center of each lid. If the lid doesn’t flex or move, it’s properly sealed. If the lid flexes, the jar is not properly sealed and should be refrigerated and used within a few weeks.
-
Storage: Store sealed jars of plum jam in a cool, dark place for up to 1 year.
Expert Tips & Tricks
- Prevent Burning: To prevent the jam from sticking and burning, especially towards the end of the cooking process, use a heavy-bottomed pan and stir the mixture frequently.
- Adjusting Sweetness: Taste the plums before adding sugar. If they are particularly sweet, you may want to reduce the amount of sugar slightly.
- Flavor Boost: A splash of vanilla extract or a pinch of cinnamon added towards the end of cooking can add a delicious depth of flavor.
- Foam Removal: As the jam cooks, some foam may form on the surface. You can skim this off with a spoon before filling the jars for a clearer jam.
- Sterilization is Key: Proper sterilization of jars and lids is essential to prevent spoilage and ensure a safe product.
Serving & Storage Suggestions
Serve your homemade smooth plum jam on toast, scones, biscuits, or muffins. It’s also delicious as a topping for yogurt, oatmeal, or ice cream. Use it as a glaze for grilled meats or poultry, or as a filling for cakes and pastries.
- Sealed jars of plum jam can be stored in a cool, dark place for up to 1 year.
- Once opened, store the jam in the refrigerator for up to 3 weeks.
- If you have any unsealed jars, store them in the refrigerator and use them within a few weeks.
- Jam can also be frozen. Leave headspace in the jar. Thaw in the fridge when ready to use.
Nutritional Information
(Estimated, per tablespoon)
| Nutrient | Amount per Serving | % Daily Value |
|---|---|---|
| Calories | 53 kcal | 3% |
| Total Fat | 0g | 0% |
| Saturated Fat | 0g | 0% |
| Cholesterol | 0mg | 0% |
| Sodium | 1mg | 0% |
| Total Carbohydrate | 13g | 4% |
| Dietary Fiber | 0.3g | 1% |
| Sugars | 12g | |
| Protein | 0.1g | 0% |
Variations & Substitutions
- Spice It Up: Add a pinch of ground ginger, cloves, or cardamom for a warm, spiced plum jam.
- Alcoholic Infusion: Stir in a tablespoon of plum brandy or rum towards the end of cooking for an adult twist.
- Mixed Fruit Jam: Combine plums with other fruits like apples, pears, or blackberries for a unique flavor combination.
- Sugar Alternatives: While using sugar alternatives can alter the texture and setting of the jam, you can experiment with honey or agave nectar. Be sure to adjust the cooking time accordingly.
- Chunky Plum Jam: For a chunkier jam, roughly chop the plums instead of mashing them completely.
FAQs (Frequently Asked Questions)
Q: Why is my jam not setting?
A: Several factors can prevent jam from setting, including insufficient pectin, too much liquid, or not cooking it long enough. Make sure to follow the recipe closely and test for doneness using the chilled plate method.
Q: Can I use frozen plums for this recipe?
A: Yes, you can use frozen plums. Thaw them completely before using and drain off any excess liquid.
Q: Do I have to use pectin?
A: Pectin helps the jam set more quickly and consistently. If you prefer not to use pectin, you can still make plum jam, but you’ll need to cook it for a longer time to achieve the desired consistency.
Q: How can I tell if my jars are properly sealed?
A: After the jars have cooled completely, press down on the center of each lid. If the lid doesn’t flex or move, it’s properly sealed. You should also hear a “pop” sound as the jars cool.
Q: Can I double or triple this recipe?
A: Yes, you can scale the recipe up, but be sure to use a larger pot to accommodate the increased volume. Cooking time may also need to be adjusted.
Final Thoughts
Now it’s your turn! I encourage you to try this recipe for smooth plum jam and experience the simple pleasure of creating something delicious from scratch. Don’t hesitate to adjust the recipe to your liking and experiment with different flavors and variations. And please, share your results – I’d love to hear how it turned out! Consider pairing your freshly made jam with a sharp cheddar cheese and some crusty bread for the perfect afternoon treat. Happy jamming!