
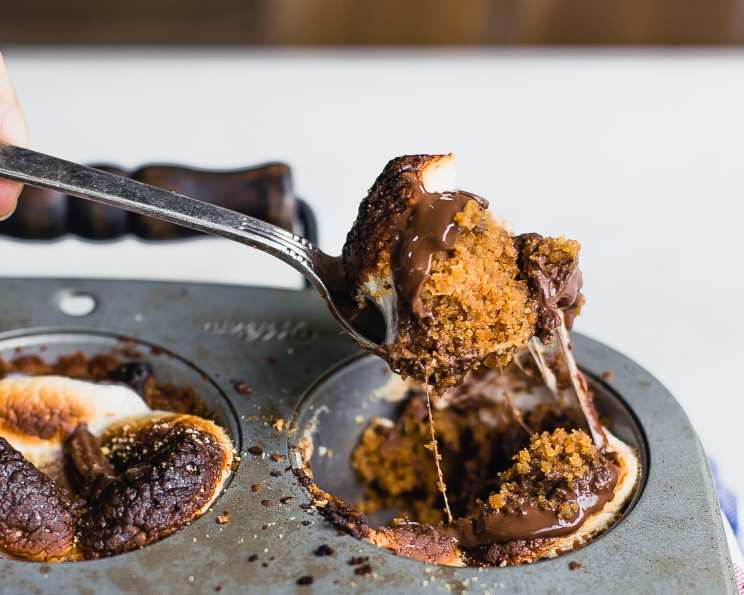
S’more Cups: A Bite-Sized Taste of Nostalgia
I’ll never forget the first time I had a s’more. It was at a family camping trip, huddled around a crackling fire, my clumsy little fingers struggling to roast the marshmallow just right. The anticipation, the gooey sweetness, the slightly burnt edges – it was pure magic. These S’more Cups capture that same campfire charm, but in a neat, adorable package, perfect for sharing without the mess (and risk of singed eyebrows!).
Recipe Overview
- Prep Time: 15 minutes
- Cook Time: 6-7 minutes
- Total Time: 22 minutes
- Servings: 24
- Yield: 24 s’more cups
- Dietary Type: Not specified
Ingredients
- 1 cup graham cracker crumbs
- ¼ cup powdered sugar
- 6 tablespoons butter, melted
- 4 regular size milk chocolate candy bars, divided
- 12 large marshmallows
Equipment Needed
- Mini muffin pan
- Mixing bowl
- Measuring cups and spoons
- Small saucepan or microwave-safe bowl (for melting chocolate)
- Spatula or spoon
Instructions
-
Preheat your oven to 350 degrees Fahrenheit (175 degrees Celsius). This is crucial for even baking and preventing burning.
-
In a mixing bowl, combine the graham cracker crumbs, powdered sugar, and melted butter. Mix thoroughly until all the crumbs are evenly moistened and the mixture resembles wet sand. This forms the base of our delectable s’more cups.
-
Use a mini muffin pan – the smaller cups make for perfectly portioned treats. Place a small scoop of the crumb mixture into each cup. You should aim for roughly the same amount in each, ensuring consistent baking.
-
Press the crumb mixture firmly into the bottom and up the sides of each muffin cup to form a little cup shape. A small measuring spoon or even your fingers work well for this. The firmer you press, the sturdier the cup will be.
-
Bake the crumb cups for 4 to 5 minutes, or until the edges start to bubble slightly and turn a light golden brown. Keep a close eye on them, as they can burn quickly. Remove from the oven.
-
While the crusts are baking, break the milk chocolate candy bars into rectangles. Then, using a sharp knife or kitchen shears, cut each marshmallow in half.
-
Once the crusts are out of the oven, immediately place one piece of chocolate into each cup. The residual heat will begin to melt the chocolate, creating a gooey base.
-
Top each cup with half a marshmallow. The marshmallow should sit comfortably on top of the chocolate, ready to get perfectly toasted.
-
Return the muffin pan to the oven and bake for another minute or two, or until the marshmallows are soft and lightly golden brown. Watch them carefully, as they can go from perfectly toasted to burnt in a matter of seconds.
-
Remove the muffin pan from the oven and let the S’more Cups cool in the pan for a few minutes before attempting to remove them. This allows the chocolate and marshmallow to set slightly, making them easier to handle.
-
Melt the remaining chocolate candy bars in a double boiler or microwave-safe bowl in 30-second intervals, stirring in between, until smooth. Be careful not to overheat the chocolate, as it can seize up and become grainy.
-
Dip each S’more Cup into the melted chocolate, coating the top and sides. Use a fork or dipping tools to make this process easier and less messy. Alternatively, you can drizzle the melted chocolate over the tops of the cups.
-
Place the dipped S’more Cups on a parchment-lined baking sheet or wire rack to allow the chocolate to set completely. This will take about 15-20 minutes at room temperature, or you can speed up the process by placing them in the refrigerator for a shorter amount of time.
-
Once the chocolate is set, the S’more Cups are ready to enjoy!
Expert Tips & Tricks
- For a richer graham cracker crust: Use honey graham crackers instead of regular ones.
- Preventing burnt marshmallows: If your oven tends to run hot, consider turning the broiler on for the last 30 seconds to toast the marshmallows quickly. Watch them like a hawk!
- Even chocolate melting: Add a teaspoon of coconut oil to the chocolate while melting to create a smoother, glossier coating.
- Crust sticking: If the crusts are sticking to the muffin pan, lightly grease the pan with cooking spray before pressing in the crumb mixture.
- Marshmallow Variations: For a gourmet twist, use flavored marshmallows like vanilla bean or salted caramel.
- Elevated Presentation: Sprinkle a pinch of sea salt on top of the melted chocolate before it sets to enhance the flavors.
Serving & Storage Suggestions
Serve these S’more Cups at room temperature for the best texture. They make a fantastic addition to dessert platters, potlucks, or as a sweet treat after a barbecue.
Store leftover S’more Cups in an airtight container at room temperature for up to 3 days. You can also refrigerate them for longer storage, but the graham cracker crust may soften slightly. If you choose to refrigerate, let them come to room temperature before serving to restore the texture. Freezing is not recommended as the marshmallow texture will change.
Nutritional Information
(Note: Estimated values, actual values may vary based on specific ingredients.)
| Nutrient | Amount per Serving | % Daily Value |
|---|---|---|
| Calories | 120 kcal | 6% |
| Total Fat | 7g | 9% |
| Saturated Fat | 4g | 20% |
| Cholesterol | 5mg | 2% |
| Sodium | 25mg | 1% |
| Total Carbohydrate | 13g | 5% |
| Dietary Fiber | 0.5g | 2% |
| Sugars | 9g | |
| Protein | 1g | 2% |
Variations & Substitutions
- Gluten-Free: Use gluten-free graham crackers for the crust.
- Dairy-Free: Substitute the butter with a dairy-free butter alternative and use dairy-free chocolate.
- Dark Chocolate: Use dark chocolate candy bars for a richer, less sweet flavor.
- Peanut Butter: Add a thin layer of peanut butter between the graham cracker crust and the chocolate for a peanut butter s’more experience.
- Seasonal: During the holidays, add a sprinkle of crushed peppermint candies on top of the melted chocolate.
FAQs (Frequently Asked Questions)
Q: Can I make these ahead of time?
A: Yes, you can make the graham cracker crusts a day or two in advance and store them in an airtight container at room temperature. Assemble the rest of the s’more cups just before serving for the best texture.
Q: How do I prevent the chocolate from burning in the oven?
A: Ensure the oven temperature is accurate, and keep a close eye on the s’more cups during the second baking stage. The chocolate should melt, but not burn. If needed, reduce the baking time by a few seconds.
Q: Can I use a different type of cookie for the crust?
A: Absolutely! Chocolate wafers or even shortbread cookies would work well as a substitute for graham crackers. Just adjust the amount of powdered sugar accordingly.
Q: What if I don’t have a mini muffin pan?
A: You can use a regular-sized muffin pan, but you’ll need to adjust the baking time and ingredient quantities accordingly. The s’more cups will be larger and require a bit more filling.
Q: My marshmallows are browning too quickly. What can I do?
A: If the marshmallows are browning too quickly, tent the muffin pan with foil during the last minute of baking. This will shield the marshmallows from direct heat while still allowing them to soften.
Final Thoughts
These S’more Cups are more than just a dessert; they’re a miniature celebration of simple joys and shared moments. Whether you’re recreating campfire memories or just looking for a delightful treat, I encourage you to give this recipe a try. Don’t be afraid to experiment with variations and make them your own. And most importantly, share them with someone you care about! Your feedback is always welcome – let me know what you think and happy baking!