
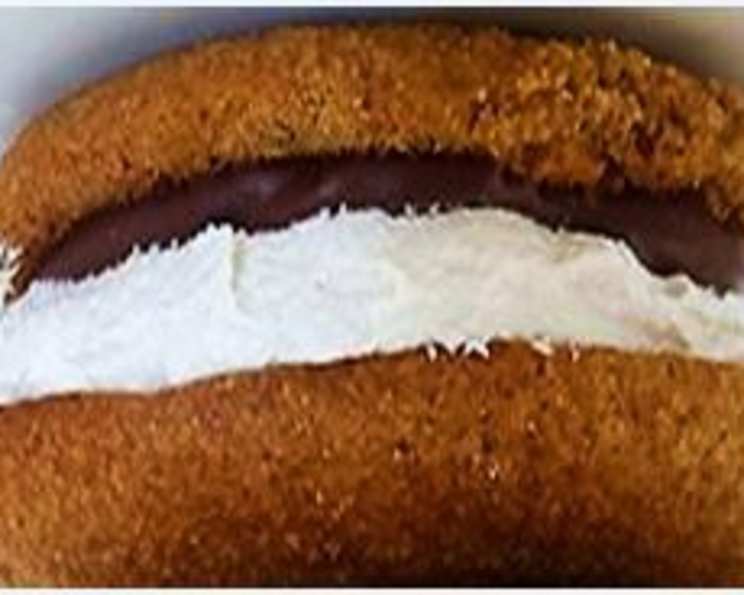
S’mores Whoopie Pies: A Childhood Classic, Elevated
I can still remember the crackle of the campfire, the sweet, almost painful anticipation as the marshmallow browned, and the gooey, melty bliss of that first bite of a s’more. It was pure, unadulterated childhood joy. Now, years later, I’ve taken that memory and transformed it into something just as magical, but perhaps a little more refined: the S’mores Whoopie Pie. Imagine the fluffy, chocolatey cake meeting the classic s’mores flavor profile – it’s nostalgia in every bite, perfect for both kids and the young at heart.
Recipe Overview
- Prep Time: 30 minutes
- Cook Time: 10 minutes
- Total Time: 1 hour 10 minutes
- Yields: 16 whoopie pies
- Serves: 16
- Dietary Type: Vegetarian
Ingredients
For the Cakes:
- 1 1/2 cups whole wheat flour
- 3/4 cup all-purpose flour
- 1 1/2 teaspoons baking powder
- 1/2 teaspoon salt
- 1/2 teaspoon cinnamon
- 4 tablespoons butter, at room temperature
- 4 tablespoons vegetable shortening
- 1 cup dark brown sugar
- 2 eggs
- 1/2 cup buttermilk
- 2 tablespoons milk
- 1/2 teaspoon vanilla extract
- 1 teaspoon baking soda
- 1 teaspoon white vinegar
- 1 teaspoon vanilla extract
For the Marshmallow Cream:
- 1 (7 1/2 ounce) jar marshmallow cream
- 1 1/4 cups vegetable shortening
- 1 cup powdered sugar
- 1 tablespoon vanilla extract
For the Chocolate Ganache:
- 12 ounces milk chocolate chips
- 3/4 cup heavy whipping cream
Equipment Needed
- Two baking sheets
- Parchment paper
- Mixing bowls (medium and large)
- Electric mixer (stand or hand-held)
- Saucepan
- Whisk
- Spoon
- Cooling rack
Instructions
-
Prepare for Baking: Begin by preheating your oven to 375°F (190°C). Line two baking sheets with parchment paper. This prevents sticking and makes cleanup a breeze.
-
Combine Dry Ingredients: In a medium bowl, whisk together the whole wheat flour, all-purpose flour, baking powder, salt, and cinnamon. Whisking ensures even distribution and eliminates lumps.
-
Cream Butter and Sugar: In a larger bowl, using an electric mixer, beat the butter, vegetable shortening, and dark brown sugar together for about 3 minutes, or until the mixture is light and creamy. This step is crucial for achieving a tender cake texture. Don’t rush it!
-
Incorporate Wet Ingredients: Add the eggs, buttermilk, and ½ teaspoon of vanilla extract to the butter mixture. Beat until everything is well combined.
-
Activate Baking Soda: In a separate, small bowl, combine the milk, baking soda, and white vinegar. This mixture will fizz – that’s exactly what you want! It’s activating the baking soda, which will give your cakes a lovely rise.
-
Combine Wet and Dry: Slowly add the baking soda mixture to the butter mixture. Then, gradually add the flour mixture and beat on low speed until everything is completely combined. Be careful not to overmix, as this can result in tough cakes.
-
Portion the Batter: Drop about 2 tablespoons of batter onto the prepared baking sheets, using a spoon or a small cookie scoop. Be sure to space each drop at least 3 inches apart, as the cakes will spread during baking.
-
Bake the Cakes: Bake for 10 minutes, or until the cakes begin to brown and spring back lightly when touched. Keep a close eye on them, as baking times can vary depending on your oven.
-
Cool the Cakes: Remove the baking sheets from the oven and let the cakes cool on the sheets for 5 minutes before transferring them to a wire rack to cool completely. This prevents them from breaking while they are still warm and delicate.
-
Prepare the Marshmallow Cream: In a bowl, beat together the marshmallow cream and vegetable shortening for 3 minutes, or until the mixture is smooth and fluffy.
-
Add Powdered Sugar: Reduce the mixer speed to low and gradually add the powdered sugar and 1 tablespoon of vanilla extract to the marshmallow mixture. Once the powdered sugar is incorporated, increase the speed and beat until the cream is light and fluffy.
-
Make the Chocolate Ganache: Place the milk chocolate chips in a large, heat-proof bowl.
-
Heat the Cream: Heat the heavy whipping cream in a saucepan over medium heat until it just begins to bubble around the edges. Do not let it boil.
-
Melt the Chocolate: Pour the heated cream over the chocolate chips in the bowl and let it sit undisturbed for about 10 minutes, until the chocolate is melted.
-
Whisk the Ganache: Stir the chocolate and cream together with a whisk until smooth and glossy.
-
Chill the Ganache: Refrigerate the ganache for about 30 minutes, stirring every 10 minutes, until it is firm enough to spread without running. This prevents the filling from squeezing out when you assemble the whoopie pies.
-
Assemble the Whoopie Pies: Pair up the cooled cakes by size. Spread the marshmallow cream onto the flat side of one cake and the chocolate ganache on the flat side of another.
-
Bring Them Together: Gently press the two cakes together to form a whoopie pie. Repeat this process until all the cakes are covered.
Expert Tips & Tricks
- Room Temperature Butter is Key: Using butter at room temperature is crucial for creating a light and airy cake batter. If you forgot to take it out ahead of time, you can quickly soften it by microwaving it in 5-second intervals, checking frequently to prevent melting.
- Don’t Overmix: Overmixing the cake batter develops the gluten in the flour, which can result in tough cakes. Mix only until the ingredients are just combined.
- Evenly Sized Cakes: For uniformly sized whoopie pies, use a cookie scoop to portion the batter onto the baking sheets.
- Ganache Consistency: The chilling time for the ganache will vary depending on your refrigerator. Check the consistency frequently and stir until it is firm enough to spread. If it gets too firm, let it sit at room temperature for a few minutes to soften slightly.
- Add a Graham Cracker Crumble: For an extra s’mores touch, press the edges of the marshmallow cream filling into crushed graham crackers after assembly.
Serving & Storage Suggestions
Serve these delightful S’mores Whoopie Pies chilled or at room temperature. They are best enjoyed within 2-3 days of making. Store any leftovers in an airtight container in the refrigerator to maintain freshness. They can also be frozen for longer storage. Wrap them individually in plastic wrap and then place them in a freezer-safe bag or container. To thaw, simply remove them from the freezer and let them sit at room temperature for about 30 minutes.
Nutritional Information
| Nutrient | Amount per Serving | % Daily Value |
|---|---|---|
| Calories | 453.7 kcal | N/A |
| Calories from Fat | 255 g | 56% |
| Total Fat | 28.4 g | 43% |
| Saturated Fat | 10.8 g | 53% |
| Cholesterol | 50.8 mg | 16% |
| Sodium | 247.5 mg | 10% |
| Total Carbohydrate | 47.2 g | 15% |
| Dietary Fiber | 1.7 g | 6% |
| Sugars | 29.3 g | 117% |
| Protein | 3.9 g | 7% |
Note: Nutritional information is an estimate and may vary based on specific ingredients and portion sizes.
Variations & Substitutions
- Gluten-Free: Substitute the all-purpose flour and whole wheat flour with a gluten-free all-purpose flour blend. Be sure to check that your baking powder is also gluten-free.
- Dairy-Free: Replace the butter with a dairy-free butter alternative and the buttermilk with a mixture of non-dairy milk (such as almond or soy milk) and a tablespoon of lemon juice or vinegar. Use dairy-free chocolate chips for the ganache and coconut cream instead of heavy cream.
- Different Chocolate: Experiment with different types of chocolate for the ganache, such as dark chocolate or semi-sweet chocolate, depending on your preference.
- Spiced Cakes: Add a pinch of ground cloves or nutmeg to the cake batter for a warmer, spicier flavor.
- Nutty Crunch: Add chopped nuts, such as pecans or walnuts, to the marshmallow cream or sprinkle them on top of the assembled whoopie pies.
FAQs (Frequently Asked Questions)
Q: Can I make the cakes ahead of time?
A: Absolutely! The cakes can be baked up to 2 days in advance and stored in an airtight container at room temperature. Just be sure they are completely cooled before storing.
Q: Why is my ganache too thin?
A: If your ganache is too thin, it likely means the chocolate didn’t melt completely or the cream wasn’t hot enough. Place the bowl back over a saucepan of simmering water (double boiler) and stir gently until the chocolate melts completely. Then, refrigerate for a longer period, checking the consistency every 15 minutes, until it’s spreadable.
Q: Can I freeze these whoopie pies?
A: Yes, these whoopie pies freeze well. Wrap them individually in plastic wrap and then place them in a freezer-safe bag or container. They can be stored in the freezer for up to 2 months.
Q: What if I don’t have buttermilk?
A: You can make a quick substitute for buttermilk by adding 1 tablespoon of white vinegar or lemon juice to 1/2 cup of milk. Let it sit for 5 minutes before using it in the recipe.
Q: How can I prevent my cakes from sticking to the parchment paper?
A: Parchment paper should prevent sticking, but to be extra sure, you can lightly grease the parchment paper with cooking spray before placing the cake batter on top.
Final Thoughts
So, there you have it – S’mores Whoopie Pies, a delightful twist on a classic treat that is sure to bring a smile to your face. Don’t be afraid to get creative with variations and make it your own! I hope you enjoy baking and sharing these delicious treats as much as I do. And if you try this recipe, I would love to hear your feedback – happy baking!