
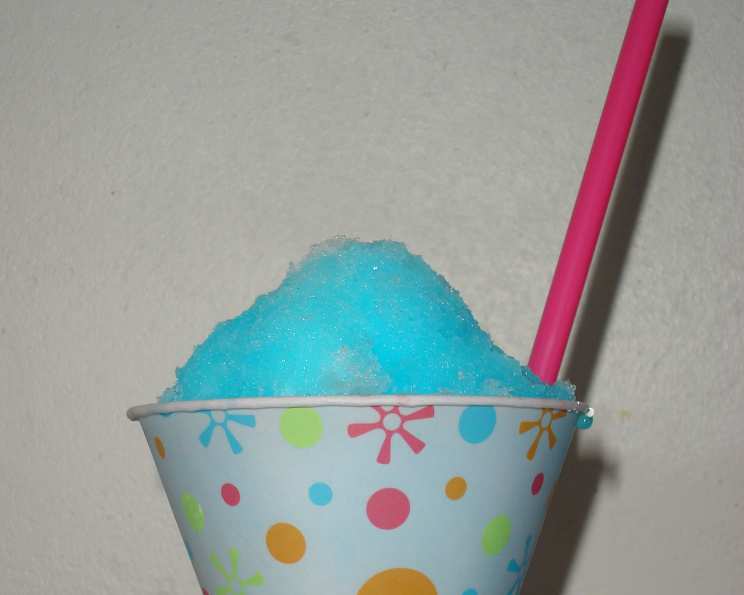
Homemade Snow Cone Syrup: A Childhood Classic, Elevated
The first time I tasted a snow cone, I was at a summer fair, the air thick with the smell of popcorn and the joyful screams from the rollercoaster. The vibrant red syrup staining my tongue and the icy granules melting in my mouth – it was pure, unadulterated summer joy. It was that sticky sweetness that glued itself to my memory, a flavor I chased every summer thereafter. Now, as a chef, I’ve refined the process of making snow cone syrup at home, capturing that nostalgic essence with a simple recipe that’s both easy and incredibly satisfying. Get ready to create some sweet summer memories!
Recipe Overview
- Prep Time: 5 minutes
- Cook Time: 5 minutes
- Total Time: 10 minutes
- Yields: About 1 1/2 cups
- Dietary Type: Vegan, Gluten-Free, Dairy-Free
Ingredients
- 1 (1/4 ounce) envelope unsweetened flavored drink mix (such as Kool-Aid)
- 1 cup granulated sugar
- 1/2 cup water
Equipment Needed
- Small bowl
- Spoon or whisk
- Squeezable bottle (for easy dispensing)
Instructions
- In a small bowl, combine the entire envelope of unsweetened flavored drink mix, the granulated sugar, and the water.
- Stir the mixture vigorously until the sugar is completely dissolved. This usually takes a few minutes. Ensure there are no granules of sugar remaining at the bottom of the bowl.
- Pour the homemade snow cone syrup into a squeezable bottle. This will make it easier to dispense evenly over the shaved ice.
- Pour generously over shaved ice and enjoy immediately!
- Store any unused syrup in the refrigerator to maintain its freshness.
Expert Tips & Tricks
- Flavor Intensity: Don’t be afraid to experiment with different flavored drink mixes to create unique flavor combinations. Try mixing two different flavors together for a custom blend.
- Sugar Dissolving: To speed up the sugar-dissolving process, you can gently heat the water in the microwave for a few seconds before adding it to the sugar and drink mix. Be careful not to boil the water.
- Color Enhancement: If you want a more vibrant color, you can add a drop or two of food coloring, but this is entirely optional, as the drink mix typically provides sufficient coloring.
- Natural Sweetener Option: You can try substituting honey or agave for sugar, but this will alter the flavor and consistency of the syrup slightly.
- Thickening Agent: If you prefer a thicker syrup, add a pinch of cornstarch to the water before combining the ingredients. Heat the mixture gently on the stovetop, stirring constantly, until it thickens slightly. Let it cool completely before pouring it into a squeeze bottle.
- Homemade Shaved Ice: If you don’t have a shaved ice machine, you can blend ice cubes in a blender until you achieve a shaved ice consistency. Be careful not to over-blend, as this can result in a slushy texture instead of shaved ice.
- Preventing Crystallization: To prevent the sugar from crystallizing, add a teaspoon of light corn syrup to the mixture while stirring. This will help maintain a smooth consistency.
Serving & Storage Suggestions
Serve your homemade snow cones immediately after preparing them. The shaved ice melts quickly, so it’s best to assemble and enjoy right away. Garnish with fresh fruit, such as berries or sliced citrus, for a burst of fresh flavor and visual appeal.
Store any leftover snow cone syrup in an airtight container or the squeezable bottle in the refrigerator. Properly stored, it will last for up to 2 weeks. The cold temperature can cause the syrup to thicken slightly, so you may need to let it sit at room temperature for a few minutes before using it again.
It’s not recommended to freeze the syrup, as the texture may change upon thawing.
Nutritional Information
Please note that these values are estimates and can vary based on the specific brand of flavored drink mix used.
| Nutrient | Amount per Serving | % Daily Value |
|---|---|---|
| Calories | 200 kcal | 10% |
| Total Fat | 0g | 0% |
| Saturated Fat | 0g | 0% |
| Cholesterol | 0mg | 0% |
| Sodium | 10mg | 0% |
| Total Carbohydrate | 50g | 17% |
| Dietary Fiber | 0g | 0% |
| Sugars | 50g | 100% |
| Protein | 0g | 0% |
Variations & Substitutions
- All-Natural Version: For a healthier alternative, use all-natural fruit juice concentrates instead of flavored drink mixes. Combine equal parts fruit juice concentrate and sugar, then add a small amount of water to reach the desired consistency.
- Citrus Burst: Add a tablespoon of fresh lemon, lime, or orange juice to the syrup for a tangy twist. This complements fruit-flavored drink mixes particularly well.
- Spice It Up: For a unique flavor, add a pinch of cinnamon, ginger, or chili powder to the syrup. This works especially well with dark fruit flavors like cherry or grape.
- Herbal Infusion: Infuse the water with fresh herbs like mint, basil, or rosemary before making the syrup. This adds a subtle, sophisticated flavor to the snow cones.
- Tropical Twist: Use coconut water instead of regular water for a tropical-flavored syrup. Combine with pineapple or mango drink mix for an authentic island experience.
- DIY Drink Mix: Skip the store-bought drink mix altogether and create your own using freeze-dried fruit powders, citric acid, and natural food coloring. This allows for complete control over the ingredients and flavor.
- Maple Syrup Base: Substitute maple syrup for granulated sugar for a distinctive flavor profile. Start with a smaller quantity and adjust to taste, as maple syrup is sweeter than granulated sugar.
FAQs (Frequently Asked Questions)
Q: Can I use diet drink mix for this recipe?
A: Yes, you can use diet drink mix to reduce the sugar content, but be aware that the flavor and texture may be slightly different. Artificial sweeteners can sometimes have a different taste profile compared to sugar.
Q: How long does homemade snow cone syrup last?
A: Homemade snow cone syrup will last for about 2 weeks when stored in an airtight container in the refrigerator.
Q: My syrup is too thick. What can I do?
A: If your syrup is too thick, simply add a little bit more water and stir until you reach the desired consistency.
Q: Can I make this syrup without sugar?
A: While you can try using a sugar substitute, it will alter the taste and texture of the syrup. Some substitutes may not dissolve as easily as sugar, which can affect the final product.
Q: What if I don’t have a squeezable bottle?
A: If you don’t have a squeezable bottle, you can use a spoon to drizzle the syrup over the shaved ice, or pour the syrup into a plastic bag and snip off one corner to create a makeshift piping bag.
Final Thoughts
This homemade snow cone syrup recipe is more than just a sweet treat; it’s a gateway to childhood memories and a chance to create new ones. The simple ingredients and easy instructions make it a fun and rewarding activity for the whole family. So, grab your favorite flavored drink mix, shave some ice, and prepare to be transported back to those carefree summer days. Don’t hesitate to experiment with different flavors and share your creations with friends and loved ones. After all, the best part of a snow cone is the joy it brings!