
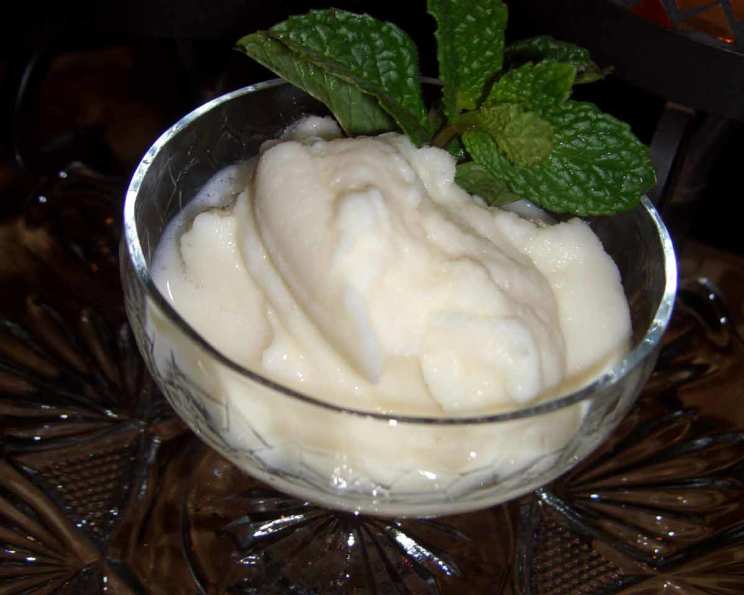
Snow Ice Cream: A Taste of Childhood Nostalgia (1950s Method)
The first time I made snow ice cream, I was a nervous culinary student trying to impress my notoriously critical grandmother. She’d often reminisce about her own mother’s snow ice cream, a simple pleasure from her Depression-era childhood. I remember the way her eyes twinkled, filled with memories of snowy days and a sweet, creamy treat. Making this recipe wasn’t just about following instructions; it was about connecting with a lineage of strong, resourceful women and trying to recapture a little bit of that magic. The pressure was on, but the result, that cool, delicate sweetness, was worth every bit of anxiety.
Recipe Overview
- Prep Time: 20 minutes
- Cook Time: 5 minutes
- Total Time: 2 hours 25 minutes (includes cooling and freezing time)
- Servings: Approximately 4 ice cube trays
- Yield: Variable, depending on snow density
- Dietary Type: Not suitable for those avoiding raw eggs
Ingredients
- 1 quart milk
- 1 egg
- 1 cup sugar
- 1/4 teaspoon salt
- 1 teaspoon pure vanilla extract
- Freshly fallen snow
Equipment Needed
- Saucepan
- Whisk
- Large Mixing Bowl
- Ice cube trays (metal preferred for traditional freezing)
Instructions
- Begin by preparing the custard. In a saucepan, combine the milk, egg, sugar, and salt.
- Whisk the ingredients together thoroughly to ensure the sugar and salt are well dissolved and the egg is fully incorporated into the milk.
- Place the saucepan over medium heat. Cook, stirring constantly with the whisk, until the mixture thickens slightly and coats the back of a spoon. This usually takes about 3-5 minutes. Be careful not to let the mixture boil, as this can cause the egg to curdle.
- Remove the saucepan from the heat and stir in the vanilla extract. This will add a warm, aromatic note to the custard.
- Pour the custard into a clean mixing bowl and let it cool completely. You can speed up the cooling process by placing the bowl in an ice bath, stirring occasionally. This step is crucial; adding warm custard to the snow will cause it to melt too quickly.
- While the custard is cooling, collect your snow. Use a large bowl and gather only fresh, clean snow that has fallen recently. Avoid snow that has been on the ground for a long time or that looks dirty. The quality of the snow directly impacts the taste and texture of your ice cream.
- Once the custard is completely cool, begin adding the snow to the bowl. Alternate between pouring in small amounts of snow and custard, stirring gently to combine. The goal is to incorporate as much snow as possible without causing the mixture to become too watery.
- Continue adding snow and custard, stirring until you reach a consistency similar to soft-serve ice cream. You may not need to use all the custard or snow, depending on the density of the snow.
- At this point, you have two options: enjoy your snow ice cream immediately, or freeze it for later. For immediate enjoyment, scoop the snow ice cream into bowls and serve.
- If you prefer a firmer consistency, pour the snow ice cream into ice cube trays (metal trays are reminiscent of the traditional method) and freeze for at least 2 hours, or until solid.
- Lick the bowl. Traditionally, the bowl is licked!
Important Note: This recipe uses raw egg. Consuming raw or undercooked eggs may increase your risk of foodborne illness, especially if you have certain medical conditions. Consider the “Modern/Safer Method” if you are concerned about raw eggs.
Expert Tips & Tricks
- Snow Quality Matters: Use only the freshest, cleanest snow for the best flavor and texture. Avoid snow that is discolored or near roads.
- Chill Everything: Make sure the custard is completely cool before adding the snow. Warm custard will melt the snow too quickly.
- Gentle Mixing: Fold the snow and custard together gently to avoid overmixing, which can result in a watery consistency.
- Adjust Sweetness: Taste the mixture as you go and adjust the amount of sugar to your liking. Some snow may be icier than others, affecting the overall sweetness.
- Flavor Enhancements: Experiment with adding a pinch of cinnamon, nutmeg, or a dash of maple syrup to the custard for added flavor.
Serving & Storage Suggestions
Serve your snow ice cream immediately for the best texture. It melts quickly, so be prepared to enjoy it right away! If you’ve frozen the mixture in ice cube trays, let it sit at room temperature for a few minutes before serving to soften slightly.
Leftover snow ice cream can be stored in an airtight container in the freezer for up to a week, but the texture may change slightly. It’s best enjoyed fresh. Because of the nature of the ingredients, it doesn’t keep well at room temperature or in the refrigerator.
Nutritional Information
Note: Nutritional information is an estimate and may vary depending on the density of the snow and specific ingredient brands used.
| Nutrient | Amount per Serving | % Daily Value |
|---|---|---|
| Calories | 250 kcal | 13% |
| Total Fat | 8g | 12% |
| Saturated Fat | 5g | 25% |
| Cholesterol | 75mg | 25% |
| Sodium | 150mg | 7% |
| Total Carbohydrate | 40g | 13% |
| Dietary Fiber | 0g | 0% |
| Sugars | 35g | – |
| Protein | 5g | 10% |
Variations & Substitutions
- Modern/Safer Method (No Egg): If you’re concerned about using raw eggs, you can use the following recipe: 1 cup milk or cream, 1/2 cup sugar, and 1 teaspoon vanilla. Mix all ingredients together and add snow until no more can be added. Eat immediately or freeze.
- Dairy-Free Option: Substitute the milk with your favorite plant-based milk, such as almond milk, soy milk, or oat milk.
- Flavor Variations: Add a tablespoon of cocoa powder to the custard for chocolate snow ice cream. You can also add a splash of coffee extract or a few drops of peppermint extract for different flavor profiles.
- Fruit Infusion: Mix in finely chopped fresh berries or fruit preserves after adding the snow for a fruity twist.
FAQs (Frequently Asked Questions)
Q: Is it safe to eat snow?
A: While fresh snowfall is generally safe, it’s best to collect snow from a clean area away from roads and pollution. Avoid snow that looks dirty or discolored.
Q: Can I use artificial vanilla extract instead of pure vanilla extract?
A: While you can, pure vanilla extract provides a much richer and more authentic flavor.
Q: How can I prevent the snow ice cream from becoming too watery?
A: Ensure the custard is completely cooled and avoid overmixing the snow and custard together. Add snow gradually, stirring gently.
Q: What if I don’t have ice cube trays?
A: You can use any freezer-safe container to freeze the snow ice cream. A loaf pan or a plastic container works well.
Q: My snow ice cream is too sweet. What can I do?
A: Add a squeeze of lemon juice or a pinch of salt to balance the sweetness. You can also add more snow to dilute the sweetness.
Final Thoughts
Snow ice cream is more than just a recipe; it’s a connection to simpler times, a taste of pure joy and childlike wonder. Whether you’re making it for the first time or reviving a cherished family tradition, I hope this recipe brings you warmth, happiness, and a sweet escape on a snowy day. Don’t be afraid to experiment with flavors and share your creations with loved ones. And most importantly, remember to lick the bowl!