
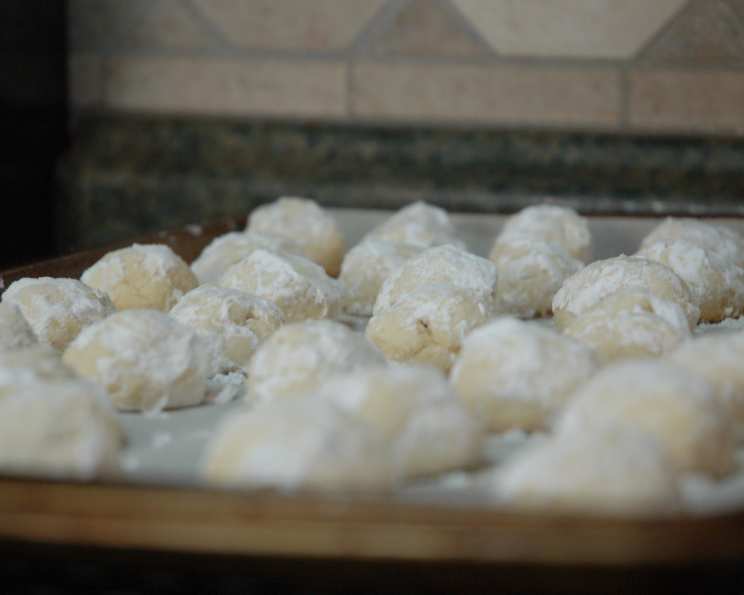
Snowdrops: A Taste of Holiday Magic
The scent of butter and almonds always transports me back to childhood Christmases. My grandmother, a master baker with flour perpetually dusted on her apron, would spend days in the kitchen, transforming simple ingredients into a wonderland of treats. Among the cookies, candies, and cakes, there was always a bowl of Snowdrops. These delicate, melt-in-your-mouth morsels, covered in a cloud of powdered sugar, were my absolute favorite. Each bite was like a tiny burst of holiday joy, a memory I cherish to this day. Now, I carry on the tradition, filling my own home with the same warm, comforting aroma.
Recipe Overview
- Prep Time: 20 minutes
- Cook Time: 10 minutes
- Total Time: 30 minutes
- Yields: 1 dozen cookies
- Dietary Type: Vegetarian
Ingredients
- 1 cup butter, softened
- 4 tablespoons icing sugar
- 2 cups cake flour
- 1 cup almonds, finely chopped
- 2 teaspoons vanilla extract
- 1 teaspoon water
- Icing sugar, for dusting
Equipment Needed
- Mixing bowl
- Electric mixer (optional)
- Baking sheet
- Parchment paper or silicone baking mat
- Sifter or fine-mesh sieve
Instructions
- Begin by creaming together the butter in a mixing bowl until it’s light and fluffy. This step is crucial for achieving the cookies’ signature delicate texture. An electric mixer makes this process easier, but you can also do it by hand with a bit of elbow grease.
- Gradually add the 4 tablespoons of icing sugar to the creamed butter, blending well until the mixture is smooth and fully combined. The icing sugar will help to create a melt-in-your-mouth texture.
- In a separate bowl, whisk together the 2 cups of cake flour. Cake flour has a lower protein content than all-purpose flour, resulting in a more tender cookie.
- Gradually incorporate the cake flour into the butter and sugar mixture, mixing on low speed (or by hand) until just combined. Be careful not to overmix the dough, as this can develop the gluten and result in a tougher cookie.
- Add the 1 cup of finely chopped almonds, 2 teaspoons of vanilla extract, and 1 teaspoon of water to the dough. Mix gently until everything is evenly distributed throughout the dough.
- Cover the dough with plastic wrap and chill it in the refrigerator for at least 30 minutes, or until it’s firm enough to handle. Chilling the dough prevents the cookies from spreading too much during baking and makes them easier to shape.
- Preheat your oven to 400°F (200°C). Line a baking sheet with parchment paper or a silicone baking mat.
- Remove the chilled dough from the refrigerator. Using your hands, roll the dough into small, round balls, about 1 inch in diameter. Place the balls on the prepared baking sheet, spacing them about 1 inch apart.
- Bake in the preheated oven for 8 to 10 minutes. Keep a close eye on the cookies – they should remain pale and not turn golden brown. Remember, they’re called Snowdrops for a reason!
- Remove the baking sheet from the oven and let the cookies cool slightly for a minute or two on the baking sheet.
- While the cookies are still warm, gently roll them in sifted icing sugar, coating them completely. The heat from the cookies will help the icing sugar adhere.
- Transfer the sugar-coated cookies to a wire rack to cool completely. As they cool, the icing sugar will set, creating a beautiful, snowy coating.
Expert Tips & Tricks
- Use room temperature butter: Softened butter is crucial for creating a smooth, creamy base for the dough. If you forget to take the butter out ahead of time, you can soften it quickly by cutting it into small cubes and letting it sit at room temperature for about 15-20 minutes.
- Don’t overmix the dough: Overmixing can develop the gluten in the flour, resulting in a tough cookie. Mix until just combined.
- Toast the almonds (optional): Toasting the almonds before adding them to the dough enhances their flavor and adds a subtle nutty note to the cookies. To toast the almonds, spread them in a single layer on a baking sheet and bake at 350°F (175°C) for 5-7 minutes, or until lightly golden and fragrant. Let them cool completely before chopping and adding them to the dough.
- Adjust baking time: Ovens vary, so keep a close eye on the cookies during baking. If your oven tends to run hot, you may need to reduce the baking time by a minute or two.
Serving & Storage Suggestions
Snowdrops are best served slightly warm, when their texture is at its most delicate and melt-in-your-mouth. They are perfect as part of a holiday dessert spread, alongside a cup of hot cocoa or coffee, or simply enjoyed on their own. Store the cooled cookies in an airtight container at room temperature for up to 5 days. They can also be frozen for longer storage – simply thaw them at room temperature before serving. Dust with additional icing sugar before serving to freshen them up.
Nutritional Information
| Nutrient | Amount per Serving | % Daily Value |
|---|---|---|
| Calories | 250 kcal | 13% |
| Total Fat | 15g | 23% |
| Saturated Fat | 9g | 45% |
| Cholesterol | 40mg | 13% |
| Sodium | 50mg | 2% |
| Total Carbohydrate | 25g | 8% |
| Dietary Fiber | 1g | 4% |
| Sugars | 10g | – |
| Protein | 3g | 6% |
Note: Nutritional information is an estimate and may vary based on specific ingredients and portion sizes.
Variations & Substitutions
- Gluten-Free Snowdrops: Substitute the cake flour with a gluten-free all-purpose flour blend. Be sure to use a blend that contains xanthan gum for binding.
- Different Nuts: Experiment with different types of nuts, such as pecans, walnuts, or hazelnuts.
- Citrus Zest: Add a teaspoon of lemon or orange zest to the dough for a bright, citrusy flavor.
- Chocolate Snowdrops: Dip the cooled cookies in melted white or dark chocolate for a decadent twist.
- Spiced Snowdrops: Add a pinch of cinnamon, nutmeg, or cardamom to the dough for a warm, festive flavor.
FAQs (Frequently Asked Questions)
Q: Why are my Snowdrops spreading too much during baking?
A: This can happen if the dough is not chilled enough. Ensure you chill the dough for at least 30 minutes before baking. Also, make sure your oven is at the correct temperature.
Q: Can I use all-purpose flour instead of cake flour?
A: While you can, the texture will be slightly different. Cake flour has a lower protein content, resulting in a more tender cookie. If using all-purpose flour, consider using 2 tablespoons less flour for every cup.
Q: How do I prevent the icing sugar from melting completely?
A: Let the cookies cool slightly before rolling them in icing sugar. If they are too hot, the sugar will melt and become sticky.
Q: Can I make the dough ahead of time?
A: Yes, you can make the dough up to 2 days in advance. Store it in the refrigerator, tightly wrapped in plastic wrap. Let it sit at room temperature for about 15 minutes before rolling into balls.
Q: Are these cookies suitable for freezing?
A: Absolutely! Snowdrops freeze well. Store them in an airtight container for up to 2 months. Thaw at room temperature and dust with fresh icing sugar before serving.
Final Thoughts
These Snowdrops are more than just cookies; they are a little piece of holiday magic. I encourage you to try this recipe and create your own memories with these delicate, melt-in-your-mouth treats. Share them with your loved ones, and don’t be afraid to experiment with variations to make them your own. The aroma of butter, almonds, and vanilla filling your kitchen is a gift in itself, and the joy of sharing these Snowdrops with friends and family is truly priceless. Happy baking!