
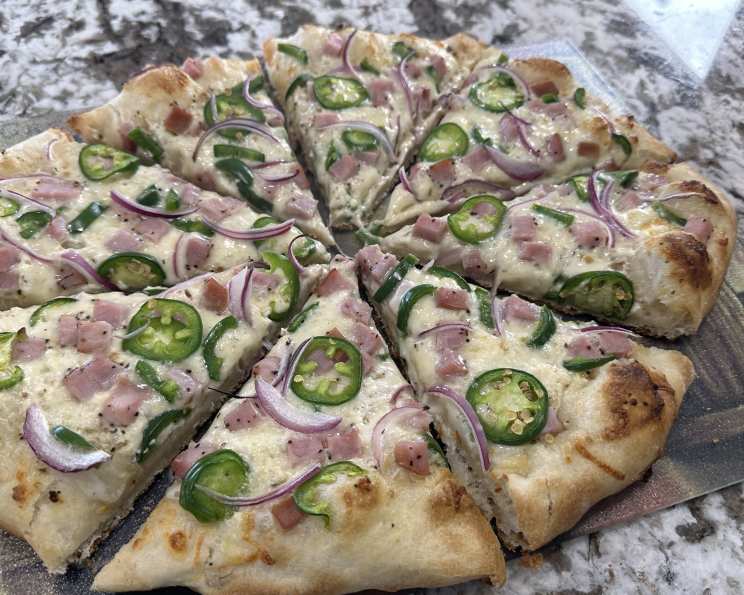
So Easy Pizza Dough: Your Weeknight Pizza Solution
There’s something magical about the aroma of baking pizza dough that instantly transports me back to my grandmother’s kitchen. Every Friday night, the scent of yeasty dough mingled with simmering tomato sauce filled the air. We’d gather around her large, worn wooden table, each of us taking turns kneading and shaping our own little masterpieces. While her recipe was a closely guarded secret, this easy pizza dough brings back those comforting memories and makes homemade pizza night a breeze, even on the busiest weeknights.
Recipe Overview
- Prep Time: 15 minutes
- Cook Time: 25-30 minutes
- Total Time: 50 minutes
- Servings: 4-6
- Yield: 1 Pizza
- Dietary Type: Vegetarian (easily made vegan)
Ingredients
- 1 (1/4 ounce) package active dry yeast
- 1 cup warm water (around 110 degrees F)
- 2 1/4 cups all-purpose flour, plus more as needed
- 2 tablespoons oil (olive or vegetable)
- 1 teaspoon salt
- 2 teaspoons white sugar
- Cornmeal for pan
Equipment Needed
- Large mixing bowl
- Measuring cups and spoons
- Pizza pan
- Cooking spray
- Oven
Instructions
-
Begin by activating the yeast. In a large mixing bowl, dissolve one (1/4 ounce) package of active dry yeast in 1 cup of warm water (approximately 110 degrees F). It’s important that the water isn’t too hot, as this can kill the yeast. Let the mixture stand for 5 to 10 minutes. You’ll know the yeast is active when it becomes creamy and foamy.
-
Once the yeast is activated, add the remaining ingredients to the bowl: 2 1/4 cups of all-purpose flour, 2 tablespoons of oil, 1 teaspoon of salt, and 2 teaspoons of white sugar. Stir vigorously to form a stiff, wet dough. The dough should come together but may still be slightly sticky.
-
If the dough is too wet and unmanageable, gradually add additional flour, about 1/4 cup at a time, until it reaches the right consistency. You’re aiming for a dough that’s slightly tacky but not overly sticky.
-
Cover the bowl with a clean kitchen towel or plastic wrap. Place the bowl in a warm place and let the dough rise for at least 30 minutes. For an even more flavorful crust, allow it to rise for up to 2 hours. The longer it rises, the more complex the flavor will be.
-
While the dough is rising, preheat your oven to 350 degrees F (175 degrees C). Prepare your pizza pan by spraying it with cooking spray and then sprinkling it liberally with cornmeal. The cornmeal will help prevent the dough from sticking and will give the crust a pleasant, slightly gritty texture.
-
After the dough has risen, grease your hands with oil to prevent sticking. Press the dough onto the prepared pizza pan, spreading it to your desired thickness. If the dough is resisting, let it rest for a few minutes to relax the gluten.
-
Bake the crust in the preheated oven for 10 minutes. This pre-baking helps to ensure a crispy bottom crust.
-
Remove the partially baked crust from the oven and add your desired pizza toppings. Get creative with your toppings! Tomato sauce, mozzarella cheese, pepperoni, vegetables – the possibilities are endless.
-
Return the pizza to the oven and bake for an additional 15-20 minutes, or until the crust is browned and crispy on the bottom and the cheese is melted and bubbly. Keep a close eye on it to prevent burning.
-
Once the pizza is done, remove it from the oven and let it cool slightly before slicing and serving. Enjoy!
Expert Tips & Tricks
- Yeast Activation is Key: Always check the expiration date on your active dry yeast. If you’re unsure if your yeast is still good, test it by dissolving it in warm water with a pinch of sugar. If it doesn’t foam up after 10 minutes, it’s likely dead and should be replaced.
- Dough Consistency: The consistency of the dough is crucial. Don’t be afraid to add a little more flour if it’s too sticky, but be careful not to add too much, or the crust will be tough.
- Rise Time: While the recipe calls for a minimum rise time of 30 minutes, allowing the dough to rise for longer (up to 2 hours) will result in a more flavorful and airy crust. You can even let it rise in the refrigerator overnight for an even deeper flavor.
- Pre-Baking: Pre-baking the crust before adding toppings helps prevent a soggy bottom. This is especially important if you’re using wet toppings like fresh tomatoes or vegetables.
- Crispy Crust: For an extra crispy crust, bake the pizza on a pizza stone or baking steel. Preheat the stone or steel in the oven for at least 30 minutes before baking.
- Flavor Boost: Add herbs like Italian seasoning, garlic powder, or onion powder to the dough for extra flavor.
Serving & Storage Suggestions
Serve your homemade pizza hot and fresh out of the oven. A simple green salad makes a great accompaniment. For leftovers, allow the pizza to cool completely before wrapping it tightly in plastic wrap or storing it in an airtight container. Leftover pizza can be stored in the refrigerator for up to 3 days. To reheat, you can use the oven, a toaster oven, or even a skillet on the stovetop for a crispy bottom crust. You can also freeze the pizza dough before baking. Wrap it tightly and it will keep in the freezer for up to 2 months. Thaw it in the refrigerator overnight before using.
Nutritional Information
| Nutrient | Amount per Serving | % Daily Value |
|---|---|---|
| Calories | 329 kcal | 16% |
| Total Fat | 7.6g | 10% |
| Saturated Fat | 1g | 5% |
| Cholesterol | 0mg | 0% |
| Sodium | 585mg | 24% |
| Total Carbohydrate | 56.4g | 21% |
| Dietary Fiber | 2.3g | 8% |
| Sugars | 2.3g | – |
| Protein | 7.9g | 16% |
Note: Nutritional information is an estimate and may vary based on specific ingredients and portion sizes.
Variations & Substitutions
- Gluten-Free: Substitute the all-purpose flour with a gluten-free flour blend for a gluten-free version. Be sure to choose a blend that is designed for baking and contains xanthan gum for structure.
- Whole Wheat: Replace half of the all-purpose flour with whole wheat flour for a nuttier flavor and added fiber.
- Vegan Pizza: Use a plant-based cheese alternative and ensure your toppings are vegan-friendly.
- Herb Infused: Mix fresh herbs like rosemary, basil, or oregano into the dough for a fragrant and flavorful crust.
- Garlic Pizza: Roast some garlic and mash it into a paste before adding it to the dough for a garlicky twist.
FAQs (Frequently Asked Questions)
Q: Can I use instant yeast instead of active dry yeast?
A: Yes, you can. If using instant yeast, you can skip the step of dissolving it in warm water. Just add it directly to the dry ingredients.
Q: My dough is too sticky. What should I do?
A: Gradually add more flour, about 1 tablespoon at a time, until the dough is easier to handle. Be careful not to add too much, or the crust will be tough.
Q: Can I make the dough ahead of time?
A: Absolutely! You can prepare the dough and let it rise in the refrigerator overnight. This will also develop a more complex flavor.
Q: My crust is not crispy enough. What am I doing wrong?
A: Make sure your oven is hot enough and that you’re pre-baking the crust before adding toppings. Baking on a pizza stone or steel can also help achieve a crispier crust.
Q: Can I freeze the pizza dough after it has risen?
A: Yes, you can. After the dough has risen, punch it down to release the air, wrap it tightly in plastic wrap, and freeze. Thaw it in the refrigerator overnight before using.
Final Thoughts
I hope this recipe inspires you to ditch the delivery menus and embrace the joy of homemade pizza night. It’s a simple, satisfying, and customizable meal that’s perfect for sharing with family and friends. Don’t be afraid to experiment with different toppings and flavors to create your own signature pizza. Whether you’re a seasoned chef or a novice cook, this So Easy Pizza Dough is sure to become a staple in your kitchen. So, gather your ingredients, preheat your oven, and get ready to create some pizza magic! And don’t forget to share your creations with me! I’d love to see your pizza masterpieces. Bon appétit!