
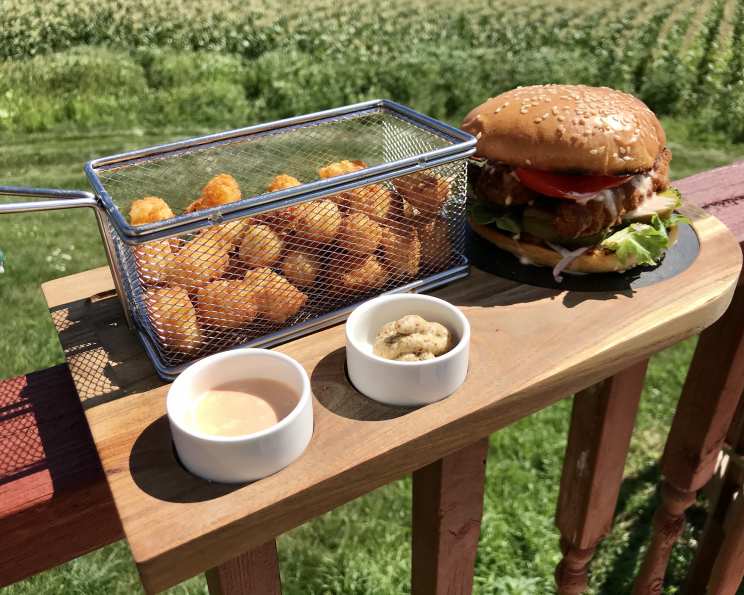
The Ultimate Soft Hamburger Buns: A Chef’s Secret
There’s a certain magic to a perfectly executed burger. It’s not just about the patty, the cheese, or the toppings, but the foundation upon which it all rests: the bun. I remember countless summer barbecues where a dry, crumbly bun ruined an otherwise magnificent burger. The disappointment was palpable. That’s why I embarked on a quest to create the perfect soft hamburger bun – one that’s sturdy enough to hold all the juicy goodness, yet yielding and tender with every bite. This recipe is the culmination of years of experimentation, and I’m thrilled to share it with you.
Recipe Overview
- Prep Time: 2 hours
- Cook Time: 20-24 minutes
- Total Time: 2 hours 54 minutes
- Yield: 10-12 buns
- Dietary Type: Not specified (contains dairy and egg)
Ingredients
Dough:
- 1 1/2 cups warm milk
- 1/4 cup butter, melted
- 1 large egg
- 3-4 tablespoons sugar
- 1 tablespoon instant dry yeast
- 1 teaspoon salt
- 4 cups flour
Egg Wash:
- 1 egg
- 2 tablespoons water
Equipment Needed
- Stand mixer (optional, but highly recommended)
- Large mixing bowl (if kneading by hand)
- Measuring cups and spoons
- Greased cookie sheet
- Pastry brush
Instructions
-
Combine the Ingredients: In the bowl of a stand mixer fitted with the dough hook (or in a large mixing bowl), combine the warm milk, melted butter, egg, sugar, instant dry yeast, salt, and flour.
-
Knead the Dough: If using a stand mixer, knead the dough on medium speed for 4-5 minutes. If kneading by hand, turn the dough out onto a lightly floured surface and knead for 8-10 minutes, until smooth and elastic. The dough should be slightly sticky but manageable.
-
First Rise: Place the dough in a lightly greased bowl, turning to coat. Cover the bowl with plastic wrap or a clean kitchen towel and let rise in a warm place for 1 hour, or until doubled in size. This is a crucial step; don’t rush it! A good rise ensures a light and airy texture.
-
Punch Down and Divide: Gently punch down the risen dough to release the air. Turn the dough out onto a lightly floured surface and divide it into 10-12 equal pieces. I like to use a kitchen scale to ensure uniformity, but eyeballing it works too.
-
Rest the Dough: Cover the dough pieces with plastic wrap or a clean kitchen towel and let them rest for 10 minutes. This allows the gluten to relax, making them easier to shape.
-
Shape the Buns: Gently shape each piece of dough into a smooth ball. Place the balls on a greased cookie sheet, fairly close to each other. Gently squish the tops down with your hand to flatten them slightly. Remember that the buns will expand significantly during the second rise, so don’t worry if they look small at this stage.
-
Second Rise: Cover the shaped buns with plastic wrap or a clean kitchen towel and let them rise in a warm place for 45 minutes to 1 hour, or until they have nearly doubled in size. This second rise is just as important as the first.
-
Preheat the Oven: While the buns are rising, preheat your oven to 375 degrees Fahrenheit (190 degrees Celsius).
-
Prepare the Egg Wash: In a small bowl, whisk together the egg and water to create the egg wash.
-
Brush and Bake: Gently brush the tops of the risen buns with the egg wash. This will give them a beautiful golden-brown color during baking. If desired, sprinkle the buns with sesame seeds or poppy seeds for added flavor and visual appeal.
-
Bake: Bake the buns in the preheated oven for 20-24 minutes, or until they are golden brown and sound hollow when tapped on the bottom. Keep a close eye on them during the last few minutes of baking to prevent burning.
-
Cool: Remove the buns from the oven and transfer them to a wire rack to cool completely before slicing and serving.
Expert Tips & Tricks
- Warm Milk Temperature: Ensure the milk is warm to the touch, but not too hot, as this can kill the yeast. Aim for a temperature between 105-115°F (40-46°C).
- Kneading Time: Don’t skimp on the kneading! Proper kneading develops the gluten, which gives the buns their structure and chewiness.
- Rising Environment: A warm, draft-free environment is essential for proper rising. If your kitchen is cool, try placing the dough in a slightly warmed oven (turned off) or near a warm appliance.
- Uniformity: For even baking, try to shape the buns as uniformly as possible. Using a kitchen scale can help with this.
- Egg Wash Alternatives: If you’re looking for a vegan alternative to the egg wash, try brushing the buns with melted butter or milk before baking.
- Preventing Soggy Buns: To prevent the bottom buns from becoming soggy, place a baking stone or pizza stone in the oven while preheating. This will help to distribute the heat evenly and create a crispier bottom.
Serving & Storage Suggestions
These soft hamburger buns are best served fresh, slightly warm, and filled with your favorite burger ingredients. They are also delicious toasted and served with butter or jam.
- Storage: Store leftover buns in an airtight container at room temperature for up to 2 days, or in the refrigerator for up to 5 days.
- Freezing: For longer storage, freeze the buns in a freezer-safe bag or container for up to 2 months. Thaw them at room temperature before serving.
- Reheating: Reheat the buns in a preheated oven at 350°F (175°C) for 5-10 minutes, or until warmed through. You can also toast them for a crispier texture.
Nutritional Information
| Nutrient | Amount per Serving | % Daily Value |
|---|---|---|
| Calories | 348.7 kcal | N/A |
| Calories from Fat | 84 g | 24% |
| Total Fat | 9.3 g | 14% |
| Saturated Fat | 5.2 g | 25% |
| Cholesterol | 68.2 mg | 22% |
| Sodium | 383.7 mg | 15% |
| Total Carbohydrate | 55.3 g | 18% |
| Dietary Fiber | 2.1 g | 8% |
| Sugars | 4.9 g | 19% |
| Protein | 10.2 g | 20% |
Please note: Nutritional information is an estimate and may vary depending on specific ingredients and portion sizes.
Variations & Substitutions
- Whole Wheat Buns: Substitute up to half of the all-purpose flour with whole wheat flour for a healthier, nuttier flavor.
- Sweet Buns: Increase the amount of sugar to 1/4 cup for sweeter buns, perfect for breakfast sandwiches or dessert burgers.
- Herb-Infused Buns: Add 1-2 tablespoons of chopped fresh herbs, such as rosemary, thyme, or oregano, to the dough for a savory twist.
- Cheese Buns: Sprinkle shredded cheese on top of the buns before baking for a cheesy, flavorful crust.
- Vegan Buns: Substitute the milk with plant-based milk (such as almond or soy milk) and use a flax egg (1 tablespoon ground flaxseed mixed with 3 tablespoons water) in place of the egg. Ensure your butter is also plant-based.
FAQs (Frequently Asked Questions)
Q: Can I make the dough ahead of time?
A: Yes! After the first rise, you can punch down the dough, wrap it tightly in plastic wrap, and refrigerate it for up to 24 hours. Allow the dough to come to room temperature for about 30 minutes before shaping and continuing with the recipe.
Q: My buns are browning too quickly. What should I do?
A: If the buns are browning too quickly, tent them loosely with aluminum foil during the last few minutes of baking.
Q: Can I use active dry yeast instead of instant dry yeast?
A: Yes, but you will need to proof the yeast first. Dissolve the active dry yeast in the warm milk with the sugar, and let it sit for 5-10 minutes until foamy before adding the remaining ingredients.
Q: Why are my buns dense and not fluffy?
A: This could be due to several factors, including using milk that was too hot (killing the yeast), not kneading the dough enough, or not allowing the dough to rise properly. Make sure to follow the instructions carefully.
Q: How do I prevent the buns from sticking to the baking sheet?
A: Make sure to grease the baking sheet thoroughly with butter or cooking spray. You can also line the baking sheet with parchment paper for added insurance.
Final Thoughts
Now that you’re armed with this recipe for unbelievably soft hamburger buns, I encourage you to head into your kitchen and give it a try. Imagine the look on your family and friends’ faces when they bite into a burger made with your homemade buns. These are more than just buns; they are an expression of love and care, a testament to the simple pleasure of sharing good food with the people you cherish. Don’t be afraid to experiment with variations and make them your own. And most importantly, have fun! Let me know how your buns turn out and what delicious creations you pair them with. Happy baking!