
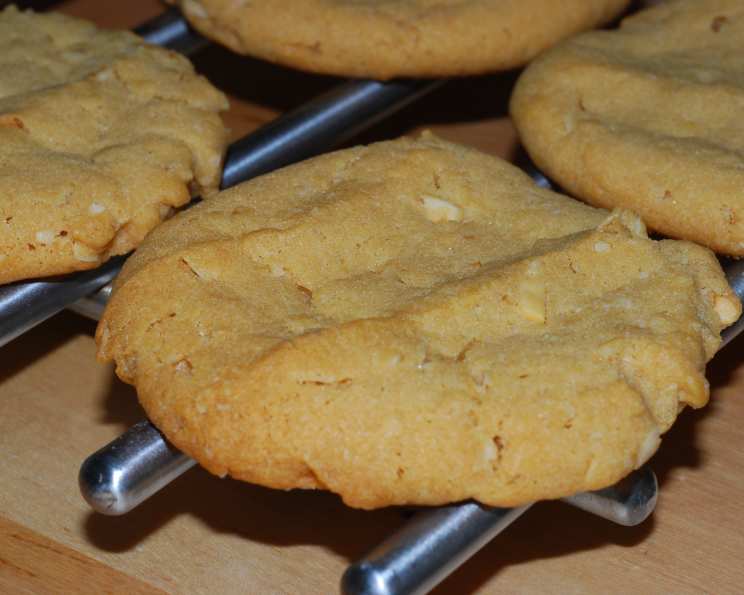
The Ultimate Soft Peanut Butter Cookies: A Childhood Classic
My grandmother, bless her heart, was a wizard with peanut butter. Not just on sandwiches, but in candies, frostings, and, most famously, her soft peanut butter cookies. I remember standing on a stool, barely tall enough to see over the counter, helping her roll the dough into perfect little spheres, the scent of warm peanut butter filling the entire house. Those cookies were more than just a treat; they were a symbol of love, family, and the simple joy of baking together. This recipe, inspired by a treasured cookbook, aims to recapture that magic, delivering the same melt-in-your-mouth texture and unforgettable peanut butter flavor that defined my childhood.
Recipe Overview
- Prep Time: 20 minutes
- Cook Time: 9-11 minutes
- Total Time: 31-41 minutes
- Yields: 36-40 cookies
- Dietary Type: Vegetarian
Ingredients
- 1/2 cup butter, softened
- 1/4 cup Butter Flavor Crisco
- 1 cup peanut butter (crunchy or creamy)
- 1 1/2 cups brown sugar
- 3/4 cup white sugar
- 2 small eggs
- 1 1/2 tablespoons vanilla
- 2 cups all-purpose flour
- 3/4 teaspoon baking soda
- 3/4 teaspoon baking powder
- 3/4 teaspoon salt
- 1 cup dry oatmeal
Equipment Needed
- Mixing bowls
- Electric mixer (stand or hand-held)
- Measuring cups and spoons
- Cookie sheets
- Parchment paper or silicone baking mats (optional)
- Cooling rack
Instructions
- Creaming the Fats and Sugars: In a large mixing bowl, using an electric mixer, whip together the softened butter, Butter Flavor Crisco, and peanut butter until the mixture is light and creamy. This step is crucial for achieving a tender cookie. Don’t rush it! The mixture should be almost fluffy.
- Adding the Sugars: Gradually add the brown sugar and white sugar to the creamed mixture. Continue mixing until everything is well combined and the sugars are fully incorporated. Scrape down the sides of the bowl as needed to ensure even mixing.
- Incorporating the Wet Ingredients: Add the eggs, one at a time, mixing well after each addition. Then, stir in the vanilla extract. The batter might look slightly curdled at this point, but don’t worry; it will come together in the next steps.
- Combining the Dry Ingredients: In a separate bowl, whisk together the all-purpose flour, baking soda, baking powder, and salt. This ensures that the leavening agents and salt are evenly distributed throughout the flour.
- Gradual Incorporation of Dry Ingredients: Gradually add the dry ingredients to the creamed mixture, mixing on low speed until just combined. Be careful not to overmix, as this can lead to tough cookies.
- Adding the Oatmeal: Stir in the dry oatmeal until it’s evenly distributed throughout the dough. This adds a delightful chewiness and texture to the cookies.
- Shaping the Cookies: Roll the dough into balls, about 1 to 1.5 inches in diameter. This recipe should yield approximately 36-40 cookies, depending on the size of the balls.
- Preparing the Baking Sheet: Place the cookie dough balls about 2 inches apart on ungreased cookie sheets. For easy cleanup and to prevent sticking, you can line the cookie sheets with parchment paper or silicone baking mats.
- Baking the Cookies: Bake in a preheated oven at 350°F (175°C) for 9-11 minutes. The cookies are done when the edges are lightly golden brown and the centers are set. Remember that oven temperatures can vary, so keep a close eye on them during the last few minutes of baking.
- Cooling: Remove the cookies from the oven and let them cool on the baking sheets for a few minutes before transferring them to a wire rack to cool completely. This prevents them from breaking apart while they are still warm and soft.
Expert Tips & Tricks
- Soft Butter is Key: Make sure your butter is truly softened, not melted. It should be soft enough to press a finger into easily but still hold its shape. This will ensure a smooth and creamy batter.
- Don’t Overmix: Overmixing the dough develops the gluten in the flour, resulting in tougher cookies. Mix until just combined, and no streaks of flour remain.
- Chill for Easier Handling (Optional): If you find the dough too sticky to handle, you can chill it in the refrigerator for 30 minutes before rolling.
- Perfectly Even Cookies: Use a cookie scoop to ensure that all the cookies are the same size for even baking.
- Peanut Butter Variety: Feel free to experiment with different types of peanut butter. Creamy will give you a smoother cookie, while crunchy adds extra texture. You can even use flavored peanut butters like chocolate or maple for a unique twist.
Serving & Storage Suggestions
Serve these soft peanut butter cookies warm or at room temperature. They are fantastic with a glass of cold milk, a cup of hot coffee, or even a scoop of vanilla ice cream. Store leftover cookies in an airtight container at room temperature for up to 5 days. For longer storage, you can freeze the cookies for up to 2 months. To freeze, place the cooled cookies in a single layer on a baking sheet and freeze until solid. Then, transfer them to a freezer-safe bag or container. Thaw at room temperature before serving.
Nutritional Information
| Nutrient | Amount per Serving | % Daily Value |
|---|---|---|
| Calories | 166.9 kcal | N/A |
| Calories from Fat | 72 g | 43% |
| Total Fat | 8 g | 12% |
| Saturated Fat | 3 g | 15% |
| Cholesterol | 15.4 mg | 5% |
| Sodium | 143.6 mg | 5% |
| Total Carbohydrate | 21.5 g | 7% |
| Dietary Fiber | 0.8 g | 3% |
| Sugars | 13.8 g | 55% |
| Protein | 3.1 g | 6% |
Note: Nutritional information is an estimate and may vary based on specific ingredients and portion sizes.
Variations & Substitutions
- Gluten-Free: Substitute the all-purpose flour with a gluten-free blend. You may need to add a little extra liquid (such as milk or water) if the dough seems too dry.
- Vegan: Replace the butter with a vegan butter alternative and the eggs with flax eggs (1 tablespoon of ground flaxseed mixed with 3 tablespoons of water per egg).
- Chocolate Chip Peanut Butter Cookies: Add 1/2 cup of chocolate chips to the dough for a delicious twist.
- Peanut Butter Blossoms: Roll the dough balls in sugar before baking and press a chocolate kiss into the center of each cookie immediately after baking.
FAQs (Frequently Asked Questions)
Q: Why are my cookies flat?
A: This can happen if the butter is too soft or melted, or if the oven temperature is too low. Ensure your butter is softened but not melted, and verify your oven temperature with an oven thermometer.
Q: Can I use natural peanut butter?
A: Yes, but be aware that natural peanut butter tends to be oilier, which can affect the texture of the cookies. You may need to add a little more flour to compensate.
Q: How do I keep my cookies from sticking to the baking sheet?
A: Line your baking sheet with parchment paper or a silicone baking mat.
Q: Can I freeze the cookie dough?
A: Absolutely! Roll the dough into balls, place them on a baking sheet, and freeze until solid. Then, transfer them to a freezer-safe bag. Bake from frozen, adding a few extra minutes to the baking time.
Q: My cookies are too dry. What did I do wrong?
A: You may have overbaked them. Keep a close eye on the cookies during the last few minutes of baking and remove them from the oven as soon as the edges are lightly golden brown.
Final Thoughts
Baking these soft peanut butter cookies is more than just following a recipe; it’s about creating memories and sharing a taste of home. Whether you’re a seasoned baker or a beginner, I encourage you to give this recipe a try. Gather your ingredients, preheat your oven, and let the aroma of warm peanut butter fill your kitchen. Share your creations with loved ones and let them experience the simple joy of a perfectly baked cookie. And please, don’t hesitate to let me know how they turn out!