
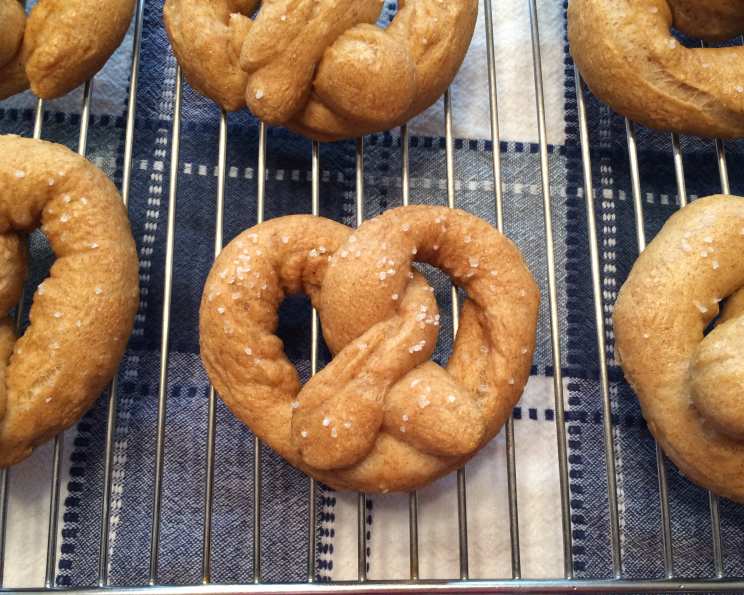
Aunt Kimmie’s Kitchen-to-Mall Soft Pretzels (Bread Machine Recipe!)
I can still smell the warm, yeasty aroma that filled Aunt Kimmie’s kitchen whenever she announced she was making her famous soft pretzels. It wasn’t just a recipe; it was an event. The whole family would gather, eager to help twist the dough into those iconic shapes, the air thick with laughter and the comforting scent of baking bread. Forget trekking to the mall; Aunt Kimmie’s pretzels were a homemade hug on a plate, a reminder that the best things in life are often made with love, right in your own kitchen.
Recipe Overview:
- Prep Time: 30 minutes
- Cook Time: 8 minutes
- Total Time: 2 hours 8 minutes
- Yields: 8 Large Pretzels
- Dietary Type: Vegetarian (easily adaptable to vegan – see variations)
Ingredients:
- 1 (1/4 ounce) package dry active yeast
- 1 tablespoon sugar
- 3 cups flour
- 1 cup water
- 1/2 teaspoon salt
- 2 tablespoons oil
- 1 egg white, slightly beaten (can substitute with plant-based milk for vegan version)
- Coarse salt
- Butter (can substitute with vegan butter)
- 2 quarts water
- 1/3 cup baking soda
- Optional: sesame seeds, cinnamon and sugar mixture
Equipment Needed:
- Bread Machine
- Very Lightly Floured Surface
- Greased Cookie Sheet
- 3-Quart Saucepan
- Slotted Spoon
Instructions:
- Begin by adding all of your ingredients to the bread machine pan in the order suggested by your bread machine’s manufacturer. This is important because the order can affect how well the dough rises and mixes.
- Select the “White Bread” setting on your bread machine, and then choose “Manual”. Press “Start”. This will initiate the kneading and first rise cycles.
- Patience is key! Allow the bread machine to run through its cycle until it has completed the second rising. You will typically hear a beep indicating this stage is finished. This whole process is crucial for developing the gluten and creating the perfect soft pretzel texture.
- Carefully remove the dough from the bread machine pan and place it onto a very lightly floured surface. This prevents the dough from sticking and makes it easier to work with.
- Divide the dough into 4 equal parts.
- Take each of these four sections and further divide them into 3 pieces each. You will now have 12 pieces of dough.
- Roll each of these pieces into an 18-inch rope. Aim for a consistent thickness to ensure even baking.
- Now comes the fun part: shaping the pretzels! Shape each rope into a circle, overlapping the ends by about 4 inches, leaving the remaining ends free.
- Take one end of the rope in each hand and twist them together at the point where the dough overlaps.
- Carefully lift the twisted ends across the circle to the opposite edge.
- Tuck the ends under the edge of the circle to create the classic pretzel shape. Moisten the ends with a little water and gently press them to seal. This ensures the pretzel holds its shape during baking.
- Place each shaped pretzel onto a greased cookie sheet.
- Let the pretzels rise, uncovered, until they appear puffy, about 20 minutes. This allows the yeast to continue working, resulting in a lighter, airier pretzel.
- While the pretzels are rising, prepare the baking soda bath. In a 3-quart saucepan, combine 2 quarts of water and 1/3 cup of baking soda. Bring this mixture to a boil. This step is essential for that characteristic pretzel chewiness and color.
- Carefully lower 1 or 2 pretzels into the boiling baking soda bath. Simmer for 10 seconds on each side. Don’t overcrowd the pot, as this can lower the water temperature and affect the pretzel’s texture.
- Lift the pretzels from the water using a slotted spoon and return them to the greased cookie sheet. Allow them to dry briefly.
- Brush each pretzel with the slightly beaten egg white. This will give them a beautiful, golden-brown sheen during baking. For a vegan option, substitute with plant-based milk.
- Sprinkle the pretzels with coarse salt or sesame seeds, or leave them plain, depending on your preference.
- If you choose to leave them plain, you can dip them in melted butter (or vegan butter) and then in a cinnamon and sugar mixture after baking for a sweet treat.
- Bake in a preheated oven at 425°F (220°C) for 4 minutes. Then, turn the cookie sheet around and bake for another 4 minutes. This ensures even browning.
- Remove from the oven and enjoy! These are best served warm.
Expert Tips & Tricks:
- Dough Consistency is Key: The dough should be slightly tacky but not sticky. If it’s too wet, add a tablespoon of flour at a time. If it’s too dry, add a teaspoon of water at a time.
- The Baking Soda Bath: Don’t skip this step! It’s what gives pretzels their unique flavor and texture. Using too much baking soda can result in a metallic taste, so measure accurately.
- Salt Application: For even salt distribution, use a salt grinder to coarsely grind the salt onto the pretzels right after brushing with egg wash.
- Freezing: Shaped, unbaked pretzels can be frozen. Freeze them on a baking sheet until solid, then transfer them to a freezer bag. When ready to bake, no need to thaw, just add a few minutes to the baking time.
- Proofing Temperature: A warm environment helps the dough rise more effectively. Place the pretzels in a slightly warmed oven (turned off) or a warm spot in your kitchen.
Serving & Storage Suggestions:
Serve these soft pretzels warm, straight from the oven, with your favorite dipping sauces. Mustard (yellow, Dijon, or honey mustard), cheese sauce, or even a sweet cream cheese dip are all fantastic options.
- Room Temperature: Pretzels are best enjoyed fresh, but they can be stored at room temperature in an airtight container for up to 2 days. However, they will lose some of their softness.
- Refrigerator: To extend their shelf life, store them in an airtight container in the refrigerator for up to 5 days. Reheat before serving.
- Freezer: For longer storage, freeze the pretzels in an airtight container or freezer bag for up to 2 months.
- Reheating: To reheat, wrap the pretzels in foil and bake at 350°F (175°C) for 5-10 minutes, or until warmed through. You can also microwave them for 15-30 seconds, but be careful not to overcook them, as they can become tough. For frozen pretzels, bake directly from frozen, adding a few minutes to the baking time.
Nutritional Information:
| Nutrient | Amount per Serving | % Daily Value |
|---|---|---|
| Calories | 211.8 kcal | N/A |
| Calories from Fat | N/A | N/A |
| Total Fat | 3.9 g | 6% |
| Saturated Fat | 0.5 g | 2% |
| Cholesterol | 0 mg | 0% |
| Sodium | 154.5 mg | 6% |
| Total Carbohydrate | 37.7 g | 12% |
| Dietary Fiber | 1.5 g | 6% |
| Sugars | 1.7 g | 6% |
| Protein | 5.7 g | 11% |
Variations & Substitutions:
- Vegan Pretzels: Substitute the egg white with plant-based milk (almond, soy, or oat milk work well) and use vegan butter for dipping.
- Gluten-Free Pretzels: Use a gluten-free flour blend designed for bread making. You may need to adjust the liquid slightly, as gluten-free flours can absorb more or less water than regular flour.
- Sweet Pretzels: After baking, dip the pretzels in melted butter and then in a cinnamon-sugar mixture. You can also drizzle them with icing or chocolate.
- Savory Pretzels: Experiment with different toppings, such as everything bagel seasoning, parmesan cheese, or dried herbs.
- Flavored Dough: Add garlic powder, onion powder, or Italian seasoning to the dough for a more complex flavor.
- Cheese-Stuffed Pretzels: Before shaping the pretzels, flatten the dough and place a small cube of cheese in the center. Fold the dough over the cheese and seal tightly before shaping.
FAQs (Frequently Asked Questions):
Q: My pretzels are coming out flat. What am I doing wrong?
A: This could be due to several factors. Make sure your yeast is fresh, and that the dough has had enough time to rise. Also, avoid over-handling the dough, as this can deflate it.
Q: Can I make the dough ahead of time and bake the pretzels later?
A: Yes, you can make the dough ahead of time and store it in the refrigerator for up to 24 hours. Let it come to room temperature before shaping and baking.
Q: Why are my pretzels tough?
A: Over-baking is the most common cause of tough pretzels. Keep a close eye on them and remove them from the oven as soon as they are golden brown.
Q: Can I use bread flour instead of all-purpose flour?
A: Yes, bread flour will give you a chewier pretzel. However, you may need to adjust the amount of liquid, as bread flour absorbs more water than all-purpose flour.
Q: What’s the purpose of the baking soda bath?
A: The baking soda bath gives the pretzels their characteristic flavor, color, and chewy texture. It’s a crucial step and shouldn’t be skipped.
Final Thoughts:
Now, go ahead and transform your kitchen into a mini pretzel bakery! The magic of Aunt Kimmie’s pretzels is not just in the taste, but in the memories created while making them. Gather your loved ones, embrace the art of pretzel-twisting, and share the joy of homemade goodness. Don’t hesitate to experiment with flavors and toppings to make them your own. And most importantly, enjoy every warm, chewy bite! Share your creations and feedback—we can’t wait to see your pretzel masterpieces!