
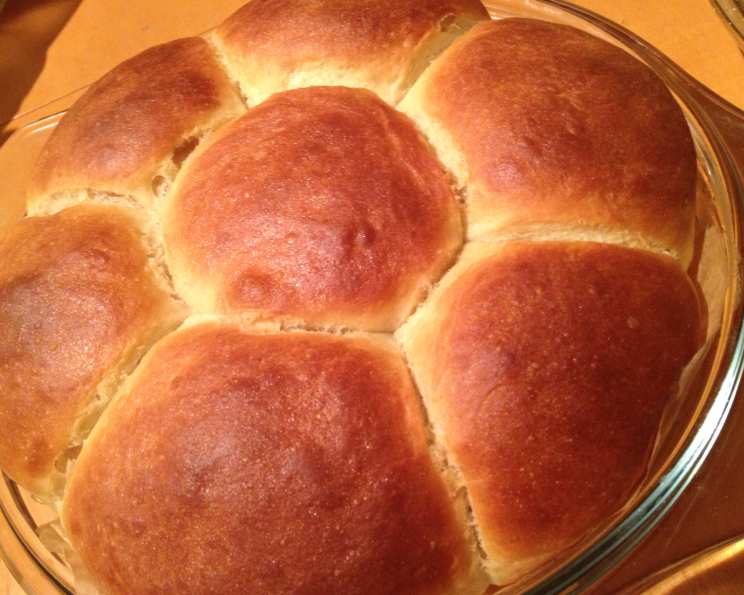
Soft Sandwich Buns (Bread Machine)
The aroma of freshly baked bread has always been my siren song, pulling me back to childhood memories of my grandmother’s kitchen. I remember standing on a stool, mesmerized as she kneaded dough with practiced ease, the rhythmic thudding a comforting soundtrack to my young life. Though she baked everything by hand, I’ve embraced the convenience of the bread machine for these soft, pillowy sandwich buns, a taste of nostalgia made effortlessly. These buns are more than just a vehicle for your favorite fillings; they’re a blank canvas for culinary creativity and a warm hug in bread form.
Recipe Overview
- Prep Time: 15 minutes
- Cook Time: 10-15 minutes
- Total Time: 1 hour 25-30 minutes (includes rise time)
- Yields: 18 buns
- Dietary Type: Vegetarian
Ingredients
- 1 1/4 cups warm milk
- 1 egg, beaten
- 2 tablespoons butter
- 1/4 cup sugar
- 3/4 teaspoon salt
- 3 3/4 cups bread flour
- 1 1/4 teaspoons active dry yeast
- 1 tablespoon melted butter, for brushing
Equipment Needed
- Bread Machine
- Measuring cups and spoons
- Lightly floured surface
- 2 1/2″ round biscuit cutter
- Greased baking sheet
- Clean kitchen towel or plastic wrap
Instructions
-
Begin by placing all the ingredients, except the melted butter, into the pan of your bread machine. Be sure to follow the specific order recommended in your bread machine’s instruction manual. This often means liquids first, followed by dry ingredients, with the yeast added last, usually into a small well on top of the flour. This prevents premature activation of the yeast.
-
Select the dough cycle on your bread machine and press start.
-
Keep a watchful eye on the dough during the first 5 minutes of mixing. If the dough appears too dry and is not forming a cohesive ball, gradually add 1 to 2 tablespoons of water (or more, if needed) until it reaches the desired consistency – slightly tacky but not sticky.
-
Once the dough cycle is complete, carefully remove the dough from the bread machine pan. Place it on a lightly floured surface.
-
Punch down the dough gently to release any trapped air.
-
Divide the dough in half. Roll each half out to approximately 3/4 inch thickness.
-
Using a 2 1/2 inch round biscuit cutter, cut out as many rounds as possible from the rolled dough. Re-roll any scraps and cut out additional rounds until all the dough is used.
-
Place the cut dough rounds onto a greased baking sheet, leaving a little space between each bun to allow for expansion during rising.
-
Brush the tops of the buns generously with melted butter. This will give them a beautiful golden color and a soft, flavorful crust.
-
Cover the baking sheet with a clean kitchen towel or loosely with plastic wrap. Place the buns in a warm place to rise until they have doubled in size. This usually takes about 1 hour, but the exact time will depend on the temperature of your environment. A slightly warm oven (turned off) or a sunny spot works well.
-
Once the buns have doubled in size, preheat your oven to 350°F (175°C).
-
Bake the buns for 10 to 15 minutes, or until they are lightly golden brown on top. Keep a close watch, as oven temperatures can vary.
-
Remove the baked buns from the oven and let them cool slightly on the baking sheet before transferring them to a wire rack to cool completely.
Expert Tips & Tricks
- For extra soft buns, consider adding a tablespoon of potato flakes to the dough. This adds moisture and tenderness.
- To ensure even baking, rotate the baking sheet halfway through the baking time.
- If you don’t have a biscuit cutter, you can use a sharp knife to cut squares or other shapes.
- For a richer flavor, use brown sugar instead of white sugar.
- To give the buns a shiny crust, brush them with an egg wash (1 egg beaten with 1 tablespoon of water) before baking.
- Don’t skip the rising step! This is crucial for creating light and airy buns.
Serving & Storage Suggestions
These soft sandwich buns are perfect for burgers, deli sandwiches, pulled pork, or even just enjoyed with butter and jam. Serve them warm or at room temperature.
To store leftover buns, place them in an airtight container or a resealable plastic bag. They will stay fresh at room temperature for 2-3 days.
For longer storage, freeze the buns in a freezer-safe bag for up to 2-3 months. To thaw, simply leave them at room temperature for a few hours or warm them in a low oven.
To reheat, wrap the buns in foil and warm them in a 350°F (175°C) oven for 5-10 minutes, or until heated through. You can also microwave them for a few seconds, but be careful not to overheat them, as they can become tough.
Nutritional Information
| Nutrient | Amount per Serving | % Daily Value |
|---|---|---|
| Calories | 138.2 kcal | N/A |
| Calories from Fat | 27 kcal | N/A |
| Total Fat | 3.1 g | 4% |
| Saturated Fat | 1.7 g | 8% |
| Cholesterol | 17.8 mg | 5% |
| Sodium | 126.7 mg | 5% |
| Total Carbohydrate | 23.6 g | 7% |
| Dietary Fiber | 0.8 g | 3% |
| Sugars | 2.9 g | N/A |
| Protein | 3.7 g | 7% |
Note: Nutritional information is an estimate and may vary based on specific ingredients and preparation methods.
Variations & Substitutions
- Dairy-Free: Substitute the warm milk with a non-dairy alternative like almond, soy, or oat milk. Ensure the butter is also replaced with a dairy-free margarine or vegetable oil.
- Whole Wheat: Replace up to half of the bread flour with whole wheat flour for a nuttier flavor and increased fiber content. You may need to add a little more liquid, as whole wheat flour absorbs more moisture.
- Sweet Buns: Increase the sugar to 1/2 cup and add 1/2 teaspoon of vanilla extract for sweeter buns, perfect for breakfast sandwiches or sweet toppings. You can also add a sprinkle of cinnamon or other spices.
- Herb Infused: Add 1-2 tablespoons of chopped fresh herbs like rosemary, thyme, or oregano to the dough for a savory twist that pairs well with grilled meats and cheeses.
- Sesame Seed Buns: Brush the tops of the buns with an egg wash and sprinkle with sesame seeds before baking for added flavor and texture.
- Garlic & Herb Buns: Add 1-2 tsp of garlic powder along with 1-2 tablespoons of a dried Italian herb blend to the dough mixture.
FAQs (Frequently Asked Questions)
Q: Can I make these buns without a bread machine?
A: Yes, you can! Mix all the ingredients (except the melted butter for brushing) in a bowl, knead for 8-10 minutes until smooth and elastic, then let rise in a warm place for 1-1.5 hours before proceeding with the recipe.
Q: Why are my buns turning out dense?
A: This can be due to several factors: not enough yeast, using old yeast, not enough liquid in the dough, or not allowing the dough to rise for long enough. Make sure your yeast is fresh, measure ingredients accurately, and give the dough ample time to rise.
Q: Can I freeze the dough instead of baking the buns immediately?
A: Yes, you can freeze the dough after it has risen in the bread machine. Punch it down, shape it into a log, wrap it tightly in plastic wrap and then in foil, and freeze for up to 2 months. Thaw overnight in the refrigerator before shaping and baking.
Q: How do I keep the buns from getting too brown on top?
A: If your buns are browning too quickly, tent them loosely with aluminum foil during the last few minutes of baking.
Q: Can I use instant yeast instead of active dry yeast?
A: Yes, you can. Use the same amount of instant yeast (1 1/4 teaspoons) and add it directly to the flour without proofing it in warm water first.
Final Thoughts
These soft sandwich buns are a testament to the simple joys of home baking. The bread machine simplifies the process, making it accessible to bakers of all skill levels. Don’t hesitate to experiment with different variations and substitutions to create your own signature buns. So, go ahead, give this recipe a try, and fill your kitchen with the delightful aroma of freshly baked bread! I encourage you to share your creations and feedback, as every baker’s touch adds a unique flavor to the story. And be sure to pair these buns with your favorite burger recipe for the ultimate at-home culinary experience!