
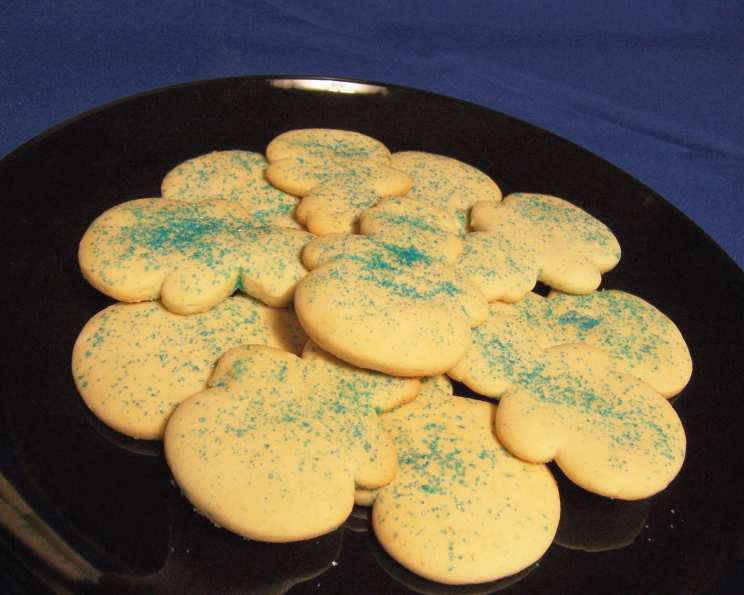
Soft Sugar Cookie Cutouts: A Taste of Childhood Magic
The scent of sugar cookies baking always takes me back to my grandmother’s kitchen. I can almost feel the warmth of the oven on my face as I carefully sprinkled colored sugar on each cookie, hoping to make them “extra special.” These weren’t just any cookies; they were canvases of holiday cheer, meticulously decorated and generously shared. The secret to my grandmother’s cookies? They were always incredibly soft, a quality I’ve strived to replicate in my own baking ever since. Now, I’m excited to share that recipe with you, so you can bring the same joy and sweetness into your home.
Recipe Overview
- Prep Time: 30 minutes (plus 2 hours chilling)
- Cook Time: 6-9 minutes
- Total Time: 2 hours 39 minutes
- Yields: 5 dozen
- Dietary Type: Not specified
Ingredients
- 1 1/2 cups sugar
- 1 cup unsalted butter, softened
- 2 eggs
- 1 teaspoon vanilla extract
- 1 cup light sour cream
- 2 teaspoons orange zest (or lemon peel)
- 4 1/3 cups all-purpose flour
- 1 teaspoon baking powder
- 1 teaspoon baking soda
- 1/2 teaspoon salt
- Colored sugars for decorating (optional)
Equipment Needed
- Large mixing bowl
- Electric mixer
- Measuring cups and spoons
- Rubber spatula
- Plastic wrap or wax paper
- Rolling pin
- Cookie cutters
- Baking sheets
- Wire cooling rack
Instructions
- In a large mixing bowl, cream together the sugar and softened butter using an electric mixer until light and fluffy. This step is crucial for incorporating air, which will contribute to the soft texture of the cookies. Don’t rush it! A good 3-5 minutes of creaming is ideal.
- Beat in the eggs, one at a time, ensuring each is fully incorporated before adding the next. Then, stir in the vanilla extract and sour cream. Mix until the batter is smooth and fluffy. The sour cream is the magic ingredient that keeps these cookies incredibly moist and soft, so be sure to use the real thing and not a substitute.
- Stir in the orange zest (or lemon peel). The citrus adds a subtle brightness that complements the sweetness of the cookie perfectly. Feel free to adjust the amount to your liking.
- In a separate bowl, whisk together the flour, baking powder, baking soda, and salt. This ensures that the leavening agents are evenly distributed throughout the flour, which is important for consistent baking.
- Gradually add the dry ingredients to the wet ingredients, mixing on low speed until just combined. Be careful not to overmix! Overmixing develops the gluten in the flour, which can result in tough cookies. Stop mixing as soon as the flour disappears into the batter.
- Divide the dough in half and wrap each half tightly in plastic wrap or wax paper. Flatten each portion into a disc. This helps the dough chill more evenly.
- Chill the dough in the refrigerator for at least 2 hours. This step is essential! Chilling allows the gluten to relax, preventing the cookies from spreading too much during baking. It also makes the dough easier to handle.
- Once the dough is chilled, preheat your oven to 400°F (200°C). Make sure your oven rack is positioned in the center of the oven for even baking.
- Lightly flour a clean work surface. Roll out one portion of the dough to a thickness of about 1/8 to 1/4 inch. Use your favorite cookie cutters to cut out shapes. If the dough starts to stick, dust it with a little more flour.
- Place the cut-out cookies onto ungreased cookie sheets, spacing them about 2 inches apart. They will spread slightly during baking, so give them enough room.
- If desired, sprinkle the cookies with colored sugars before baking. This adds a festive touch and eliminates the need for frosting after baking (though frosting is always welcome!).
- Bake for 6-9 minutes, or until the edges are slightly golden brown. Keep a close eye on them, as they can burn easily. The baking time will depend on the thickness of your cookies and your oven.
- Let the cookies cool on the baking sheets for about 2 minutes before transferring them to a wire rack to cool completely. This prevents them from breaking while they are still warm and soft.
Expert Tips & Tricks
- Soft Butter is Key: Ensure your butter is truly softened, but not melted. It should be pliable enough to easily cream with the sugar.
- Don’t Overmix: Overmixing develops gluten, leading to tougher cookies. Mix until just combined.
- Chill Time is Crucial: Don’t skip the chilling step! It makes the dough easier to handle and prevents excessive spreading. If you’re short on time, you can chill the dough for as little as an hour, but the longer the better.
- Baking Sheet Prep: Ungreased baking sheets are preferred to prevent the cookies from spreading too much.
- Even Baking: Rotate the baking sheets halfway through baking to ensure even browning.
- For Extra Softness: Consider adding a tablespoon of cornstarch to the dry ingredients. This can help to create an even softer texture.
- Dough Too Sticky? If the dough is too sticky to roll out, add a little more flour, one tablespoon at a time, until it reaches a workable consistency.
Serving & Storage Suggestions
These soft sugar cookie cutouts are best enjoyed fresh, but they can be stored in an airtight container at room temperature for up to 3-4 days. To maintain their softness, consider placing a slice of bread in the container to help retain moisture. For longer storage, you can freeze the baked cookies for up to 2-3 months. Thaw them completely at room temperature before serving. You can also freeze the unbaked dough. Wrap it tightly in plastic wrap and store it in the freezer for up to 3 months. Thaw completely in the refrigerator before rolling and baking. Serve these delightful cookies with a glass of cold milk, a cup of hot cocoa, or alongside your favorite holiday desserts. They are also perfect for gifting!
Nutritional Information
| Nutrient | Amount per Serving | % Daily Value |
|---|---|---|
| Calories | 1047.8 kcal | N/A |
| Calories from Fat | 402 g | 38% |
| Total Fat | 44.7 g | 68% |
| Saturated Fat | 27.1 g | 135% |
| Cholesterol | 188.1 mg | 62% |
| Sodium | 625.8 mg | 26% |
| Total Carbohydrate | 146.6 g | 48% |
| Dietary Fiber | 3 g | 12% |
| Sugars | 60.5 g | 241% |
| Protein | 15.7 g | 31% |
Note: Nutritional information is an estimate and can vary based on specific ingredients and portion sizes.
Variations & Substitutions
- Gluten-Free: Substitute the all-purpose flour with a gluten-free blend. Be sure to add a binder like xanthan gum to help with the texture.
- Vegan: Replace the butter with a vegan butter alternative, the eggs with flax eggs (1 tablespoon ground flaxseed + 3 tablespoons water per egg), and the sour cream with a plant-based sour cream alternative.
- Spice it Up: Add a teaspoon of ground cinnamon, nutmeg, or ginger to the dry ingredients for a warm, spiced flavor.
- Citrus Twist: Experiment with different citrus zests, such as lime or grapefruit, for a unique flavor profile.
- Chocolate Chip: Fold in 1 cup of chocolate chips or chunks to the dough for a chocolatey treat.
- Almond Extract: Substitute vanilla extract with almond extract.
FAQs (Frequently Asked Questions)
Q: Why are my cookies spreading too much?
A: The most common reason for spreading is that the dough wasn’t chilled long enough. Make sure to chill the dough for at least 2 hours, or even overnight, to allow the gluten to relax and prevent excessive spreading. Also, ensure your oven temperature is accurate.
Q: Can I freeze the cookie dough?
A: Yes, you can freeze the cookie dough. Wrap it tightly in plastic wrap and store it in the freezer for up to 3 months. Thaw completely in the refrigerator before rolling and baking.
Q: My cookies are too dry. What did I do wrong?
A: Overbaking is the most likely cause of dry cookies. Reduce the baking time slightly, and make sure to store the cookies in an airtight container to prevent them from drying out.
Q: Can I use a different type of sour cream?
A: While light sour cream is recommended for its specific texture and flavor, you can use full-fat sour cream for a richer taste. However, avoid using low-fat or fat-free sour cream, as they can result in drier cookies.
Q: How do I prevent the cookies from sticking to the baking sheet?
A: Using ungreased baking sheets helps prevent over-spreading. If you are concerned with sticking you can use parchment paper or a silicone baking mat.
Final Thoughts
Now that you have this beloved recipe, it’s time to preheat your oven and let the magic begin. These soft sugar cookie cutouts are more than just a treat; they’re a blank canvas for your creativity and a guaranteed way to bring smiles to the faces of those you share them with. Don’t be afraid to experiment with different decorations, flavors, and variations to make them your own. I encourage you to bake a batch, share them with loved ones, and create some sweet memories. Happy baking!