
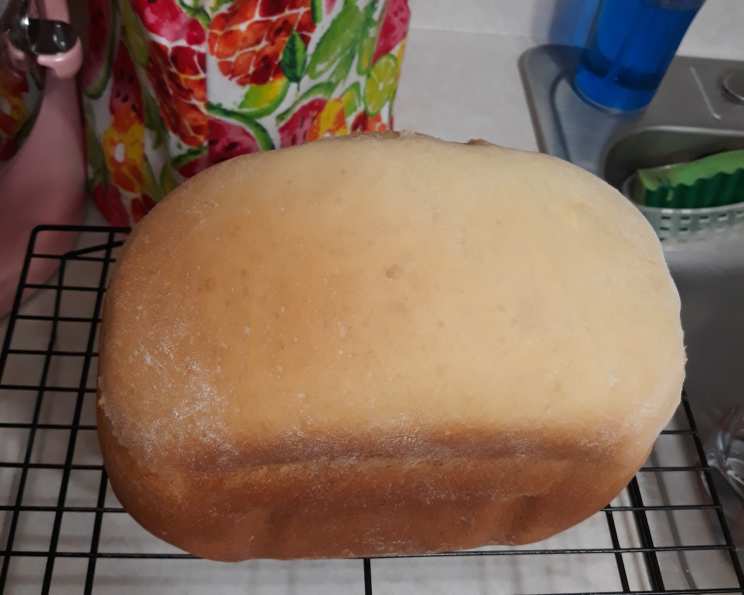
Softest Ever Bread Machine Bread: A Chef’s Secret to Homemade Bliss
The aroma of baking bread is, without a doubt, one of my favorite scents in the world. It’s a sensory trigger that immediately transports me back to my grandmother’s kitchen. I can almost see her now, flour dusting her apron as she pulled loaves of golden-brown bread from her massive, ancient oven. While I can’t replicate that exact oven, this bread machine recipe has become my go-to for capturing that same comforting essence. It’s the kind of bread that makes any sandwich a little more special and turns a simple bowl of soup into a complete meal.
Recipe Overview
- Prep Time: 15 minutes
- Cook Time: 1 hour 10 minutes (in bread machine) or 25-30 minutes (in oven)
- Total Time: 1 hour 25 minutes to 1 hour 40 minutes
- Yields: 1 loaf
- Dietary Type: Vegetarian
Ingredients
- 1 cup warm water (110 degrees F/45 degrees C)
- 2 tablespoons white sugar
- 1 (1/4 ounce) package bread machine yeast
- 1⁄4 cup vegetable oil
- 3 cups bread flour
- 1 teaspoon salt
Equipment Needed
- Bread Machine
- Greased loaf pan (optional, for oven baking)
Instructions
- Begin by adding the warm water, white sugar, and bread machine yeast to the pan of your bread machine. It’s crucial to use water that’s at the correct temperature – too cold, and the yeast won’t activate; too hot, and you’ll kill it. 110 degrees Fahrenheit is the sweet spot.
- Allow the yeast to dissolve and foam for approximately 10 minutes. This step is essential for ensuring that the yeast is active and ready to leaven the bread. You should see a bubbly, foamy layer forming on top of the water. This indicates that the yeast is alive and doing its job!
- Carefully add the vegetable oil, bread flour, and salt to the yeast mixture in the bread machine pan. Make sure the salt and yeast don’t come into direct contact, as the salt can inhibit yeast activity. Layering the flour on top helps prevent this.
- Select the Basic or White Bread setting on your bread machine. Once selected, press Start. The bread machine will now handle the kneading, rising, and baking process. This typically takes around 1 hour and 10 minutes, but refer to your bread machine’s manual for specific cycle times.
- Alternatively, for an oven-baked loaf: Use the Dough cycle of your bread maker. After the cycle is complete, carefully remove the dough from the machine and place it in a greased loaf pan. Gently punch down the dough to release any large air bubbles.
- Let the dough rise again in the greased loaf pan until it has approximately doubled in size. This can take anywhere from 30 minutes to an hour, depending on the temperature of your kitchen. A warm, draft-free environment is ideal for rising.
- Bake in a preheated oven at 350 degrees Fahrenheit (175 degrees Celsius) for 25-30 minutes, or until the bread is golden brown and sounds hollow when tapped on the bottom. Keep a close eye on the bread during the last 10 minutes of baking to prevent over-browning. If necessary, tent the loaf loosely with foil.
- Remove the bread from the oven and let it cool in the pan for a few minutes before transferring it to a wire rack to cool completely. This prevents the bottom of the loaf from becoming soggy. Resist the temptation to slice into it immediately – allowing it to cool fully will result in a cleaner cut and a better texture.
Expert Tips & Tricks
- For an even softer crust: Brush the top of the loaf with melted butter immediately after removing it from the bread machine or oven. This adds a touch of richness and helps to keep the crust soft.
- Adjusting the sweetness: If you prefer a slightly sweeter bread, you can increase the amount of sugar by a tablespoon or two.
- Measuring matters: Precise measurements are crucial for successful bread baking. Use measuring cups and spoons designed for baking, and level them off carefully.
- Troubleshooting rising: If your bread isn’t rising properly, it could be due to old yeast, water that’s too hot or too cold, or too much salt. Make sure your yeast is fresh and that you’re using the correct water temperature.
- Dough too wet or dry? Adjust the flour or water in small increments (1 tablespoon at a time) until the dough forms a smooth, slightly tacky ball.
Serving & Storage Suggestions
This bread is incredibly versatile. Enjoy it fresh out of the bread machine or oven, slathered with butter or your favorite jam. It’s also perfect for sandwiches, toast, and grilled cheese.
- Room Temperature: Store the bread in a breadbox or airtight container at room temperature for up to 3 days.
- Refrigerator: For longer storage, keep the bread in the refrigerator for up to a week. However, refrigerating bread can dry it out, so it’s best to use it for toast or grilled sandwiches after a few days.
- Freezer: For the longest storage, slice the bread and freeze it in a freezer-safe bag for up to 2-3 months. Thaw individual slices as needed.
- Reheating: To reheat, wrap the bread in foil and warm it in a 350°F oven for 5-10 minutes, or until heated through. You can also toast individual slices.
Nutritional Information
| Nutrient | Amount per Serving | % Daily Value |
|---|---|---|
| Calories | 275 kcal | 14% |
| Total Fat | 7g | 11% |
| Saturated Fat | 1g | 5% |
| Cholesterol | 0mg | 0% |
| Sodium | 390mg | 17% |
| Total Carbohydrate | 48g | 16% |
| Dietary Fiber | 2g | 8% |
| Sugars | 4g | – |
| Protein | 7g | 14% |
Nutritional information is an estimate and may vary based on specific ingredients and portion sizes.
Variations & Substitutions
- Whole Wheat Bread: Substitute up to half of the bread flour with whole wheat flour for a heartier loaf.
- Herb Bread: Add 1-2 tablespoons of dried herbs, such as rosemary, thyme, or oregano, to the dough for a flavorful twist.
- Cheese Bread: Add 1/2 cup of shredded cheese, such as cheddar or Parmesan, to the dough.
- Garlic Bread: Add 1-2 teaspoons of garlic powder to the dough. You can also brush the finished loaf with garlic butter.
- Dairy-Free: Use a dairy-free milk alternative, like almond or soy milk, in place of the water. Ensure your vegetable oil is also dairy-free.
- Sweet Bread: Add 1/4 cup of raisins, dried cranberries, or chocolate chips to the dough for a sweet treat.
FAQs (Frequently Asked Questions)
Q: Can I use active dry yeast instead of bread machine yeast?
A: Yes, you can. However, you may need to proof the active dry yeast in warm water with a teaspoon of sugar for 5-10 minutes before adding it to the bread machine.
Q: My bread is too dense. What could be the problem?
A: Dense bread can be caused by several factors, including old yeast, not enough liquid, or too much flour. Make sure your yeast is fresh, and measure your ingredients accurately.
Q: Can I make this recipe without a bread machine?
A: Absolutely! Follow steps 5-7 to bake the dough in a conventional oven after using a stand mixer with a dough hook to knead the ingredients. Knead for about 8 minutes until a smooth, elastic dough forms.
Q: How do I prevent the crust from getting too dark?
A: If your bread is browning too quickly, you can tent it loosely with foil during the last 10-15 minutes of baking.
Q: Can I add seeds to this bread?
A: Yes, you can add seeds like sesame, poppy, or sunflower seeds to the dough before baking. About 1/4 to 1/2 cup of seeds should be sufficient.
Final Thoughts
There’s something truly special about the simple act of baking bread. The way it fills your home with warmth and the incredible satisfaction of tearing into a freshly baked loaf – it’s an experience everyone should enjoy. This recipe for the softest ever bread machine bread is a fantastic starting point, whether you’re a seasoned baker or a complete novice. So, go ahead, gather your ingredients, and let the aroma of homemade bread fill your kitchen. Don’t hesitate to experiment with variations, and most importantly, share your delicious creation with family and friends. Happy baking!