
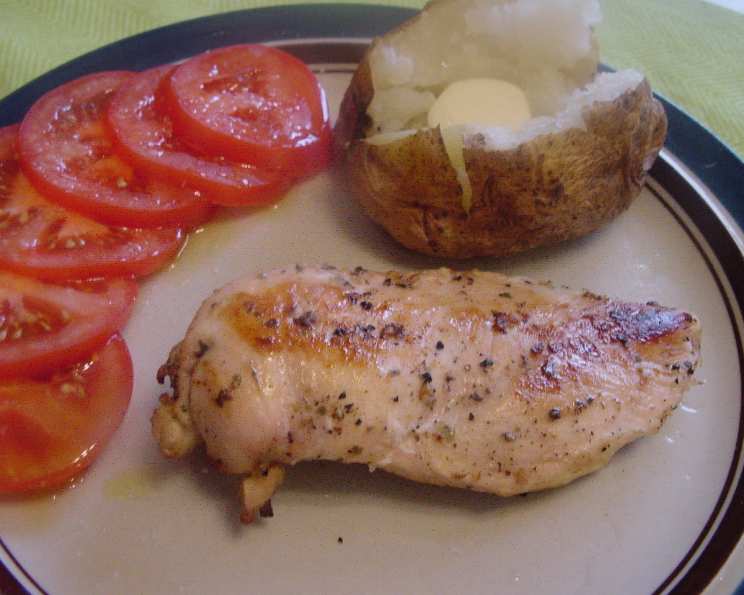
The Perfectly Simple Solo Baked Chicken Breast
I still remember my first tiny apartment after culinary school. It was gloriously mine, but also…empty. Mastering restaurant techniques felt a little silly when I was only cooking for myself. This simple baked chicken breast became my weeknight savior. It’s a reminder that incredible flavor doesn’t always require hours in the kitchen or a pantry overflowing with ingredients. Sometimes, the most satisfying meals are the ones that are humble, honest, and perfectly portioned for one.
Recipe Overview
- Prep Time: 10 minutes
- Cook Time: 35 minutes
- Total Time: 45 minutes
- Servings: 1
- Yield: 1 chicken breast
- Dietary Type: Gluten-Free, Dairy-Free (if butter is replaced)
Ingredients
- 1 boneless skinless chicken breast, thawed
- 1 lemon, juice of
- 1 tablespoon melted butter
- Pepper to taste
Equipment Needed
- Cast iron frying pan
- Shallow dish
- Pastry brush (optional, for buttering)
Instructions
-
Begin by placing your cast iron frying pan into the oven. Preheat the oven to 350 degrees Fahrenheit and allow the pan to heat for 10 minutes. This ensures the chicken breast will have a beautiful sear upon contact, helping to lock in those delicious juices.
-
While the oven and pan are preheating, prepare your chicken breast. If the chicken is still partially frozen, you can speed up the thawing process by microwaving it on power level 3 for 7 minutes. Keep a close eye on it – you want it thawed, not cooked. Ensure the chicken is fully thawed for even cooking.
-
Place the thawed chicken breast into a shallow dish. Pour the juice of 1 lemon over the chicken, making sure to coat both sides thoroughly. The lemon juice acts as a tenderizer and infuses the chicken with a bright, zesty flavor. Allow the chicken to sit in the lemon juice for at least 5 minutes. This brief marinade is key to a flavorful and moist final product.
-
Season generously. Cover both sides of the chicken breast with freshly ground pepper. Don’t be shy – pepper adds a wonderful depth of flavor. You can add salt at this stage, but I prefer to add it after cooking to better control the sodium content.
-
Brush the chicken breast with melted butter, coating both sides evenly. A pastry brush makes this easy, but you can also use a spoon or your fingers. The butter will help the chicken brown beautifully and adds a richness that complements the lemon and pepper. For a dairy-free option, substitute with olive oil or your preferred dairy-free butter alternative.
-
Carefully remove the preheated cast iron pan from the oven (remember to use oven mitts!). Place the buttered chicken breast into the hot pan. The pan should sizzle slightly as the chicken hits the surface.
-
Bake for 35 minutes. Halfway through the baking time, after approximately 17-18 minutes, turn the chicken breast over to ensure even browning.
-
Check for doneness. The chicken is done when it reaches an internal temperature of 165°F (74°C). Use a meat thermometer inserted into the thickest part of the breast to ensure accuracy. If you don’t have a thermometer, pierce the thickest part with a fork. If the juices run clear, it’s likely done. If the juices are still pink, return the chicken to the oven for a few more minutes and check again.
-
Rest. Once cooked, remove the chicken from the pan and let it rest for 5-10 minutes before slicing. This allows the juices to redistribute, resulting in a more tender and flavorful breast.
-
Optional Potato Preparation: If you’re looking for a simple side, puncture a baking potato several times with a fork. Microwave it on high for 3 minutes, then coat it with olive oil, salt, and pepper. Place the potato in the oven alongside the chicken breast. It will be perfectly cooked in the same 35 minutes.
Expert Tips & Tricks
- Pound the Chicken: For more even cooking, place the chicken breast between two sheets of plastic wrap and gently pound it to an even thickness using a rolling pin or the flat side of a meat mallet.
- Brining: For an extra juicy chicken breast, try brining it for 30 minutes before cooking. Dissolve 1 tablespoon of salt and 1 tablespoon of sugar in 4 cups of water. Submerge the chicken breast in the brine and refrigerate.
- Spice it Up: Experiment with different seasonings! Garlic powder, paprika, dried herbs like thyme or rosemary, or a pinch of red pepper flakes can all add interesting flavors.
- Pan Sauce: After removing the chicken, deglaze the pan with a splash of white wine or chicken broth. Scrape up any browned bits from the bottom of the pan and simmer until the sauce thickens slightly. Drizzle over the chicken for extra flavor.
Serving & Storage Suggestions
Serve the baked chicken breast immediately. It’s delicious on its own, sliced over a salad, or paired with roasted vegetables, rice, or the suggested baked potato.
To store leftovers, allow the chicken to cool completely before placing it in an airtight container. Refrigerate for up to 3-4 days. You can also freeze cooked chicken for up to 2-3 months. Thaw overnight in the refrigerator before reheating.
To reheat, you can microwave the chicken, but it may become slightly dry. For best results, reheat in a skillet over medium-low heat with a little broth or water to keep it moist. You can also reheat it in the oven at 350°F until warmed through.
Nutritional Information
| Nutrient | Amount per Serving | % Daily Value |
|---|---|---|
| Calories | 246.9 kcal | N/A |
| Calories from Fat | N/A | 54% |
| Total Fat | 14.7 g | 22% |
| Saturated Fat | 8 g | 39% |
| Cholesterol | 106 mg | 35% |
| Sodium | 238.8 mg | 9% |
| Total Carbohydrate | 3.3 g | 1% |
| Dietary Fiber | 0.1 g | 0% |
| Sugars | 1.2 g | 4% |
| Protein | 25.3 g | 50% |
Note: Nutritional information is an estimate and can vary based on specific ingredients and portion sizes.
Variations & Substitutions
- Herb Crusted: Before baking, press chopped fresh herbs like rosemary, thyme, or parsley into the buttered chicken breast.
- Lemon Herb Marinade: Instead of just lemon juice, create a marinade with lemon juice, olive oil, minced garlic, and chopped herbs. Marinate the chicken for at least 30 minutes before baking.
- Spicy Chicken: Add a pinch of red pepper flakes or a dash of hot sauce to the butter before brushing it on the chicken.
- Mediterranean Flavors: Use olive oil instead of butter and add a sprinkle of dried oregano, feta cheese (after baking), and a squeeze of lemon juice.
- Balsamic Glaze: After baking, drizzle the chicken with a balsamic glaze for a sweet and tangy flavor.
FAQs (Frequently Asked Questions)
Q: Can I use a different type of pan if I don’t have a cast iron frying pan?
A: Yes, you can use another oven-safe skillet or baking dish. However, the cast iron pan helps create a nice sear on the chicken and distributes heat evenly.
Q: Can I use frozen chicken breast straight from the freezer?
A: It’s best to thaw the chicken breast completely before cooking for even results. If you’re short on time, you can use the microwave thawing method described in the instructions.
Q: How do I know when the chicken is fully cooked?
A: The best way is to use a meat thermometer. Insert it into the thickest part of the breast, and it should read 165°F (74°C).
Q: Can I make this recipe ahead of time?
A: You can marinate the chicken in the lemon juice and pepper up to 24 hours in advance. Store it in the refrigerator and bring it to room temperature before baking.
Q: What can I serve with this chicken breast?
A: This chicken breast is versatile and pairs well with many sides, such as roasted vegetables, rice, quinoa, salad, or a baked potato.
Final Thoughts
This Solo Baked Chicken Breast is a testament to the fact that simple can be extraordinary. It’s a dependable, flavorful, and healthy option for a quick and satisfying meal for one. Don’t hesitate to experiment with different seasonings and variations to make it your own. I hope this recipe becomes a staple in your kitchen, just as it did in mine. And when you make it, I’d love to hear about your experience and any personal touches you added!