
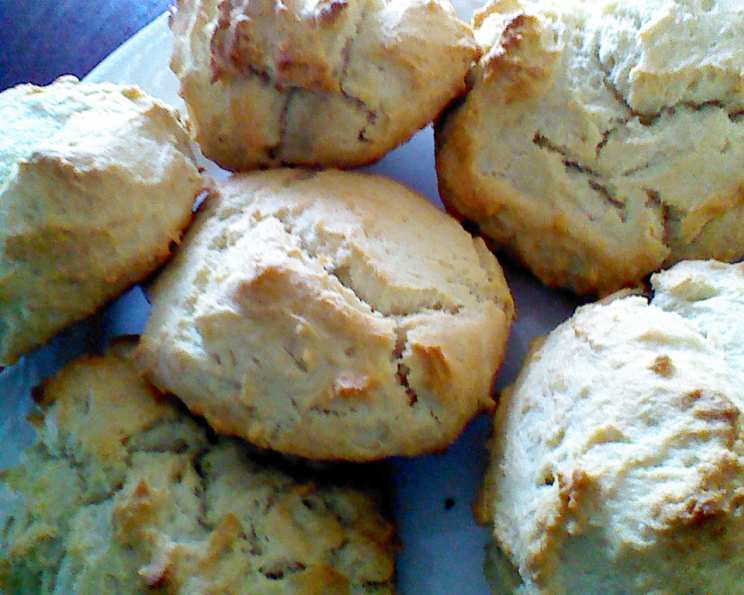
The Irresistible Charm of Sour Cream Biscuits
The first time I tasted a truly great biscuit, I was a kid visiting my grandmother in Tennessee. Mornings at her house always started with the aroma of something magical baking in the oven, and more often than not, it was a batch of her legendary biscuits. They were tall, fluffy, and unbelievably tender, with a slightly tangy flavor that kept me coming back for more. She never shared her exact recipe (grandma’s secrets!), but I’ve spent years chasing that same taste of home. These sour cream biscuits bring me right back to her kitchen.
Recipe Overview
- Prep Time: 12 minutes
- Cook Time: 10-12 minutes
- Total Time: 22-24 minutes
- Servings: 6-8
- Yield: 6-8 biscuits
- Dietary Type: Not specified (contains dairy and gluten)
Ingredients
- 2 cups flour
- 3 teaspoons baking powder
- ½ teaspoon baking soda
- 1 teaspoon sugar
- 1 teaspoon salt
- ½ cup Butter Flavor Crisco (or vegetable shortening)
- 1 cup sour cream
Equipment Needed
- Large Mixing Bowl
- Measuring Cups and Spoons
- Pastry Blender or Fork
- Baking Sheet
Instructions
- Preheat your oven to 450°F (232°C). Ensure the rack is in the middle position for even baking.
- In a large mixing bowl, combine the flour, baking powder, baking soda, sugar, and salt. Whisking these dry ingredients together ensures even distribution, resulting in a more consistent rise.
- Add the Butter Flavor Crisco (or vegetable shortening) to the flour mixture. Using a pastry blender or a fork, cut in the shortening until the mixture resembles coarse crumbs. This step is crucial; you want small, distinct pieces of shortening dispersed throughout the flour, which will create flaky layers when baked. Avoid over-mixing at this stage.
- Pour in the sour cream. Gently stir the mixture just until everything is moistened. It’s important not to overmix; a few streaks of flour are okay. Overmixing develops gluten, which can lead to tough biscuits.
- Lightly flour a clean work surface. Grease your hands with a small amount of shortening or cooking spray. Turn the dough out onto the floured surface. Gently knead the dough about 10 times. The kneading process brings the dough together without overdeveloping the gluten.
- Form the dough into a rough circle or square. Using your hands (or a biscuit cutter if you prefer), gently pat or cut out biscuits that are approximately 1 ½ inches in diameter and ¾ inch thick.
- Place the biscuit mounds onto an ungreased baking sheet. Placing them close together encourages them to rise taller and have softer sides, while spacing them apart will result in slightly crispier biscuits.
- Bake for 10-12 minutes, or until the biscuits are golden brown on top. Keep a close eye on them, as ovens can vary. A toothpick inserted into the center should come out clean.
- Remove from the oven and let cool slightly on the baking sheet before serving.
Expert Tips & Tricks
- Cold ingredients are key: For the flakiest biscuits, make sure your sour cream and shortening are cold. You can even chill the flour mixture for 15 minutes before adding the sour cream.
- Don’t twist the cutter: If using a biscuit cutter, press straight down and lift straight up. Twisting the cutter can seal the edges and prevent the biscuits from rising properly.
- Brush with melted butter (optional): For extra flavor and a beautiful golden sheen, brush the tops of the biscuits with melted butter during the last few minutes of baking.
- Make-ahead option: You can mix the dry ingredients ahead of time and store them in an airtight container. When ready to bake, add the cold shortening and sour cream, and follow the remaining steps.
- High altitude adjustments: If you live at a high altitude, you may need to reduce the amount of baking powder slightly (by about ¼ teaspoon) to prevent the biscuits from rising too quickly and then collapsing.
- Reheating: To reheat, wrap loosely in foil and warm in a 350°F (175°C) oven for about 5-10 minutes.
Serving & Storage Suggestions
These sour cream biscuits are best served warm, fresh from the oven. They’re delicious on their own, slathered with butter and jam, or alongside a hearty breakfast. They also make a fantastic accompaniment to soups, stews, or fried chicken.
- Serving: Serve warm with butter, jam, honey, or gravy.
- Storage: Store leftover biscuits in an airtight container at room temperature for up to 2 days, or in the refrigerator for up to 5 days.
- Freezing: For longer storage, freeze the biscuits in a single layer on a baking sheet until solid, then transfer them to a freezer bag or container. They can be frozen for up to 2 months.
- Reheating Frozen Biscuits: To reheat frozen biscuits, bake them directly from frozen in a 350°F (175°C) oven for about 10-15 minutes, or until warmed through.
Nutritional Information
(Note: Estimated values will vary based on specific ingredients used.)
| Nutrient | Amount per Serving | % Daily Value |
|---|---|---|
| Calories | 375 kcal | 19% |
| Total Fat | 24g | 37% |
| Saturated Fat | 11g | 55% |
| Cholesterol | 30mg | 10% |
| Sodium | 720mg | 30% |
| Total Carbohydrate | 35g | 12% |
| Dietary Fiber | 1g | 4% |
| Sugars | 2g | 4% |
| Protein | 5g | 10% |
Variations & Substitutions
- Buttermilk Biscuits: Substitute buttermilk for the sour cream. You may need to add a little more flour to achieve the right consistency.
- Herb and Cheese Biscuits: Add 1/4 cup of chopped fresh herbs (such as chives, rosemary, or thyme) and 1/2 cup of shredded cheese (such as cheddar, parmesan, or Gruyere) to the dry ingredients.
- Sweet Biscuits: Increase the sugar to 2-3 tablespoons and add a pinch of nutmeg or cinnamon to the dry ingredients. Serve with fruit preserves or whipped cream.
- Gluten-Free Biscuits: Use a gluten-free all-purpose flour blend and follow the recipe as directed. Be sure to use a gluten-free baking powder as well.
- Vegan Biscuits: Substitute the sour cream with a vegan sour cream alternative. Use a vegan butter flavored shortening, and ensure that your sugar is processed without bone char.
- Garlic Biscuits: Add 1-2 teaspoons of garlic powder to the dry ingredients, or brush the baked biscuits with garlic butter.
FAQs (Frequently Asked Questions)
Q: Can I use regular Crisco instead of Butter Flavor Crisco?
A: Yes, you can definitely use regular Crisco (vegetable shortening). The butter flavor just adds a subtle richness.
Q: My biscuits are flat and dense. What did I do wrong?
A: Overmixing the dough or using warm ingredients are the most common culprits. Be gentle when mixing and ensure your ingredients are cold. Expired baking powder/soda can also impact rise.
Q: Can I make these biscuits ahead of time and bake them later?
A: Yes, you can prepare the biscuits up to the point of baking and then refrigerate them for a few hours. Just be sure to cover them tightly to prevent them from drying out. You may need to add a minute or two to the baking time.
Q: How can I make sure my biscuits are flaky?
A: Use cold ingredients, don’t overmix the dough, and cut the shortening into the flour thoroughly. The small pieces of shortening create layers as they melt during baking.
Q: What can I serve with these biscuits?
A: These biscuits are incredibly versatile! They’re great with breakfast dishes like scrambled eggs and bacon, or as a side for soups, stews, and fried chicken.
Final Thoughts
These sour cream biscuits are a delightful treat that’s surprisingly simple to make. With just a few basic ingredients and a little bit of care, you can create a batch of warm, tender biscuits that are perfect for any occasion. Don’t be afraid to experiment with different flavors and variations to create your own signature biscuit. I encourage you to try this recipe and share your creations with friends and family. And if you discover any delicious pairings, please share your feedback – I’m always looking for inspiration!