
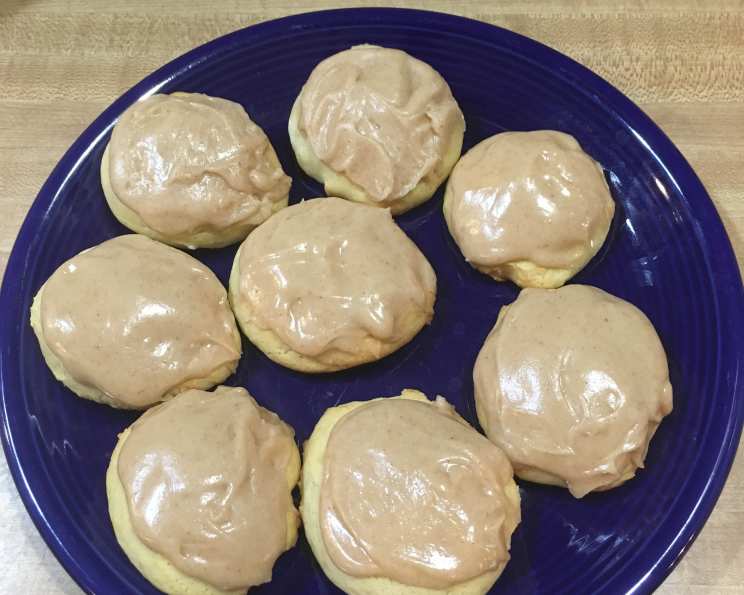
Sour Cream Cookies with Burnt Butter Icing: A Taste of Nostalgia
The scent of these cookies baking always transports me back to my grandmother’s kitchen. I can almost see her now, flour dusting her apron as she carefully dropped spoonfuls of dough onto parchment paper. The anticipation was almost unbearable as the aroma of vanilla and warm sugar filled the air, promising a sweet reward for a patient grandchild. These Sour Cream Cookies weren’t just a treat; they were a symbol of love, comfort, and the simple joys of home.
Recipe Overview
- Prep Time: 20 minutes
- Cook Time: 8-10 minutes
- Total Time: 1 hour 20 minutes (includes chilling time)
- Yields: Approximately 30 cookies
- Serves: 15
- Dietary Type: Not specified
Ingredients
- 1/2 cup shortening
- 1 1/2 cups granulated sugar
- 2 eggs
- 1 cup sour cream
- 1 teaspoon vanilla
For the Cookie Dough:
- 2 3/4 cups flour
- 1 teaspoon baking soda
- 1/2 teaspoon baking powder
- 1/2 teaspoon salt
For the Burnt Butter Icing:
- 8 tablespoons butter
- 2 cups powdered sugar
- 1 teaspoon vanilla
- 1-2 tablespoons hot tap water
Equipment Needed
- Mixing bowls
- Electric mixer (optional, but recommended)
- Measuring cups and spoons
- Cookie sheets
- Parchment paper
- Saucepan
- Butter knife or offset spatula
Instructions
-
Cream together the shortening and granulated sugar in a large mixing bowl until light and fluffy. An electric mixer makes this much easier.
-
Beat in the eggs one at a time, mixing well after each addition.
-
Stir in the sour cream and vanilla until combined. The mixture might look slightly curdled at this point, but don’t worry, it will all come together.
-
In a separate bowl, sift together the flour, baking soda, baking powder, and salt. Sifting ensures that there are no lumps and that the dry ingredients are evenly distributed.
-
Gradually add the dry ingredients to the wet ingredients, mixing until just combined. Be careful not to overmix, as this can result in tough cookies. An electric mixer can be used on low speed for this step, but be mindful not to overwork the dough.
-
Cover the dough and chill in the refrigerator for at least 1 hour. This step is crucial as it allows the gluten in the flour to relax, preventing the cookies from spreading too thin during baking.
-
Preheat your oven to 400 degrees F (200 degrees C). Line cookie sheets with parchment paper. Parchment paper is essential; trust me on this one. It prevents the cookies from sticking and makes cleanup a breeze.
-
Drop rounded spoonfuls of dough about 2 inches apart onto the prepared cookie sheets.
-
Bake for 8-10 minutes, or until the edges are lightly golden and the tops are set. A good test is to gently touch the top of a cookie; it should leave almost no imprint. Be careful not to overbake, as these cookies can become dry.
-
While the cookies are cooling on a wire rack, prepare the burnt butter icing.
-
In a saucepan over medium heat, melt the butter.
-
Continue to cook the butter, swirling the pan occasionally, until it turns a golden brown color and has a nutty aroma. Be careful not to burn it! The difference between perfectly burnt butter and overly burnt butter is just a matter of seconds.
-
Remove the saucepan from the heat.
-
Gradually blend in the powdered sugar, mixing until smooth.
-
Stir in the vanilla and 1-2 tablespoons of hot tap water, adding enough water to achieve a smooth and creamy consistency. The amount of water needed may vary depending on the humidity.
-
While the cookies are still slightly warm, spread the burnt butter icing over them using a butter knife or offset spatula.
-
Allow the icing to set before serving.
Expert Tips & Tricks
-
For a richer flavor, use brown butter instead of regular melted butter in the icing. To make brown butter, cook the butter over medium heat until it turns a nutty brown color and releases a fragrant aroma. Be careful not to burn it!
-
To prevent the cookies from spreading too thin, ensure the butter is cold when creaming it with the sugar. You can also add a tablespoon or two of extra flour to the dough.
-
If you want to add a festive touch, you can tint the icing with food coloring to suit the holiday or occasion.
-
For a slightly tangy flavor, add a teaspoon of lemon zest to the cookie dough.
-
If you don’t have sour cream on hand, you can substitute plain Greek yogurt.
Serving & Storage Suggestions
These Sour Cream Cookies are best enjoyed slightly warm, with a glass of milk or a cup of coffee. They are also delicious served as part of a dessert platter or as a sweet treat for afternoon tea.
To store leftover cookies, place them in an airtight container at room temperature. They will stay fresh for up to 3 days. For longer storage, you can freeze the cookies for up to 2 months. Thaw them at room temperature before serving.
Nutritional Information
Note: These values are estimates and may vary based on specific ingredients and portion sizes.
| Nutrient | Amount per Serving | % Daily Value |
|---|---|---|
| Calories | 250 kcal | 13% |
| Total Fat | 12g | 18% |
| Saturated Fat | 7g | 35% |
| Cholesterol | 30mg | 10% |
| Sodium | 100mg | 4% |
| Total Carbohydrate | 35g | 12% |
| Dietary Fiber | 0g | 0% |
| Sugars | 20g | N/A |
| Protein | 2g | 4% |
Variations & Substitutions
- Gluten-Free: Substitute the all-purpose flour with a gluten-free flour blend. Be sure to choose a blend that is designed for baking and contains xanthan gum.
- Dairy-Free: Replace the butter with a dairy-free butter alternative and the sour cream with a plant-based sour cream substitute.
- Spiced: Add 1/2 teaspoon of ground cinnamon or nutmeg to the dough for a warm, spiced flavor.
- Chocolate Chip: Fold 1/2 cup of chocolate chips into the dough before chilling.
- Citrus: Add the zest of one lemon, orange, or lime to the cookie dough for a bright, citrusy flavor.
FAQs (Frequently Asked Questions)
Q: Can I freeze the cookie dough?
A: Yes, you can freeze the cookie dough for up to 2 months. Wrap the dough tightly in plastic wrap and then place it in a freezer-safe bag. Thaw the dough in the refrigerator overnight before baking.
Q: What if I don’t have parchment paper?
A: While parchment paper is highly recommended, you can grease the cookie sheets with butter or cooking spray as an alternative. However, keep a close eye on the cookies to prevent them from sticking or burning.
Q: Can I use a different type of sugar?
A: While granulated sugar is the standard choice, you can experiment with other types of sugar, such as brown sugar or coconut sugar. Keep in mind that using brown sugar will result in a slightly chewier cookie.
Q: My icing is too thick. What should I do?
A: If your icing is too thick, gradually add more hot tap water, one teaspoon at a time, until you reach the desired consistency.
Q: My cookies spread too thin. What did I do wrong?
A: There are a few reasons why your cookies might have spread too thin. Make sure the dough is properly chilled, and that your oven temperature is accurate. Also, avoid overmixing the dough.
Final Thoughts
These Sour Cream Cookies with Burnt Butter Icing are more than just a recipe; they’re a connection to cherished memories and a celebration of simple pleasures. The combination of the soft, slightly tangy cookie and the rich, nutty icing is simply irresistible. I encourage you to try this recipe and experience the joy of baking these delightful cookies for yourself. Share them with your loved ones and create new memories that will last a lifetime. And don’t hesitate to put your own personal spin on the recipe by adding your favorite flavors and ingredients. Happy baking!