
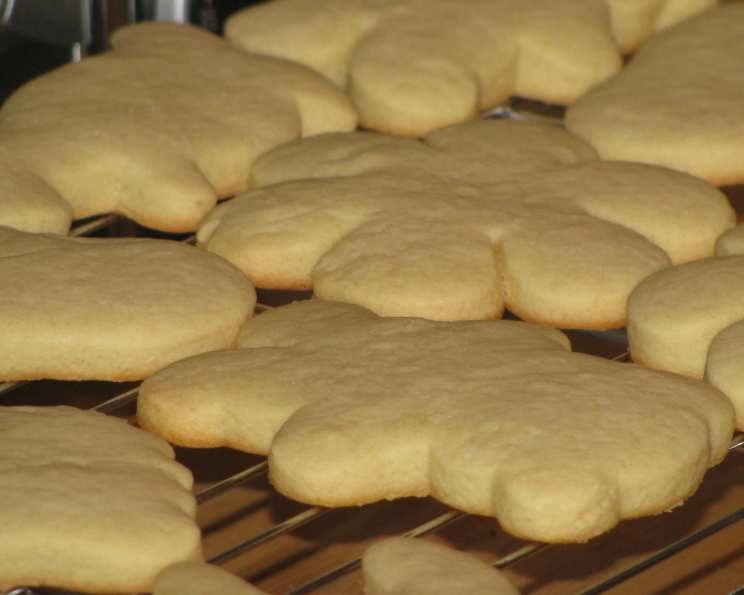
Sour Cream Cut-Out Cookies: A Taste of Nostalgia
My grandmother, a woman whose hands were permanently dusted with flour, always had a batch of these cookies ready during the holidays. I remember sitting at her kitchen table, the scent of vanilla and warm butter filling the air, carefully decorating these soft, tender cookies with sprinkles and homemade frosting. These weren’t just cookies; they were edible memories, a tangible expression of her love, and a tradition I’ve cherished and passed down through generations.
Recipe Overview
- Prep Time: 30 minutes
- Cook Time: 8-10 minutes
- Total Time: 40 minutes
- Yields: 24 cookies
- Serves: 24
- Dietary Type: Suitable for Vegetarian Diets
Ingredients
- 1 cup butter, softened
- 1 cup sugar
- 1 egg
- ½ cup sour cream
- 3 ½ cups all-purpose flour
- 1 teaspoon baking soda
- 1 pinch salt
- Frosting and sprinkles (optional, for decoration)
Equipment Needed
- Mixing bowls (medium and large)
- Electric mixer (optional, but recommended)
- Measuring cups and spoons
- Rolling pin
- Cookie cutters
- Baking sheets
- Parchment paper (optional)
- Wire cooling rack
Instructions
- Cream together the butter and sugar: In a medium bowl, or in the bowl of a stand mixer, combine the softened butter and sugar. Beat until the mixture is light and fluffy, about 3-5 minutes. This step is crucial for creating a tender cookie, so don’t rush it. The mixture should be noticeably paler and airy.
- Incorporate wet ingredients: Add the egg and sour cream to the butter-sugar mixture. Mix until everything is well combined. Be careful not to overmix at this stage. Overmixing can lead to tough cookies.
- Combine dry ingredients: In a separate bowl, whisk together the flour, baking soda, and salt. This ensures that the baking soda and salt are evenly distributed throughout the flour.
- Gradually add dry ingredients to wet ingredients: Gradually add the flour mixture to the wet ingredients, mixing on low speed until just combined. Start with about half of the flour mixture, mix until incorporated, and then add the rest. Mix until a dough forms. Once the dough starts to come together, be careful not to overmix.
- Knead the dough: Turn the dough out onto a lightly floured surface. Knead the dough gently until it is smooth and no longer sticky. This usually takes just a minute or two. Add a little more flour if necessary, but be careful not to add too much, as this can make the cookies tough.
- Roll out the dough: Divide the dough in half, keeping the other half in the fridge to keep it cool while you’re working on the other half. On a lightly floured surface, roll out the dough to about ¼ to ½ inch thickness. The thickness will affect the texture; thinner cookies will be crispier, while thicker cookies will be softer.
- Cut out shapes: Use your favorite cookie cutters to cut out desired shapes from the rolled-out dough. Gather the scraps of dough, re-roll them, and cut out more cookies. This helps to minimize waste.
- Arrange on baking sheet: Place the cookies about 1 ½ inches apart on an ungreased cookie sheet. You can also line the cookie sheet with parchment paper for easy cleanup.
- Bake: Bake in a preheated oven at 350°F (175°C) for 8-10 minutes. The cookies should be lightly browned at the edges. Keep a close eye on them, as they can burn quickly.
- Cool: Remove the cookie sheets from the oven and let the cookies cool on the cookie sheets for a few minutes before transferring them to a wire rack to cool completely.
- Decorate: Once the cookies are completely cool, decorate them with your favorite frosting and sprinkles.
Expert Tips & Tricks
- Chill the dough: For best results, chill the dough for at least 30 minutes before rolling it out. This will make it easier to handle and prevent the cookies from spreading too much during baking. You can chill it for much longer too!
- Don’t overbake: Overbaked cookies will be dry and crumbly. Bake until the edges are just lightly browned.
- Use room temperature ingredients: Make sure your butter and egg are at room temperature for the best texture. This allows them to emulsify properly, creating a smooth and creamy batter.
- Even baking: Ensure even baking by using an oven thermometer to confirm the oven temperature is accurate. Rotate the baking sheets halfway through baking.
- Prevent Spreading: If your cookies are spreading too much, try chilling the dough for a longer period or adding a tablespoon or two of flour.
Serving & Storage Suggestions
Serve these delightful cookies as a festive treat during the holidays, a sweet addition to tea time, or a simple dessert after dinner. They pair wonderfully with a glass of cold milk, a warm cup of cocoa, or a rich coffee.
Storage: Store the cooled, undecorated cookies in an airtight container at room temperature for up to 3-5 days. Decorated cookies are best stored in a single layer to prevent the frosting from smudging.
Freezing: These cookies freeze well, both baked and unbaked. To freeze unbaked cookies, cut out the shapes and place them on a baking sheet lined with parchment paper. Freeze until solid, then transfer to a freezer-safe bag or container. Bake from frozen, adding a few extra minutes to the baking time. To freeze baked cookies, let them cool completely before freezing in a freezer-safe container. They can be stored in the freezer for up to 2-3 months.
Nutritional Information
Note: Nutritional information is an estimate and may vary based on specific ingredients and portion sizes.
| Nutrient | Amount per Serving | % Daily Value |
|---|---|---|
| Calories | 179 kcal | – |
| Total Fat | 9g | 13% |
| Saturated Fat | 5.5g | 27% |
| Cholesterol | 30.6mg | 10% |
| Sodium | 133.7mg | 5% |
| Total Carbohydrate | 22.4g | 7% |
| Dietary Fiber | 0.5g | 1% |
| Sugars | 8.6g | – |
| Protein | 2.3g | 4% |
Variations & Substitutions
- Lemon Zest: Add the zest of one lemon to the dough for a bright, citrusy flavor.
- Spices: Incorporate ½ teaspoon of ground cinnamon, nutmeg, or cardamom for a warm, spiced cookie.
- Almond Extract: Substitute ½ teaspoon of vanilla extract with almond extract for a nutty flavor.
- Chocolate Chip: Gently fold ½ cup of mini chocolate chips into the dough before rolling.
- Gluten-Free: Substitute the all-purpose flour with a gluten-free blend for a gluten-free option. Be sure to add 1/4 tsp of Xanthan Gum to give structure to the dough.
- Dairy-Free: Replace the butter with a vegan butter substitute and the sour cream with a dairy-free sour cream alternative.
FAQs (Frequently Asked Questions)
Q: Can I use margarine instead of butter?
A: While you can use margarine, butter will yield a richer flavor and a more tender cookie. If using margarine, choose one with a high-fat content.
Q: My dough is too sticky. What should I do?
A: Add a tablespoon of flour at a time until the dough is easier to handle. Be careful not to add too much flour, as this can make the cookies tough. You can also chill the dough, which will make it less sticky.
Q: Can I make the dough ahead of time?
A: Yes, you can make the dough ahead of time. Wrap it tightly in plastic wrap and store it in the refrigerator for up to 2 days. Let the dough sit at room temperature for about 15 minutes before rolling it out.
Q: How do I prevent the cookies from spreading too much during baking?
A: Chilling the dough before rolling and baking can help prevent spreading. Also, make sure your oven is at the correct temperature.
Q: What’s the best way to decorate these cookies?
A: Royal icing is a popular choice for decorating sugar cookies as it dries hard and creates a smooth finish. You can also use buttercream frosting or a simple glaze made from powdered sugar and milk or lemon juice. Don’t forget the sprinkles!
Final Thoughts
These Sour Cream Cut-Out Cookies are more than just a recipe; they’re a connection to cherished memories and a delicious way to create new ones. The soft, tender texture and delicate flavor make them a crowd-pleaser for any occasion. So, gather your ingredients, preheat your oven, and embark on a baking adventure that will fill your kitchen with warmth and the delightful aroma of homemade cookies. Don’t hesitate to experiment with different cookie cutters, frostings, and sprinkles to personalize your creations. Happy baking, and I can’t wait to see what you create!