
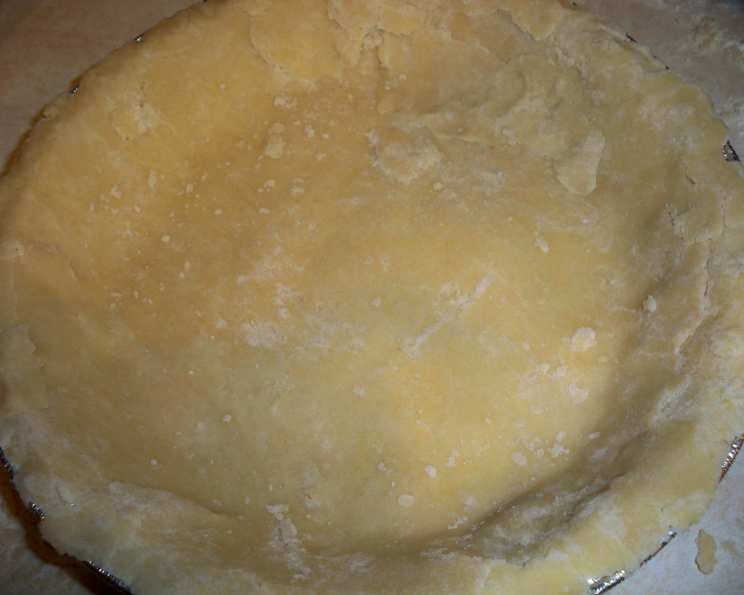
The Only Sour Cream Pastry Recipe You’ll Ever Need
The scent of baking pastry always takes me back to my grandmother’s kitchen. I can almost see her now, flour dusting her apron as she expertly rolled out dough, a twinkle in her eye. While she made many things from scratch, her sour cream pastry was legendary – unbelievably tender, yet sturdy enough to hold even the juiciest fruit filling. This is that recipe, passed down through generations and adapted for the modern kitchen, yet retaining all the magic of its humble origins.
Recipe Overview
- Prep Time: 20 minutes
- Chill Time: 20 minutes
- Cook Time: Varies depending on filling
- Total Time: 40 minutes + chill time + cook time
- Yields: 2 pie crusts
- Serves: 8-16
- Dietary Type: Not suitable for dairy-free diets
Ingredients
- 2 cups sifted flour
- ½ teaspoon salt
- ½ teaspoon baking powder (not baking soda)
- ½ cup shortening, chilled
- ¼ cup sour cream (full fat recommended)
- 1 egg, beaten
Equipment Needed
- Food Processor
- Wax Paper
- Rolling Pin
- Pie Dish (or other desired bakeware)
Instructions
-
Combine Dry Ingredients: In a food processor, pulse the 2 cups of sifted flour, ½ teaspoon of salt, and ½ teaspoon of baking powder until well combined. Sifting the flour ensures a lighter, more tender crust.
-
Incorporate Shortening: Add the ½ cup of chilled shortening to the flour mixture. Pulse until the mixture resembles a coarse meal. You should still see small pieces of shortening, which will create flaky layers in the final crust. Chilling the shortening is crucial for this step.
-
Add Wet Ingredients: In a separate small bowl, stir together the ¼ cup of sour cream and 1 beaten egg. Pour this mixture all at once into the food processor.
-
Process Until Just Combined: Pulse the food processor until the dough just comes together. Be careful not to overmix; overmixing will develop the gluten in the flour, resulting in a tough crust.
-
Shape and Chill: Dump the dough out onto a sheet of wax paper. Gather it into a disk, wrap it securely in the wax paper, and chill in the refrigerator for at least 20 minutes. This chilling period allows the gluten to relax, making the dough easier to roll out and preventing it from shrinking during baking.
-
Divide and Roll: After chilling, cut the dough in half. Rewrap one piece and return it to the refrigerator to keep it cold while you work with the other.
-
Roll Out the Dough: On a lightly floured surface, roll out the dough to the desired thickness for your pie or other pastry. Work from the center outwards, rotating the dough as you go to ensure an even thickness. If the dough starts to stick, add a little more flour to the surface.
-
Transfer and Fill: Carefully transfer the rolled-out dough to your pie dish or prepared baking sheet. Fill and bake according to your filling recipe’s instructions. Remember that the baking time and temperature will vary depending on the filling you use. For a single-crust pie, you may need to blind bake the crust before adding the filling. To blind bake, prick the bottom of the crust with a fork, line it with parchment paper, and weigh it down with pie weights or dried beans. Bake at 375°F (190°C) for 15-20 minutes, or until the edges are lightly golden. Remove the parchment paper and weights and bake for another 5-10 minutes, or until the bottom is also golden brown.
Expert Tips & Tricks
- Keep Everything Cold: The key to a flaky pastry is to keep all your ingredients as cold as possible. You can even chill the flour and sour cream before you start.
- Don’t Overmix: Overmixing develops the gluten in the flour, resulting in a tough crust. Pulse the food processor just until the dough comes together.
- Use Full-Fat Sour Cream: Full-fat sour cream provides the best flavor and texture.
- Reroll Scraps: Don’t throw away the leftover dough scraps! Reroll them on a lightly floured surface. Cut into 2-inch squares, add a small amount of jam in the center, fold over to form a triangle, and bake at 375°F (190°C) for 10-12 minutes for a quick and delicious treat.
- Dock the Crust: Before blind baking or filling, prick the bottom of the crust with a fork (docking). This prevents the crust from puffing up during baking.
- Egg Wash: For a golden-brown crust, brush the top with a beaten egg or milk before baking. You can also sprinkle with sugar for added sweetness and shine.
- Prevent Soggy Bottoms: To prevent a soggy bottom crust, bake the pie on the lowest rack in the oven. You can also preheat a baking stone or pizza stone in the oven and place the pie directly on the hot stone.
Serving & Storage Suggestions
This sour cream pastry is perfect for sweet or savory pies. Serve your freshly baked pie warm or at room temperature. Leftover pie should be stored in the refrigerator, covered, for up to 3 days. To reheat, warm individual slices in the oven at 350°F (175°C) for 10-15 minutes, or until heated through. You can also freeze baked or unbaked pie crusts for up to 2 months. Wrap them tightly in plastic wrap and then in foil to prevent freezer burn. Thaw frozen crusts in the refrigerator overnight before using.
Nutritional Information
Note: Nutritional information is an estimate and may vary based on specific ingredients and portion sizes.
| Nutrient | Amount per Serving | % Daily Value |
|---|---|---|
| Calories | 251.6 kcal | N/A |
| Calories from Fat | 137 kcal | 54% |
| Total Fat | 15.2 g | 23% |
| Saturated Fat | 4.4 g | 21% |
| Cholesterol | 29.6 mg | 9% |
| Sodium | 181.2 mg | 7% |
| Total Carbohydrate | 24.3 g | 8% |
| Dietary Fiber | 0.8 g | 3% |
| Sugars | 0.1 g | 0% |
| Protein | 4.2 g | 8% |
Variations & Substitutions
- Gluten-Free: Substitute the all-purpose flour with a gluten-free blend designed for baking. You may need to adjust the amount of liquid depending on the blend you use.
- Vegan: While difficult to replicate the exact texture without dairy, you can try using a vegan shortening and a non-dairy sour cream substitute, such as cashew cream. Replace the egg with a flax egg (1 tablespoon flaxseed meal mixed with 3 tablespoons water, let sit for 5 minutes).
- Lemon Zest: Add a teaspoon of lemon zest to the flour mixture for a bright, citrusy flavor.
- Herbs: For savory pies, add a teaspoon of dried herbs, such as thyme, rosemary, or sage, to the flour mixture.
- Spices: Add a pinch of cinnamon, nutmeg, or ginger to the flour mixture for a warm, spiced crust.
FAQs (Frequently Asked Questions)
Q: Why is it important to sift the flour?
A: Sifting the flour removes any lumps and ensures a lighter, more tender crust. It also helps to aerate the flour, which makes it easier to combine with the other ingredients.
Q: Can I make this dough ahead of time?
A: Yes, this dough can be made ahead of time and stored in the refrigerator for up to 2 days. Wrap it tightly in plastic wrap to prevent it from drying out. You can also freeze the dough for up to 2 months.
Q: What if my dough is too sticky?
A: If your dough is too sticky, add a little more flour, one tablespoon at a time, until it reaches the desired consistency. Be careful not to add too much flour, as this will make the crust tough.
Q: Can I use butter instead of shortening?
A: While shortening is recommended for its flakiness, you can use butter. Ensure the butter is very cold and cut into small cubes before adding it to the food processor.
Q: My crust shrinks during baking. How can I prevent this?
A: To prevent shrinking, chill the dough thoroughly before rolling it out, and avoid overworking the dough. You can also try blind baking the crust with pie weights or dried beans to help it hold its shape.
Final Thoughts
This sour cream pastry recipe is more than just a set of instructions; it’s a connection to the past, a taste of tradition, and a testament to the simple joys of home baking. Don’t be intimidated – it’s surprisingly easy to make, and the results are well worth the effort. I encourage you to give it a try, experiment with different fillings, and share the deliciousness with your loved ones. And if you happen to bake up a batch of those jam-filled squares from the scraps, send me a picture! Happy baking!