
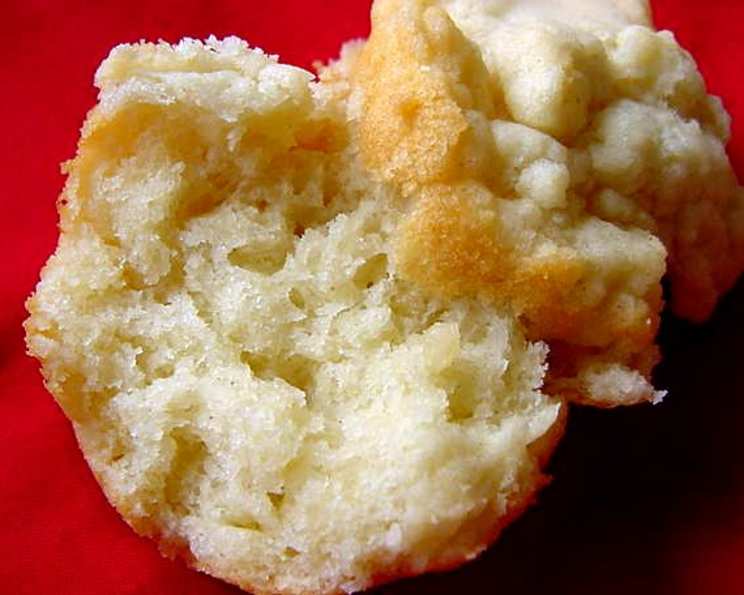
Sour Cream Rolls: A Taste of Mountain Comfort
I can still picture my grandmother, her hands dusted with flour, humming a hymn as she pulled a tray of golden-brown rolls from her ancient oven. The aroma, a comforting blend of warm butter and tangy sour cream, would fill her cozy mountain kitchen, beckoning us grandkids in from our games. These weren’t just rolls; they were edible hugs, a symbol of her love and a taste of the simple life nestled in the heart of the northeast Georgia mountains. Now, I’m thrilled to share this cherished recipe with you, so you can bake your own batch of memories.
Recipe Overview
- Prep Time: 10 minutes
- Cook Time: 20 minutes
- Total Time: 30 minutes
- Servings: 12
- Yield: 12 rolls
- Dietary Type: Not Gluten-Free
Ingredients
- ¾ cup (1 ½ sticks) butter or margarine, softened
- 1 cup sour cream
- 2 cups self-rising flour, sifted
Equipment Needed
- Mixing Bowl
- Measuring Cups
- Measuring Spoons
- Sifter
- Regular Muffin Pan (12 count)
- Oven
Instructions
- Begin by preheating your oven to 350 degrees Fahrenheit (175 degrees Celsius). This is crucial to ensure even baking and a perfect golden-brown crust.
- In a mixing bowl, combine the softened butter or margarine and the sour cream. Mix thoroughly until the mixture is well combined and relatively smooth. You can use a stand mixer or a hand mixer for this step, but a sturdy spoon and some elbow grease will work just as well. Make sure the butter is truly softened, not melted, to avoid a greasy final product.
- Sift the self-rising flour directly into the butter and sour cream mixture. Sifting is essential to remove any lumps and ensure a light and airy texture for your rolls. Gently fold the flour into the wet ingredients until just combined. Be careful not to overmix the dough, as this can result in tough rolls. A few streaks of flour are perfectly fine at this stage.
- Once the dough is mixed, it will be somewhat sticky. Using a spoon or your hands, divide the dough evenly into the ungreased muffin pan. Fill each muffin cup about two-thirds full. This recipe makes 12 standard-size rolls. You can also use mini muffin pans for smaller, bite-sized rolls, perfect for showers or brunch events; adjust the baking time accordingly, checking for doneness sooner.
- Place the muffin pan in the preheated oven and bake for 20 minutes, or until the rolls are golden brown on top and cooked through. To test for doneness, insert a toothpick into the center of a roll. If it comes out clean, the rolls are ready. Be aware that oven temperatures can vary, so keep a close eye on the rolls during the last few minutes of baking to prevent burning.
- Remove the rolls from the oven and let them cool in the muffin pan for a few minutes before transferring them to a wire rack to cool completely. This prevents the bottoms from becoming soggy. Enjoy warm or at room temperature!
Expert Tips & Tricks
- Softened Butter is Key: Ensure your butter or margarine is properly softened, not melted. This allows it to cream together with the sour cream, creating a light and tender crumb.
- Don’t Overmix: Overmixing develops the gluten in the flour, resulting in tough rolls. Mix just until the ingredients are combined.
- Refrigerate for Later: The dough can be stored in the refrigerator for up to a week. This is a great way to prep in advance for a busy week or to have fresh rolls whenever you want them. Simply bake as directed when ready.
- Enhance the Flavor: For a richer flavor, brush the tops of the rolls with melted butter or a mixture of melted butter and honey during the last few minutes of baking.
- High Altitude Adjustments: If you’re baking at a high altitude, you may need to add a tablespoon or two of flour to compensate for the drier air.
Serving & Storage Suggestions
Serve these sour cream rolls warm, straight from the oven, with a generous pat of butter or a drizzle of honey. They are the perfect accompaniment to any meal, from a hearty soup or stew to a simple salad. They also make a delicious addition to a holiday bread basket.
Leftover rolls can be stored in an airtight container at room temperature for up to 2 days, in the refrigerator for up to 5 days, or in the freezer for up to 2 months. To reheat, wrap the rolls in foil and warm them in a 350°F (175°C) oven for about 10 minutes, or until heated through. You can also microwave them for a few seconds, but be careful not to overcook them, as they can become tough.
Nutritional Information
(Estimated per serving, based on 12 servings)
| Nutrient | Amount per Serving | % Daily Value |
|---|---|---|
| Calories | 212.5 kcal | |
| Calories from Fat | ||
| Total Fat | 15.5 g | 23% |
| Saturated Fat | 9.5 g | 47% |
| Cholesterol | 40.5 mg | 13% |
| Sodium | 381.2 mg | 15% |
| Total Carbohydrate | 16 g | 5% |
| Dietary Fiber | 0.6 g | 2% |
| Sugars | 0.7 g | |
| Protein | 2.6 g | 5% |
Variations & Substitutions
- Garlic Herb Rolls: Add 1-2 teaspoons of garlic powder and a tablespoon of chopped fresh herbs like rosemary or thyme to the dough for a savory twist.
- Sweet Rolls: Sprinkle the tops of the rolls with cinnamon and sugar before baking for a sweet treat. You can also add a simple glaze of powdered sugar and milk after baking.
- Cheese Rolls: Add ½ cup of shredded cheddar cheese to the dough for cheesy goodness.
- Dairy-Free Option: While the classic recipe relies on sour cream, you could experiment with a thick plant-based yogurt alternative, though the flavor will be slightly different. Be sure the butter substitute also performs well in baking.
- Gluten-Free Adaptation: This recipe relies on self-rising flour, so converting it to gluten-free would require significant adjustments. A gluten-free self-rising flour blend would be necessary, and you may need to experiment with xanthan gum to achieve the right texture.
FAQs (Frequently Asked Questions)
Q: Can I use unsalted butter for these rolls?
A: Yes, you can use unsalted butter, but you’ll need to add about ¼ teaspoon of salt to the dough to compensate for the lack of salt in the butter.
Q: What if I don’t have self-rising flour?
A: To make your own self-rising flour, combine 1 cup of all-purpose flour with 1 ½ teaspoons of baking powder and ¼ teaspoon of salt. Whisk together thoroughly before adding to the recipe. You’ll need 2 cups of this homemade mixture for the recipe.
Q: Can I make these rolls ahead of time and freeze them?
A: Yes, you can freeze the baked rolls. Let them cool completely, then wrap them tightly in plastic wrap and place them in a freezer bag. They can be stored in the freezer for up to 2 months. Thaw them overnight in the refrigerator or at room temperature before reheating.
Q: My rolls are browning too quickly. What should I do?
A: If your rolls are browning too quickly, tent the muffin pan with aluminum foil during the last few minutes of baking. This will prevent them from burning.
Q: Can I double the recipe?
A: Absolutely! Just double all the ingredients and use two muffin pans. The baking time may need to be slightly increased.
Final Thoughts
I sincerely hope you’ll give these sour cream rolls a try. They are simple, comforting, and a true taste of mountain hospitality. Whether you’re serving them alongside a weeknight dinner or sharing them with loved ones at a special gathering, these rolls are sure to be a hit. And who knows, maybe they’ll even spark a few cherished memories of your own! Don’t hesitate to share your baking experiences and any creative adaptations you make – I’d love to hear about them. Happy baking!