
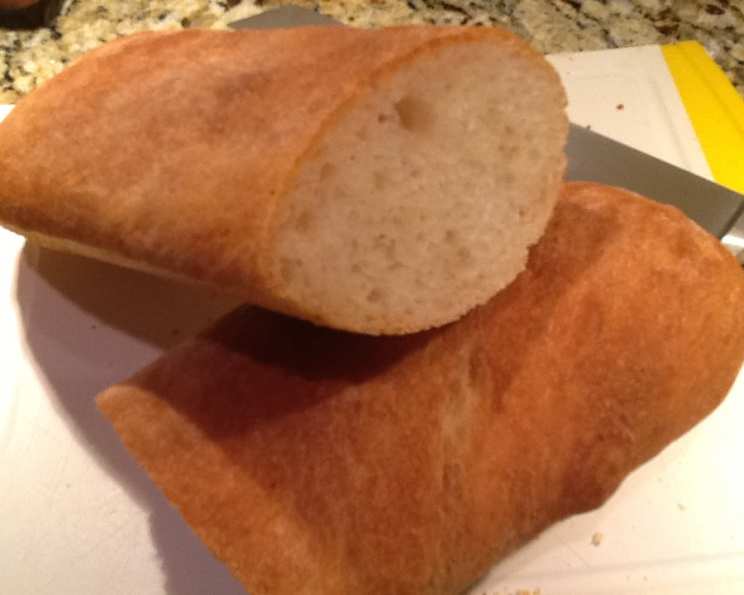
Sourdough Ciabatta: A Taste of Italy in Your Own Kitchen
The first time I tasted truly exceptional ciabatta, I was wandering through a sun-drenched market in Florence. The baker, a burly man with flour dusting his apron, handed me a still-warm loaf. Its crust crackled in my hands, giving way to an airy, irregular interior. The subtle tang of sourdough, the delicate olive oil aroma – it was a revelation. I’ve been chasing that perfect loaf ever since, and this recipe is my closest accomplishment yet.
Recipe Overview
- Prep Time: 20 minutes
- Cook Time: 35 minutes
- Total Time: 2 hours 55 minutes (includes rising time)
- Yields: 3 loaves
- Dietary Type: Vegetarian
Ingredients
- 2 teaspoons instant yeast
- 1 cup sourdough starter
- 1 1/4 cups water
- 3/4 cup milk
- 1 tablespoon olive oil
- 1 tablespoon salt
- 6-8 cups unbleached all-purpose flour (amount may vary)
Equipment Needed
- Large mixing bowl
- Lightly floured work surface
- Oiled bowl
- Plastic wrap or damp towel
- Parchment-lined baking sheets
- Serrated knife or lame
- Spray bottle or plant mister
Instructions
- In a large bowl, combine the water, milk, olive oil, and sourdough starter. Mix well to combine these wet ingredients.
- In a separate bowl, or directly into the flour bag, mix the instant yeast and salt into the unbleached all-purpose flour. This ensures even distribution of the yeast and salt throughout the dough.
- Gradually add the flour mixture to the wet ingredients. Stir in 6 cups of flour, a cup at a time, until you have a dough with the consistency of a thick drop-cookie batter. The consistency at this stage is crucial for achieving the desired airy texture of ciabatta. Don’t be afraid to get your hands in there and mix thoroughly!
- Turn the dough out onto a lightly floured work surface. Knead the dough, adding more flour as necessary, until it is smooth and satiny. Be mindful of the dough’s hydration; you want it to be on the slack side, but not excessively sticky. The dough should be able to hold its shape in the oven without spreading out too much. This is where experience comes in. The right dough is essential to get the correct results.
- Place the dough in an oiled bowl and cover it with plastic wrap or a damp towel to prevent it from drying out.
- Place the bowl in a warm spot and let the dough rise, undisturbed, for about 1 1/2 to 2 hours, or until it has doubled in size. The warmer the environment, the faster the dough will rise. Be patient and allow the sourdough to work its magic.
- Once the dough has doubled, gently punch it down to release the excess gas. Turn it out onto a lightly floured work surface.
- Gently knead the dough again, being careful not to overwork it. Divide it into three equal pieces.
- Form each piece of dough into a torpedo shape, being careful not to degas the dough too much. Place the loaves on parchment-lined baking sheets, giving them ample space to expand during the second rise.
- With a serrated knife or lame, make three slashes in the tops of the loaves, each about 1/2-inch deep. These slashes will allow the bread to expand properly in the oven and create its characteristic appearance.
- Cover the loaves with a damp towel to prevent a skin from forming.
- Let the loaves rise until they look puffy, approximately 30 minutes. While the loaves are rising, preheat your oven to 425°F (220°C).
- Just before placing the loaves in the oven, brush or spray them generously with water. A plant mister works well for this, creating a fine mist.
- Bake the loaves for 10 minutes, spraying them with water two more times during this initial baking period. This creates steam in the oven, which helps to develop a crisp crust and allows the bread to expand fully.
- Lower the oven temperature to 375°F (190°C) and bake for an additional 25 minutes, or until the loaves are golden brown. The internal temperature of the bread should reach around 200-210°F (93-99°C).
- Remove the baked ciabatta from the oven and let it cool completely on a wire rack before slicing and serving. This allows the crumb to set properly and prevents a gummy texture.
Expert Tips & Tricks
- Hydration is Key: The essence of ciabatta lies in its high hydration. Don’t be afraid of a slightly sticky dough; it’s what creates those signature large holes.
- The Right Flour: Use a high-quality unbleached all-purpose flour for best results. Bread flour can also be used for a chewier texture.
- Steam Power: Creating steam in the oven during the first part of baking is essential for a crisp crust. If you don’t have a spray bottle, you can place a pan of hot water on the bottom rack of the oven.
- Don’t Overhandle: Be gentle when shaping the loaves to preserve the air bubbles in the dough.
- Cooling Time is Crucial: Resist the temptation to slice into the ciabatta while it’s still hot. Allowing it to cool completely ensures a better texture and flavor.
Serving & Storage Suggestions
Ciabatta is incredibly versatile. Serve it warm with a drizzle of olive oil and balsamic vinegar, use it for sandwiches, or accompany it with soups and stews.
Store leftover ciabatta at room temperature in a bread bag or airtight container for up to 2 days. For longer storage, slice the bread and freeze it in a freezer bag. To reheat, simply toast the frozen slices or warm them in a low oven.
Nutritional Information
Please note that the following values are estimates and may vary based on specific ingredients and portion sizes.
| Nutrient | Amount per Serving | % Daily Value |
|---|---|---|
| Calories | 330 kcal | 17% |
| Total Fat | 8g | 12% |
| Saturated Fat | 1g | 5% |
| Cholesterol | 0mg | 0% |
| Sodium | 450mg | 19% |
| Total Carbohydrate | 55g | 20% |
| Dietary Fiber | 3g | 12% |
| Sugars | 1g | – |
| Protein | 10g | 20% |
Variations & Substitutions
- Whole Wheat Ciabatta: Substitute up to half of the all-purpose flour with whole wheat flour for a nuttier flavor and added fiber.
- Herb-Infused Ciabatta: Add 2 tablespoons of chopped fresh herbs, such as rosemary, thyme, or oregano, to the dough during the kneading process.
- Olive Ciabatta: Incorporate 1/2 cup of chopped Kalamata olives into the dough for a Mediterranean twist.
- Gluten-Free Ciabatta: While challenging, gluten-free ciabatta is possible using a blend of gluten-free flours and binders. Look for a specific gluten-free ciabatta recipe for best results.
FAQs (Frequently Asked Questions)
Q: Why is my ciabatta flat and dense?
A: This is often due to overworking the dough, using too much flour, or not allowing it to rise sufficiently. Remember that Ciabatta needs to be a slack dough, which feels almost too wet!
Q: How can I tell if my sourdough starter is active enough?
A: An active starter will double in size within a few hours of feeding and have a bubbly appearance. If your starter is sluggish, feed it regularly for a few days until it becomes more active.
Q: Can I use active dry yeast instead of instant yeast?
A: Yes, but you’ll need to activate the active dry yeast in warm water with a pinch of sugar for 5-10 minutes before adding it to the dough.
Q: How do I get those big holes in my ciabatta?
A: The key is a high hydration dough and gentle handling. Avoid overworking the dough, and allow it to rise properly.
Q: Can I make this recipe ahead of time?
A: You can prepare the dough ahead of time and let it rise in the refrigerator overnight. This will develop a deeper flavor. Bring the dough to room temperature before shaping and baking.
Final Thoughts
Sourdough ciabatta, with its rustic charm and delightful flavor, is a bread that truly elevates any meal. Don’t be intimidated by the process – with a little practice, you’ll be baking loaves that rival those from the finest Italian bakeries. Experiment with variations, share your creations with friends and family, and most importantly, enjoy the journey of bread making. I’d love to hear about your baking successes (or learning experiences!) and how you choose to enjoy your homemade ciabatta. Pair it with a creamy tomato soup or a hearty Italian stew for the ultimate comfort food experience. Buon appetito!