
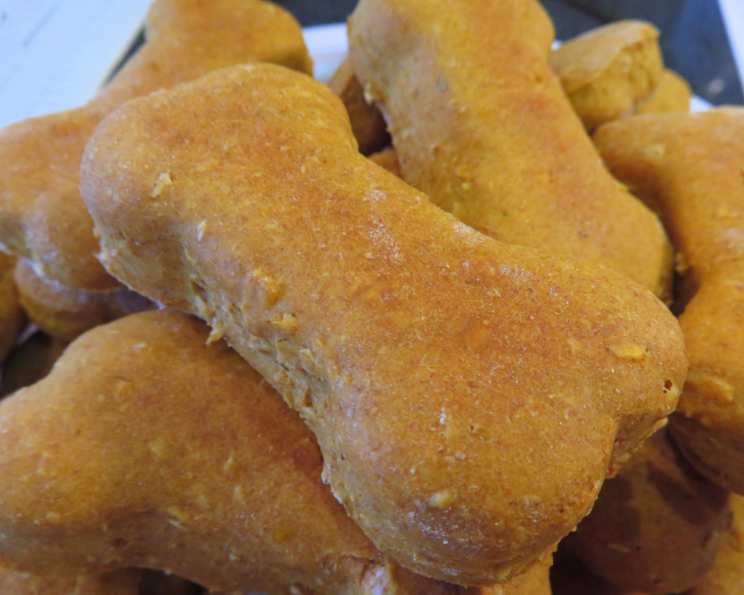
Sourdough Doggie Biscuits: A Recipe for Happy Tails
The aroma of baking bread has always been a comfort, a warm blanket on a chilly day. But it wasn’t until my scruffy terrier mix, Barnaby, started showing an unusual interest in my sourdough starter that I considered bringing that same comfort to his world. He’d sit patiently by the counter, nose twitching, as I tended to my bubbly concoction, his eyes pleading for a taste. It sparked an idea: could I create a healthy, delicious treat for him using the discard from my sourdough endeavors? The answer, as you’ll soon discover, was a resounding “yes!”
Recipe Overview
- Prep Time: 15 minutes
- Cook Time: 40 minutes
- Total Time: 55 minutes
- Yields: 3 1/2 dozen large bones
- Servings: 42
- Dietary Type: Dog-Friendly
Ingredients
- 2 eggs
- 1/2 cup pumpkin (canned, unsweetened)
- 1 cup sourdough starter (discard is fine!)
- 1/4 cup peanut butter (ensure it’s xylitol-free!)
- 2 tablespoons bacon drippings (or cooking oil)
- 1 cup oats (quick or old fashioned)
- 2 1/2 cups whole wheat flour
Equipment Needed
- Electric mixer
- Large mixing bowl
- Floured surface
- Rolling pin
- Cookie cutters (dog bone shaped, optional)
- Cookie sheets
- Pizza cutter or knife
Instructions
-
Preheat your oven to 325°F (160°C). Ensure your oven rack is in the center position for even baking.
-
In a large mixing bowl, combine the eggs, pumpkin, sourdough starter, peanut butter, and bacon drippings (or cooking oil). Use an electric mixer on medium speed to thoroughly blend these wet ingredients until a smooth batter forms. The bacon drippings add a savory depth that dogs adore, but any cooking oil works in a pinch.
-
Add the oats to the mixture and continue mixing on low speed. The oats provide fiber and a slightly chewy texture.
-
Gradually add the whole wheat flour, about 1/2 cup at a time, while continuing to mix. At first, the electric mixer will handle the dough. However, as the dough thickens, it will become too difficult for the mixer.
-
Turn the dough out onto a lightly floured surface. Knead in the remaining flour by hand. The goal is to achieve a stiff dough that is not crumbly. It should be firm enough to roll out without sticking excessively. Don’t add too much flour, though, or the biscuits will become too hard.
-
Using a rolling pin, roll out the dough to about 1/2-inch thickness. This thickness ensures a good balance of chewiness and crunch.
-
Now comes the fun part! Use cookie cutters in desired shapes (dog bones are always a hit!) to cut out individual biscuits. Alternatively, for a quicker version, use a pizza cutter or knife to cut the dough into 1/2-inch wide strips, then cut the strips into 2-inch lengths. This method creates simple, uniform biscuits quickly.
-
Place the cut-out biscuits on ungreased cookie sheets, leaving a small space between each biscuit to allow for even air circulation.
-
Bake in the preheated oven at 325°F (160°C) for 20 minutes.
-
After 20 minutes, turn the biscuits over on the cookie sheets and bake for another 20 minutes. This ensures even browning and thorough drying.
-
After the second bake, turn off the oven. Open the oven door slightly to allow excess heat and moisture to escape for a few minutes. Then, close the oven door and leave the biscuits inside until all the heat is completely gone. This final step is crucial for creating a truly crunchy, shelf-stable biscuit.
-
Once the oven has completely cooled, check the biscuits for any remaining moisture. If any biscuits still feel soft, let them air-dry until they are completely hard and crisp before storing. This will prevent mold growth and ensure they last longer.
Expert Tips & Tricks
- Sourdough Starter Consistency: The consistency of your sourdough starter can affect the final product. A slightly wetter starter might require a touch more flour, while a drier one may need a tablespoon or two of water. Adjust accordingly.
- Flavor Boost: For a slightly different flavor profile, consider adding a tablespoon of dried parsley or rosemary to the dough. These herbs are safe for dogs and offer additional health benefits.
- Peanut Butter Power: Always double-check that the peanut butter you use does not contain xylitol, an artificial sweetener that is extremely toxic to dogs.
- Baking Time Variations: Baking times may vary depending on your oven. Keep a close eye on the biscuits during the last 10 minutes of baking to prevent burning. The biscuits should be golden brown and firm to the touch.
Serving & Storage Suggestions
Serve these homemade dog biscuits as a healthy and rewarding treat for your furry friend. They are perfect for training, rewarding good behavior, or simply showing your dog some love.
Store the cooled biscuits in an airtight container at room temperature. When fully dried, they should last for several weeks. Avoid storing them in a humid environment, as this can cause them to soften. If you notice any signs of mold, discard the biscuits immediately. Freezing is not recommended.
Nutritional Information
Please note that these values are estimates and may vary based on specific ingredients and portion sizes.
| Nutrient | Amount per Serving | % Daily Value (Dog) |
|---|---|---|
| Calories | 57 kcal | N/A |
| Calories from Fat | 18 kcal | N/A |
| Total Fat | 2g | N/A |
| Saturated Fat | 0.6g | N/A |
| Cholesterol | 9.4mg | N/A |
| Sodium | 11.6mg | N/A |
| Total Carbohydrate | 8g | N/A |
| Dietary Fiber | 1.3g | N/A |
| Sugars | 0.2g | N/A |
| Protein | 2.3g | N/A |
Note: Daily values for dogs are not standardized and depend on the size, age, and activity level of your pet. Consult with your veterinarian for specific nutritional advice.
Variations & Substitutions
- Gluten-Free Option: Substitute the whole wheat flour with a gluten-free flour blend specifically formulated for baking. You may need to adjust the amount of flour slightly to achieve the desired dough consistency.
- Sweet Potato Delight: Replace the canned pumpkin with an equal amount of mashed sweet potato for a different source of vitamins and a slightly sweeter flavor.
- Savory Herb Blend: Add a teaspoon of dried rosemary, thyme, and oregano to the dough for a more complex savory flavor profile. Ensure all herbs are safe for canine consumption.
FAQs (Frequently Asked Questions)
Q: Can I use active sourdough starter instead of discard?
A: Yes, you can use active starter, but the biscuits may have a slightly more sour flavor. Discard works perfectly well and is a great way to reduce waste.
Q: My dough is too sticky. What should I do?
A: Gradually add more flour, one tablespoon at a time, until the dough reaches a stiff, non-sticky consistency. Be careful not to add too much, or the biscuits will be too hard.
Q: Can I use different types of flour?
A: While whole wheat flour is recommended for its nutritional benefits, you can experiment with other flours like oat flour or spelt flour. Keep in mind that different flours absorb liquids differently, so you may need to adjust the amount of flour accordingly.
Q: How long will these biscuits last?
A: When fully dried and stored in an airtight container, these biscuits can last for several weeks. Ensure they are completely cool and dry before storing to prevent mold growth.
Q: My dog has allergies. Can I substitute ingredients?
A: Absolutely! If your dog has allergies, you can substitute ingredients as needed. For example, you can use sunflower seed butter instead of peanut butter, or rice flour instead of wheat flour. Always consult with your veterinarian if you have any concerns about specific ingredients.
Final Thoughts
Creating these Sourdough Doggie Biscuits is more than just baking; it’s an act of love for your furry companion. Knowing exactly what goes into their treats gives you peace of mind, and the joy of seeing them wag their tails in anticipation is truly priceless. So, gather your ingredients, preheat your oven, and get ready to whip up a batch of these wholesome, homemade goodies. I encourage you to share your baking experiences and any creative adaptations you make along the way. Happy baking, and even happier tails!