
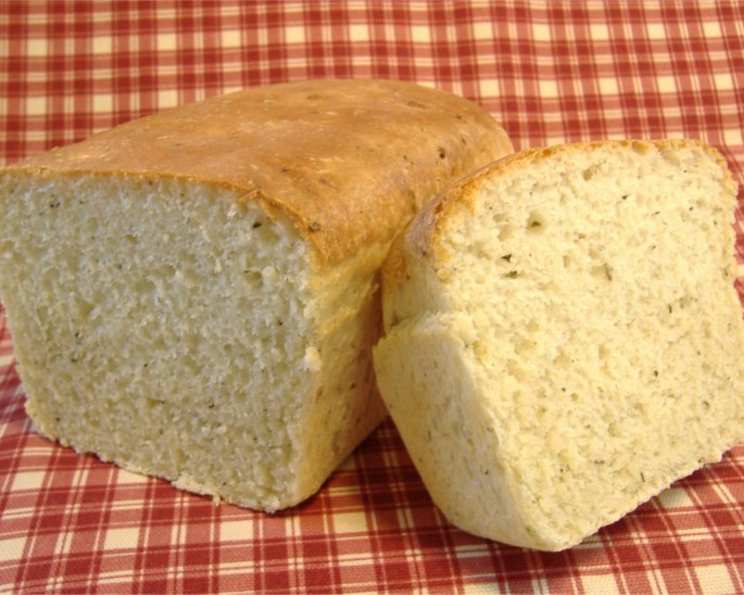
Sourdough Onion Herb Bread: A Rustic Delight
The memory still makes my mouth water. As a child, visiting my grandmother’s farm was always a sensory explosion, but one aroma always stood out: the earthy, savory perfume of her freshly baked bread. She’d pull it, still steaming, from her ancient wood-fired oven. That first bite, the slight tang of sourdough mingling with the sweet bite of caramelized onion and fragrant herbs… it was pure comfort and love baked into every slice. While I’ve refined my own version over the years, striving for that same depth of flavor and satisfying chew, that simple farmhouse bread will forever be the benchmark for homemade goodness.
Recipe Overview
- Prep Time: 30 minutes
- Cook Time: 30 minutes
- Total Time: 3 hours 30 minutes (including rising time)
- Yields: 2 1-pound loaves
- Dietary Type: Vegetarian
Ingredients
- 1 3/4 cups proofed sourdough starter
- 3/4 cup milk
- 2 tablespoons sugar
- 4 tablespoons butter
- 1/4 cup dried potato flakes
- 2 teaspoons salt
- 2 tablespoons dried onion flakes
- 2 teaspoons dried mixed Italian seasoning
- 4 cups unbleached all-purpose flour
Equipment Needed
- Bread Machine (optional)
- Mixing Bowls
- Measuring Cups and Spoons
- Lightly Floured Board
- 2 Greased Bread Pans
- Non-Stick Cooking Spray
- Wire Rack
Instructions
-
Combine Ingredients: If using a bread machine, add all ingredients to the bread machine pan in the order recommended by the manufacturer. If mixing by hand, in a large bowl, combine the proofed sourdough starter, milk, sugar, melted butter, dried potato flakes, salt, dried onion flakes, and dried mixed Italian seasoning.
-
Add Flour: Gradually add the unbleached all-purpose flour, mixing until a shaggy dough forms.
-
Knead the Dough: If using a bread machine, select the dough cycle, but remove the dough from the machine at the end of the kneading phase. Do not let the dough rise in the machine. If kneading by hand, turn the dough out onto a lightly floured board and knead for 8-10 minutes, until smooth and elastic. Add more flour, one tablespoon at a time, if the dough is too sticky.
-
Shape the Loaves: Divide the dough in half. Gently shape each half into a loaf.
-
Prepare Pans: Place each loaf into a greased bread pan.
-
Spray and Rise: Spray the tops of the loaves with non-stick cooking spray. Cover the pans with a clean kitchen towel or plastic wrap.
-
First Rise (Proofing): Let rise in a warm place until light. This can take several hours (usually 2 1/2 to 3 hours), depending on the temperature of your kitchen and the activity of your sourdough starter. The dough should roughly double in size. Patience is key here!
-
Preheat Oven: Preheat your oven to 350°F (175°C).
-
Bake: Bake the loaves for about 30 minutes, or until golden brown. To check for doneness, insert a toothpick into the center of a loaf; it should come out clean. You can also tap the bottom of the loaf; it should sound hollow. If the tops of the loaves are browning too quickly, tent them loosely with foil.
-
Cool: Remove the loaves from the oven and turn them out of the pans onto a wire rack to cool completely.
-
Butter (Optional): While the loaves are still hot, brush the tops with melted butter for a richer flavor and a softer crust.
Expert Tips & Tricks
- Sourdough Starter Activity: The activity of your sourdough starter is crucial for a good rise. Make sure your starter is bubbly and active before using it in the recipe. A healthy, well-fed starter will result in a lighter, more flavorful bread.
- Warm Environment for Rising: Create a warm, humid environment for the dough to rise. You can do this by placing the covered dough in a slightly warmed (but turned-off!) oven, or by placing a bowl of hot water next to the dough.
- Oven Temperature Accuracy: Use an oven thermometer to ensure your oven is at the correct temperature. Many ovens are not calibrated accurately.
- Kneading is Key: Don’t skimp on the kneading time. Proper kneading develops the gluten, which gives the bread its structure and chewy texture.
- Doneness Check: If you are unsure if the bread is done, use an instant-read thermometer. The internal temperature should be around 200-210°F (93-99°C).
Serving & Storage Suggestions
Serve this sourdough onion herb bread warm or at room temperature. It’s delicious on its own, toasted with butter, or used for sandwiches. It pairs well with soups, stews, and salads.
To store, wrap the cooled bread tightly in plastic wrap or place it in an airtight container. It will last for 2-3 days at room temperature or up to a week in the refrigerator. For longer storage, slice the bread and freeze it in a freezer-safe bag for up to 2-3 months. Thaw completely before serving or toasting. To refresh slightly stale bread, lightly sprinkle it with water and bake it in a preheated oven at 350°F (175°C) for 5-10 minutes.
Nutritional Information
| Nutrient | Amount per Serving (estimated) | % Daily Value |
|---|---|---|
| Calories | 630 kcal | 32% |
| Total Fat | 14.5 g | 22% |
| Saturated Fat | 8.5 g | 43% |
| Cholesterol | 37 mg | 12% |
| Sodium | 1273 mg | 53% |
| Total Carbohydrate | 108 g | 36% |
| Dietary Fiber | 3.8 g | 15% |
| Sugars | 7.7 g | |
| Protein | 15 g | 30% |
Note: Nutritional information is an estimate and may vary based on specific ingredients and preparation methods.
Variations & Substitutions
- Gluten-Free: Use a gluten-free all-purpose flour blend, but be aware that the texture will be different. You may need to add a binder like xanthan gum.
- Vegan: Substitute the butter with a vegan butter alternative or olive oil. Ensure the milk used is also plant-based such as almond or oat milk.
- Different Herbs: Experiment with different dried herbs like rosemary, thyme, or oregano. Fresh herbs can also be used, but you’ll need to use about three times the amount of dried herbs.
- Cheese: Add shredded Parmesan or Asiago cheese to the dough for a cheesy version.
- Garlic: Add 1-2 cloves of minced garlic to the dough for a garlicky flavor.
- Sweet Onion: Substitute regular dried onion flakes with sweet onion flakes for a slightly sweeter flavor profile.
- Seed Topping: Before baking, sprinkle the loaves with sesame seeds, poppy seeds, or sunflower seeds for added texture and flavor.
FAQs (Frequently Asked Questions)
Q: My sourdough starter isn’t very active. What can I do?
A: Feed your starter regularly (once or twice a day) with equal parts flour and water. Discard half of the starter before each feeding. Keep it in a warm place to encourage activity.
Q: My dough isn’t rising. What could be the problem?
A: The most common cause is a weak starter or a too-cold environment. Make sure your starter is bubbly and active, and find a warmer place for the dough to rise. You can also try adding a pinch of instant yeast to the dough to help it along.
Q: Can I freeze the dough instead of baking it right away?
A: Yes, you can freeze the dough after shaping it into loaves. Wrap it tightly in plastic wrap and then foil. Thaw it in the refrigerator overnight before letting it rise and baking.
Q: My bread is browning too quickly on top. What should I do?
A: Tent the loaves loosely with aluminum foil during the last part of baking to prevent them from browning too much.
Q: Can I make this recipe without a bread machine?
A: Absolutely! The instructions detail both bread machine and traditional mixing methods. Simply follow the instructions for mixing and kneading by hand.
Final Thoughts
This Sourdough Onion Herb Bread is more than just a recipe; it’s an invitation to slow down, connect with the process of baking, and create something truly special. The aroma alone is enough to fill your kitchen with warmth and comfort. Don’t be intimidated by sourdough; it’s a forgiving process. I encourage you to try it, experiment with different herbs and toppings, and make it your own. This bread pairs beautifully with a hearty bowl of soup or a simple cheese plate. Share your creations and let me know what you think!