
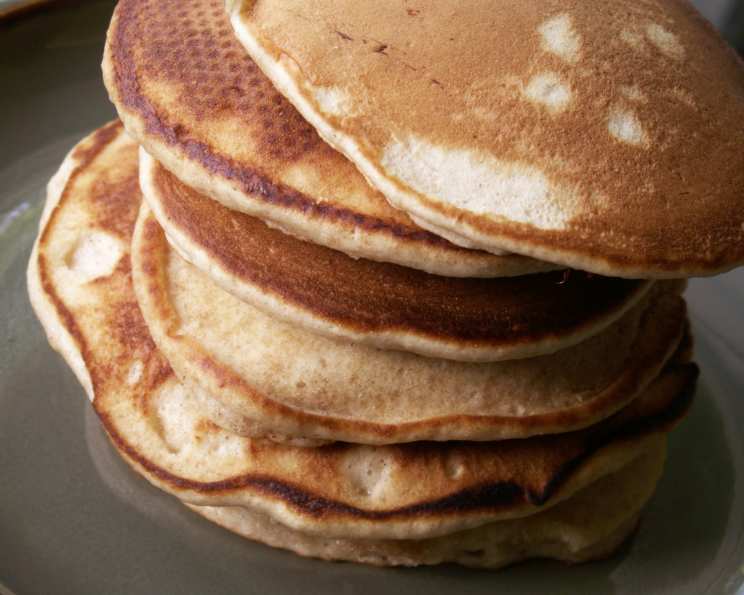
Sourdough Serenity: Amish Friendship Bread Starter Pancakes
The aroma still wafts through my memory – Sunday mornings at my grandmother’s, the air thick with the sweet-tangy scent of sourdough. Not the artisanal loaves everyone raves about now, but something even more magical: pancakes made with her beloved Amish Friendship Bread starter. Each bite was a warm hug, a comforting blend of subtle sweetness and that unmistakable sourdough tang, slathered with melting butter and pure maple syrup. It wasn’t just breakfast; it was a ritual, a connection to generations past. These pancakes are my way of keeping that tradition alive.
Recipe Overview
- Prep Time: 5 minutes
- Cook Time: 20 minutes
- Total Time: 25 minutes
- Servings: 4-6
- Yields: 12 pancakes
- Dietary Type: Vegetarian
Ingredients
- 1 egg
- 1 cup Amish starter
- ½ cup milk
- 2 tablespoons oil (or substitute applesauce)
- 1 teaspoon vanilla
- 1 ½ teaspoons baking powder
- 1 cup flour
Equipment Needed
- Mixing bowl
- Whisk or fork
- Griddle or large frying pan
- Non-stick cooking spray
- Measuring cups and spoons
- 1/4 cup measuring cup or ladle
Instructions
- In a mixing bowl, beat the egg until light and frothy. This incorporates air for a fluffier pancake.
- Add the wet ingredients to the beaten egg: 1 cup of Amish starter, ½ cup of milk, 2 tablespoons of oil (or applesauce), and 1 teaspoon of vanilla. Whisk these ingredients together until well combined. The mixture might appear a bit bubbly from the starter; that’s perfectly normal.
- In a separate bowl, whisk together the dry ingredients: 1 ½ teaspoons of baking powder and 1 cup of flour. This ensures even distribution of the baking powder for a consistent rise.
- Gradually add the dry ingredients to the wet ingredients. Mix gently until just combined. Be careful not to overmix the batter, as this can develop the gluten in the flour, resulting in tougher pancakes. A few small lumps are perfectly acceptable.
- If the batter seems too thick (it should be easily pourable but not watery), add more milk, 1 tablespoon at a time, until you reach your desired consistency. Remember, pancake batter thickens slightly as it sits, so err on the side of slightly thinner rather than too thick.
- Preheat a griddle or large frying pan over medium-high heat. The ideal temperature is crucial for even cooking and golden-brown pancakes. If you don’t have a griddle, a large, heavy-bottomed frying pan works perfectly well.
- Lightly spray the preheated griddle with non-stick cooking spray. You can also use a bit of butter or oil, but cooking spray is the easiest and cleanest method.
- Pour ¼ cup of batter onto the hot griddle for each pancake. Avoid overcrowding the griddle, as this can lower the temperature and result in unevenly cooked pancakes.
- Cook the pancakes until they look set around the edges and bubbles start to appear on the surface. This usually takes about 2-3 minutes per side. The bubbles are a sign that the baking powder is working and the pancakes are rising.
- Once the pancake looks set around the edges and bubbles are coming up thru the middle of the pancake, turn it over and cook another minute or two, or until golden brown on the second side and cooked through.
- Serve the pancakes hot with your favorite toppings. Butter and maple syrup are classic choices, but fresh fruit, whipped cream, or a sprinkle of cinnamon are also delicious options.
Expert Tips & Tricks
- Don’t overmix: Overmixing develops gluten, leading to tough pancakes. Mix until just combined, leaving a few small lumps.
- Rest the batter: Letting the batter rest for 5-10 minutes allows the gluten to relax, resulting in more tender pancakes. The baking powder will also activate slightly, contributing to a lighter texture.
- Adjust the heat: If the pancakes are browning too quickly, reduce the heat slightly. If they’re not browning enough, increase the heat.
- Use a preheated griddle: A hot griddle ensures even cooking and a golden-brown color.
- Applesauce substitution: Substituting applesauce for the oil adds a subtle sweetness and moistness to the pancakes. It’s a great way to reduce the fat content, too.
- Cinnamon or apple pie spice: For a warm, comforting flavor, add ½ teaspoon of cinnamon or apple pie spice to the dry ingredients.
- Freeze for later: Cooked pancakes can be frozen for up to 2 months. Place cooled pancakes in a single layer on a baking sheet and freeze until solid. Then, transfer to a freezer bag or container. Reheat in a toaster, microwave, or oven.
Serving & Storage Suggestions
Serve these sourdough pancakes immediately while they’re hot and fluffy. Classic toppings like butter and maple syrup are always a hit, but don’t be afraid to get creative! Fresh berries, whipped cream, chocolate chips, a sprinkle of cinnamon, or a drizzle of honey all make fantastic additions.
Leftover pancakes can be stored in an airtight container in the refrigerator for up to 3 days. Reheat them in the microwave for about 30 seconds, in a toaster for a minute or two, or in a skillet over low heat until warmed through. For longer storage, freeze the pancakes as described in the “Expert Tips & Tricks” section.
Nutritional Information
| Nutrient | Amount per Serving | % Daily Value |
|---|---|---|
| Calories | 215 kcal | 11% |
| Total Fat | 9.4g | 14% |
| Saturated Fat | 2g | 10% |
| Cholesterol | 50.8mg | 16% |
| Sodium | 169.6mg | 7% |
| Total Carbohydrate | 25.9g | 8% |
| Dietary Fiber | 0.8g | 3% |
| Sugars | 0.3g | 1% |
| Protein | 5.8g | 11% |
Nutritional information is an estimate and may vary based on specific ingredients and portion sizes.
Variations & Substitutions
- Gluten-Free: Substitute the all-purpose flour with a gluten-free blend. Be sure to use a blend that contains xanthan gum or another binding agent to help hold the pancakes together.
- Dairy-Free: Use a non-dairy milk alternative like almond milk, soy milk, or oat milk.
- Vegan: Substitute the egg with a flax egg (1 tablespoon of ground flaxseed mixed with 3 tablespoons of water, let sit for 5 minutes to thicken).
- Sweetness Boost: Add a tablespoon of sugar or honey to the batter for a sweeter pancake.
- Seasonal Flavors: During the fall, add a tablespoon of pumpkin puree and a pinch of pumpkin pie spice to the batter for delicious pumpkin pancakes. In the summer, fold in fresh blueberries or raspberries.
FAQs (Frequently Asked Questions)
Q: What is Amish Friendship Bread Starter?
A: Amish Friendship Bread Starter is a sweet sourdough starter that’s shared among friends and family. It goes through a 10-day fermentation process, during which it’s fed with flour, sugar, and milk.
Q: Can I use a different type of sourdough starter?
A: Yes, you can use any type of sourdough starter, but the flavor profile of the pancakes will vary slightly depending on the starter’s acidity.
Q: How do I know when the griddle is hot enough?
A: You can test the griddle’s temperature by sprinkling a few drops of water on it. If the water sizzles and evaporates quickly, the griddle is ready.
Q: Can I make the batter ahead of time?
A: Yes, you can make the batter up to 24 hours in advance. Store it in the refrigerator in an airtight container. The batter may thicken slightly, so you may need to add a tablespoon or two of milk to thin it out before cooking.
Q: Why are my pancakes flat?
A: Flat pancakes are usually caused by overmixing the batter or using old baking powder. Make sure to mix the batter gently and use fresh baking powder for the best results.
Final Thoughts
These Amish Friendship Bread Starter pancakes are more than just a breakfast recipe; they’re a link to tradition, a taste of home, and a celebration of simple pleasures. Don’t be intimidated by the sourdough starter; it’s easier than you think! Gather your ingredients, follow the instructions, and get ready to enjoy a stack of warm, fluffy pancakes that are sure to become a family favorite. I encourage you to experiment with different toppings and variations to create your own signature pancake masterpiece. And please, share your feedback and creations! I’d love to hear how these pancakes have brought a little sourdough serenity to your kitchen.