
Reviving the Ancient Grain: Crafting Sourdough Starter from Flakes
My earliest memories of truly exceptional bread are intertwined with the tangy aroma of my grandmother’s kitchen. She had a sourdough starter that was practically a family heirloom, passed down through generations. The complex flavors she coaxed from that humble mixture of flour and water were simply magical. While she used a traditional, ever-evolving starter, I’ve since learned that the journey to exceptional sourdough can begin even more simply, with dried starter flakes, offering a taste of history in a conveniently shelf-stable form.
Recipe Overview
- Prep Time: 5 minutes
- Proofing Time: 48-72 hours
- Total Time: 72 hours 5 minutes
- Yield: 2 Cups
- Dietary Type: Vegan
Ingredients
- 2 tablespoons sourdough starter flakes
- 2 cups bottled water, lukewarm
- 2 cups flour (all-purpose or bread flour)
Equipment Needed
- Glass or plastic bowl (never metal)
- Plastic or wooden spoon (never metal)
- Loose-fitting lid or plastic wrap
Instructions
- In your glass or plastic bowl (remember, avoid metal!), combine the 2 tablespoons of dried sourdough starter flakes, ½ cup of lukewarm bottled water, and ½ cup of flour.
- Optional Flavor Boost: For a more pronounced, rustic flavor, consider adding one or two tablespoons of rye flour to this initial feeding.
- Using a plastic or wooden spoon (again, no metal!), stir the mixture vigorously to incorporate air. This step is crucial for kickstarting the fermentation process.
- Cover the bowl loosely with a lid or plastic wrap. A tight seal can trap excess gases and inhibit the starter’s growth.
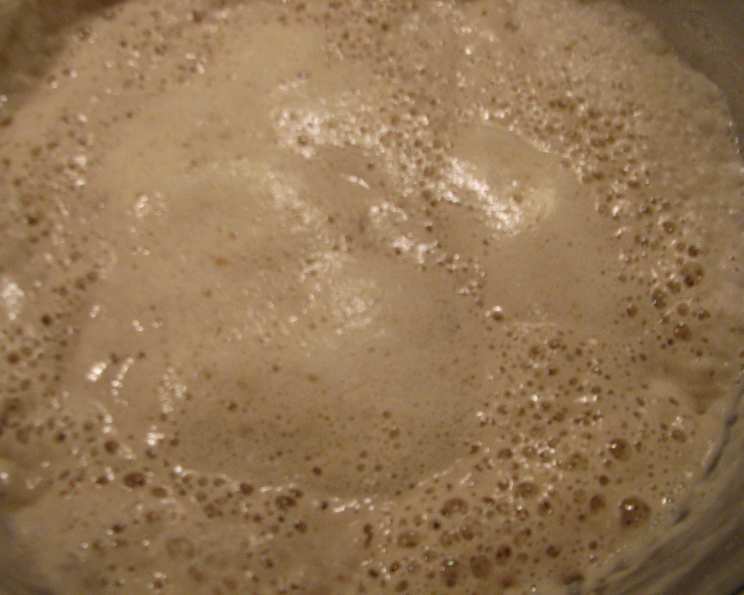
- Place the covered bowl in a warm, draft-free area. A countertop is usually fine. Allow the starter to proof for 8-14 hours. You’re looking for signs of activity: bubbling, an increase in volume, and a slightly sour aroma.
- Troubleshooting: If you don’t see any activity after 14 hours, don’t panic! Just proceed to the next feeding. Sometimes the starter needs a little extra time to wake up.
- Second Feeding: Add 1 ½ cups of lukewarm bottled water and 1 ½ cups of flour to the mixture.
- Stir vigorously to ensure everything is well combined.
- Cover loosely and place in a warm, draft-free area. Allow the starter to proof for another 8-14 hours, or until it is noticeably bubbly and has increased in volume.
- Crucial Backup Step: At this stage, it’s highly recommended to create a backup batch of sourdough flakes as described in the “Preserving Your Starter” section below. This safeguards your efforts in case something goes wrong down the line.
- At this point, you should have approximately 2 cups of active starter, ready to use in your favorite sourdough recipes.
- Important Note: Always reserve ¼ cup of starter for future use. If your recipe calls for more than 1 ½ cups of starter, you’ll need to feed the starter again, adding equal parts of water and flour, and proofing for another 8-14 hours.
- After removing the amount of starter needed for your recipe, save approximately ¼ cup of starter. Discard (or make flakes from) any excess.
- Place the saved starter in a clean glass jar or plastic storage container. Avoid airtight containers, as gases need to escape. I use a glass jar with a small hole punched in the top, covering the opening with plastic wrap to prevent the starter from contacting the metal lid.
- To feed the saved starter, stir in ½ cup each of flour and water. Let it sit on the counter for 30-45 minutes, then close the container and place it in the refrigerator.
- The starter can be stored in the refrigerator for up to two weeks. If you need to store it longer, remove the container every two weeks, discard all but ¼ cup, and feed again as described above to reactivate it.
Preserving Your Starter
Preserving a portion of your active starter is a vital safety net. Should your main starter falter, you won’t have to start from scratch. This method also allows you to easily share your sourdough starter with friends.
- During the peak of your starter’s activity (when it’s bubbly and ready for baking), pour a small puddle onto a sheet of wax paper.
- Using the back of a spoon, spread the starter into a very thin layer.
- Let it completely dry overnight at room temperature.
- The next day, the dried starter will be brittle. Gently bend the wax paper to break the starter into flakes, resembling potato chips.
- Store the flakes in a sealed plastic zip-lock bag in the refrigerator. Be sure to label the bag with the date and type of starter.
- Starter can be kept this way for up to six months (and possibly longer).
- To reactivate the flakes, combine them with equal amounts of flour and water and let them sit in a warm place for about 12 hours. I refresh my backup flakes every three months to ensure their vitality.
Expert Tips & Tricks
- Temperature is Key: The ideal temperature for proofing your starter is between 70-75°F (21-24°C). In colder months, consider using a seedling heat mat or placing the starter near a warm oven.
- Observe Closely: Pay close attention to the starter’s activity. The more bubbly and voluminous it becomes, the more active and potent it is for baking.
- Discard Wisely: Don’t feel guilty about discarding excess starter! It’s a necessary part of the feeding process. However, get creative with the discard – it can be used in pancakes, waffles, crackers, and other delicious recipes.
- Smell Test: A healthy starter should have a pleasantly sour, slightly tangy aroma. A foul or off-putting smell indicates a problem.
Serving & Storage Suggestions
Your active sourdough starter is the foundation for a myriad of baked goods. Use it to make bread, pancakes, waffles, pizza dough, and more! Serve your creations warm and enjoy the unique flavors and textures that sourdough provides.
As mentioned above, always save ¼ cup of starter. Store the remaining starter in the fridge, following the feeding instructions provided. Remember to refresh it every two weeks, even if you’re not actively baking.
Nutritional Information
Please note that these values are estimates and can vary based on the type of flour used.
| Nutrient | Amount per Serving | % Daily Value |
|---|---|---|
| Calories | 455 kcal | N/A |
| Total Fat | 1.2g | 1% |
| Saturated Fat | 0.2g | 0% |
| Cholesterol | 0mg | 0% |
| Sodium | 2.8mg | 0% |
| Total Carbohydrate | 95.4g | 31% |
| Dietary Fiber | 3.4g | 13% |
| Sugars | 0.3g | 1% |
| Protein | 12.9g | 25% |
Variations & Substitutions
- Gluten-Free: Experiment with gluten-free flour blends to create a gluten-free sourdough starter and baked goods. Be aware that the consistency and proofing times may differ.
- Different Flours: Explore using different types of flour, such as whole wheat, rye, or spelt, to add unique flavors and textures to your sourdough.
- Sweet Starter: Add a touch of honey or maple syrup to your starter to encourage yeast activity and create a slightly sweeter flavor profile.
FAQs (Frequently Asked Questions)
Q: Can I use tap water instead of bottled water?
A: Bottled water is recommended because tap water often contains chlorine, which can inhibit the growth of beneficial bacteria in the starter. If you must use tap water, let it sit uncovered for 24 hours to allow the chlorine to dissipate.
Q: How do I know when my starter is ready to use?
A: A ready-to-use starter will be bubbly, have a slightly sour aroma, and will have roughly doubled in volume after feeding.
Q: What if my starter smells bad?
A: An off-putting smell usually indicates an imbalance in the starter’s ecosystem. Discard most of the starter, leaving a small amount, and feed it again with fresh flour and water. If the smell persists, the starter may be contaminated and need to be restarted.
Q: Can I use a metal spoon to stir my starter?
A: It’s best to avoid using metal utensils or containers, as metal can react with the acids in the starter and potentially affect its flavor and activity.
Q: My starter isn’t bubbling; what should I do?
A: Ensure the starter is in a warm enough environment. Also, try using a different type of flour or increasing the feeding frequency. Sometimes it just takes a little patience.
Final Thoughts
Creating a sourdough starter from flakes is a rewarding experience that connects you to a rich culinary tradition. It’s a journey of patience and observation, but the results are well worth the effort. Don’t be afraid to experiment, adapt, and make it your own. Once you’ve mastered the art of sourdough starter, the possibilities are endless! Share your sourdough creations with friends and family, and savor the unique flavors that only a homemade starter can provide.