
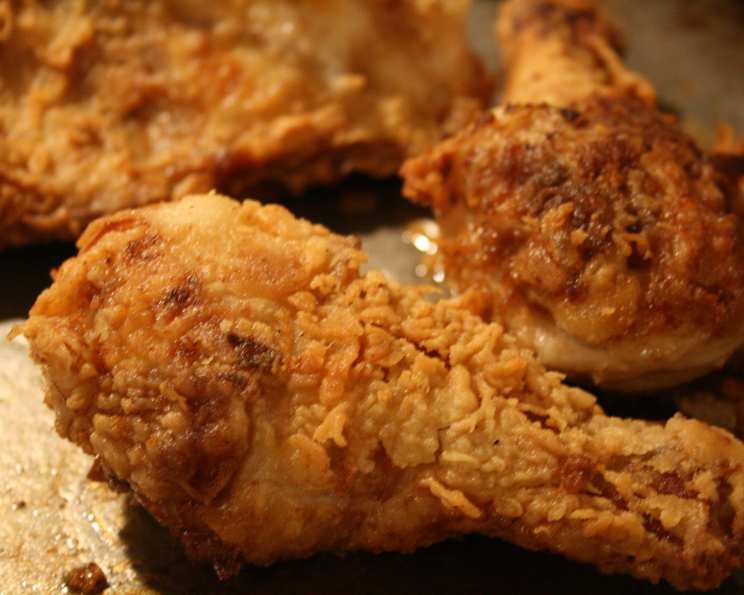
Southern Buttermilk Fried Chicken: A Culinary Love Letter
The scent of frying chicken always takes me back to my grandmother’s kitchen in rural Georgia. I can almost feel the warmth of the cast iron skillet radiating through the air, hear the gentle sizzle of the chicken as it browns, and see my grandmother’s practiced hands deftly turning each piece. That crispy, golden-brown skin, the juicy, tender meat beneath – it was more than just a meal; it was a hug in edible form, a taste of home. I remember watching her, fascinated, as she transformed humble ingredients into something extraordinary, a skill and a love I now strive to emulate in my own kitchen.
Recipe Overview
- Prep Time: 20 minutes
- Cook Time: 25-35 minutes
- Total Time: 45-55 minutes
- Servings: 4-6
- Yield: Varies based on chicken pieces
- Dietary Type: Not Gluten-Free, Not Dairy-Free
Ingredients
- Chicken pieces or 1 frying chicken, cut up
- 1 cup buttermilk
- 2 cups self-rising flour
- 1 teaspoon salt (or to taste)
- ½ teaspoon freshly ground black pepper (or to taste)
- Oil (for frying)
Equipment Needed
- Large bowl
- 1-gallon zip-lock bag
- Heavy skillet (cast iron preferred)
- Instant-read thermometer
- Tongs
- Paper towels
Instructions
-
Begin by thoroughly washing the chicken pieces under cold water. Pat them completely dry with paper towels. This crucial step ensures the flour coating adheres properly, resulting in a crispier crust.
-
Pour the buttermilk into a small bowl. This is your chicken‘s first bath.
-
Take each piece of chicken and fully submerge it in the buttermilk, ensuring every surface is well-coated. Let the chicken soak in the buttermilk for at least 15 minutes. This tenderizes the chicken and adds a delicious tang.
-
In a large 1-gallon zip-lock bag, combine the self-rising flour, salt, and pepper. Seal the bag tightly and shake to ensure the dry ingredients are evenly mixed. This is your dredging station.
-
Remove a piece of buttermilk-soaked chicken from the bowl, letting any excess buttermilk drip off. Place it into the zip-lock bag with the flour mixture.
-
Reseal the bag, trapping some air inside. Shake the bag vigorously to coat the chicken completely with the flour mixture. Repeat this process for each piece of chicken.
-
Heat about ¾ inch of oil in a heavy skillet over medium heat. The oil should shimmer but not smoke. Using a thermometer, aim for an oil temperature of 325-350°F (160-175°C). Maintaining the correct temperature is vital for crispy, non-greasy chicken.
-
Before adding the chicken to the hot oil, give each piece a final shake in the zip-lock bag to remove any excess flour.
-
Carefully place the floured chicken pieces into the hot oil, being careful not to overcrowd the skillet. Overcrowding lowers the oil temperature, resulting in soggy chicken.
-
Brown the chicken lightly on both sides, about 5-7 minutes per side. Then, reduce the heat to medium-low. This prevents the outside from burning before the inside is cooked through.
-
Continue cooking the chicken, turning frequently, until it reaches an internal temperature of 180°F (82°C) on an instant-read thermometer. Insert the thermometer into the thickest part of the chicken, avoiding the bone. Cooking time may vary slightly depending on your heat setting and the size of the chicken pieces, generally 15-20 minutes after reducing the heat.
-
Once the chicken is cooked through and golden brown, carefully remove it from the skillet using tongs and place it on a plate lined with paper towels to drain any excess oil.
Expert Tips & Tricks
- Double Dredging: For an extra crispy crust, dip the buttermilk-soaked chicken in the flour mixture, then back into the buttermilk, and then back into the flour mixture again.
- Spice It Up: Add a pinch of cayenne pepper or smoked paprika to the flour mixture for a subtle kick.
- Brining: For even more tender and flavorful chicken, brine it in a salt and sugar solution for a few hours before soaking it in buttermilk.
- Don’t overcrowd the pan: Cook in batches to maintain the oil temperature.
- Temperature is Key: Invest in a good instant-read thermometer to ensure your chicken is cooked to a safe internal temperature without being overcooked.
- Used Oil: Be sure to dispose of used cooking oil properly after its cooled. Never pour it down the drain!
Serving & Storage Suggestions
Serve your freshly fried chicken hot and crispy. It pairs perfectly with classic Southern sides like mashed potatoes, collard greens, coleslaw, macaroni and cheese, and biscuits. For a lighter meal, serve it with a fresh salad.
Leftover fried chicken can be stored in an airtight container in the refrigerator for up to 3-4 days. To reheat, preheat your oven to 350°F (175°C). Place the chicken on a baking sheet lined with parchment paper and bake for 15-20 minutes, or until heated through and crispy. You can also reheat it in an air fryer for similar results. Microwaving is not recommended, as it will make the chicken soggy. Fried chicken can be frozen for up to 2 months. Wrap it tightly in plastic wrap and then in foil before freezing. Thaw it overnight in the refrigerator before reheating.
Nutritional Information
| Nutrient | Amount per Serving | % Daily Value |
|---|---|---|
| Calories | 450 kcal | 23% |
| Total Fat | 25g | 38% |
| Saturated Fat | 8g | 40% |
| Cholesterol | 150mg | 50% |
| Sodium | 800mg | 35% |
| Total Carbohydrate | 30g | 10% |
| Dietary Fiber | 2g | 8% |
| Sugars | 5g | N/A |
| Protein | 25g | 50% |
Note: Nutritional information is an estimate and may vary based on specific ingredients and portion sizes.
Variations & Substitutions
- Gluten-Free: Use a gluten-free flour blend instead of self-rising flour. You may need to add a little extra baking powder to help with the rise.
- Spicy Chicken: Add cayenne pepper, chili powder, or hot sauce to the buttermilk marinade for a spicier kick.
- Herb-Infused: Add fresh herbs like thyme, rosemary, or sage to the flour mixture for a more complex flavor profile.
- Coconut Milk: For a dairy-free alternative, you can substitute the buttermilk with coconut milk. The slight sweetness of the coconut milk will add a unique flavor.
- Air Fryer Chicken: While it won’t be exactly the same, you can achieve a similar crispy texture by cooking the chicken in an air fryer. Preheat your air fryer to 375°F (190°C) and cook the chicken for 20-25 minutes, flipping halfway through.
FAQs (Frequently Asked Questions)
Q: What makes this fried chicken “Southern” style?
A: The use of buttermilk for marinating and self-rising flour for coating are hallmarks of classic Southern fried chicken recipes. The buttermilk tenderizes the chicken and adds a tangy flavor, while the self-rising flour creates a light and crispy crust.
Q: Why is it important to dry the chicken thoroughly before coating it?
A: Drying the chicken ensures that the flour mixture adheres properly, creating a thicker and crispier crust. Excess moisture will prevent the flour from sticking, resulting in a soggy crust.
Q: Can I use boneless, skinless chicken breasts for this recipe?
A: Yes, you can, but keep in mind that boneless, skinless chicken breasts tend to dry out more easily. Reduce the cooking time accordingly and consider pounding the chicken breasts to an even thickness before coating them.
Q: How do I know when the oil is hot enough for frying?
A: The easiest way to tell is to use a deep-fry thermometer. However, if you don’t have one, you can test the oil by dropping a small piece of flour into it. If the flour sizzles and turns golden brown in a few seconds, the oil is ready.
Q: What if my chicken is browning too quickly but isn’t cooked through?
A: Reduce the heat to medium-low to allow the chicken to cook through without burning the outside. You can also loosely cover the skillet with a lid to trap heat and speed up the cooking process.
Final Thoughts
There’s something truly special about Southern Buttermilk Fried Chicken – the satisfying crunch, the juicy meat, and the unmistakable flavor that evokes memories of family gatherings and Sunday suppers. This recipe, adapted from my own family traditions, is a testament to the simple ingredients and time-honored techniques that make this dish a culinary classic. So, gather your ingredients, preheat your skillet, and get ready to experience the magic of homemade fried chicken. Don’t be afraid to experiment with variations and make it your own. And most importantly, don’t forget to share it with the people you love. Serve it with a refreshing glass of iced tea or a crisp, dry white wine for the perfect pairing. Enjoy!