
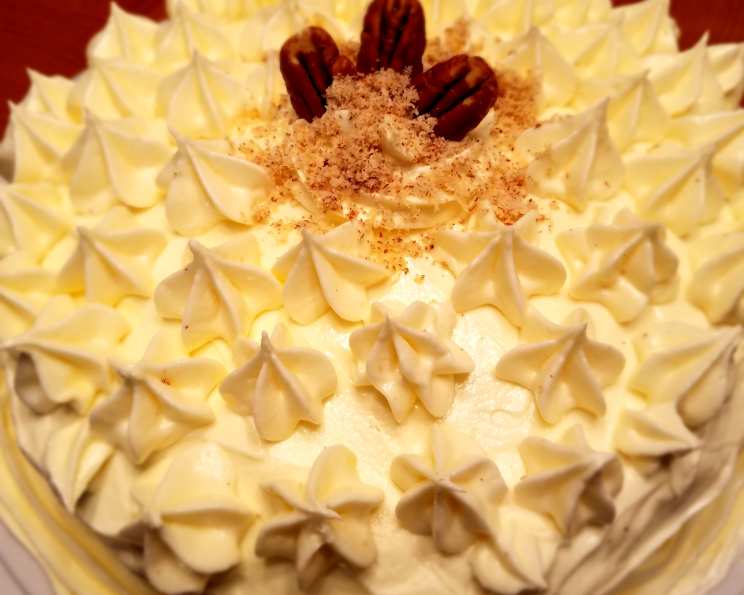
Southern Red Velvet Cake: A Culinary Classic
My grandmother’s Red Velvet Cake was legendary. Not just because of its striking crimson hue, but because it tasted like a warm hug on a cold day. I remember standing on a stool in her kitchen, mesmerized as she carefully layered the cake with creamy frosting, a sprinkle of pecans adding the final touch. The aroma of vanilla and cocoa would fill the air, promising a slice of pure comfort and joy. It’s a taste I’ve chased in every bakery, every restaurant – and now, I share her (almost) exact recipe.
Recipe Overview
- Prep Time: 30 minutes
- Cook Time: 30 minutes
- Total Time: 1 hour
- Servings: 6-8
- Yield: 1 three-layer cake
- Dietary Type: Not specified
Ingredients
- Vegetable oil, for the pans
- 2 1/2 cups all-purpose flour
- 1 1/2 cups sugar
- 1 teaspoon baking soda
- 1 teaspoon salt
- 1 teaspoon cocoa powder
- 1 1/2 cups vegetable oil
- 1 cup buttermilk, at room temperature
- 2 large eggs, at room temperature
- 2 tablespoons red food coloring (1oz)
- 1 teaspoon white distilled vinegar
- 1 teaspoon vanilla extract
Cream Cheese Frosting
- 1 lb cream cheese, softened
- 4 cups sifted confectioners’ sugar
- 1 cup unsalted butter, softened
- 1 teaspoon vanilla extract
Garnish
- Crushed pecans (optional)
Equipment Needed
- 3 (9 x 1 1/2-inch) round cake pans
- Large mixing bowls
- Standing mixer or hand-held electric mixer
- Rubber spatula
- Whisk
- Palette knife or offset spatula
- Rotating cake stand (optional, but recommended)
- Cooling rack
Instructions
-
Preheat your oven to 350 degrees F (175 degrees C). This is crucial for even baking and a moist crumb. Lightly oil and flour 3 (9 by 1 1/2-inch round) cake pans. This will ensure that your cakes release easily after baking. Don’t skimp on this step!
-
In a large bowl, sift together the flour, sugar, baking soda, salt, and cocoa powder. Sifting is important to remove any lumps and aerate the dry ingredients, resulting in a lighter cake.
-
In another large bowl, whisk together the oil, buttermilk, eggs, food coloring, vinegar, and vanilla. Ensure the buttermilk and eggs are at room temperature; this helps them emulsify properly with the other ingredients, creating a smoother batter.
-
Using a standing mixer (with the paddle attachment) or a hand-held electric mixer, gradually mix the dry ingredients into the wet ingredients until just combined and a smooth batter is formed. Be careful not to overmix, as this can develop the gluten in the flour and result in a tough cake.
-
Divide the cake batter evenly among the prepared cake pans. I recommend using a kitchen scale to ensure each pan receives the same amount of batter, which will lead to even baking.
-
Place the pans in the oven evenly spaced apart. Bake, rotating the pans halfway through the cooking time, until the cake pulls away from the side of the pans, and a toothpick inserted in the center of the cakes comes out clean, about 30 minutes. Start checking for doneness around the 25-minute mark, as oven temperatures can vary.
-
Remove the cakes from the oven and run a knife around the edges to loosen them from the sides of the pans. One at a time, invert the cakes onto a plate and then re-invert them onto a cooling rack, rounded-sides up. Let cool completely before frosting. This is essential! Frosting a warm cake will melt the frosting and create a mess.
-
Prepare the Cream Cheese Frosting: In a standing mixer fitted with the paddle attachment, or with a hand-held electric mixer in a large bowl, mix the cream cheese, sugar, and butter on low speed until incorporated. Increase the speed to high, and mix until light and fluffy, about 5 minutes. Occasionally turn the mixer off, and scrape down the sides of the bowl with a rubber spatula to ensure everything is evenly incorporated.
-
Reduce the speed of the mixer to low. Add the vanilla, raise the speed to high and mix briefly until fluffy (scrape down the bowl occasionally). Store in the refrigerator until somewhat stiff, before using. This will make it easier to spread. The frosting may be stored in the refrigerator for up to 3 days.
-
Frost the cake: Place 1 layer, rounded-side down, in the middle of a rotating cake stand (if using). Using a palette knife or offset spatula, spread some of the cream cheese frosting over the top of the cake. Spread enough frosting to make a 1/4 to 1/2-inch layer.
-
Carefully set another layer on top, rounded-side down, and repeat. Top with the remaining layer and cover the entire cake with the remaining frosting.
-
Sprinkle the top with the pecans (optional).
Expert Tips & Tricks
- Buttermilk Substitute: If you don’t have buttermilk, you can make a quick substitute by adding 1 tablespoon of white vinegar or lemon juice to a liquid measuring cup, then filling the cup to the 1-cup line with milk. Let it stand for 5 minutes before using.
- Cake Flour: For an even more tender cake, substitute 1/2 cup of the all-purpose flour with cake flour.
- Red Food Coloring: Gel food coloring provides a more intense color with less liquid than liquid food coloring.
- Leveling Cakes: If your cake layers are uneven, use a serrated knife to level them before frosting.
- Crumb Coat: Apply a thin layer of frosting over the entire cake (a “crumb coat”) to trap any loose crumbs. Chill the cake for 15-20 minutes before applying the final layer of frosting. This prevents crumbs from getting mixed into your frosting.
- Make-Ahead: The cake layers can be baked and stored, well-wrapped, in the refrigerator for up to 2 days, or in the freezer for up to 1 month. Thaw completely before frosting.
Serving & Storage Suggestions
Serve the Red Velvet Cake chilled or at room temperature. For an elegant presentation, garnish with fresh berries or a dusting of cocoa powder in addition to the pecans.
Store leftover cake in an airtight container in the refrigerator for up to 3 days. The cake can also be frozen for up to 2 months. Thaw in the refrigerator overnight before serving. It is best to freeze the cake unfrosted.
Nutritional Information
Please note that these are estimates and can vary based on specific ingredient brands and preparation methods.
| Nutrient | Amount per Serving | % Daily Value |
|---|---|---|
| Calories | 1751.4 kcal | N/A |
| Calories from Fat | 1022 g | 58% |
| Total Fat | 113.6 g | 174% |
| Saturated Fat | 42 g | 209% |
| Cholesterol | 228.3 mg | 76% |
| Sodium | 914.5 mg | 38% |
| Total Carbohydrate | 175.1 g | 58% |
| Dietary Fiber | 1.5 g | 6% |
| Sugars | 132.9 g | 531% |
| Protein | 13.7 g | 27% |
Variations & Substitutions
- Chocolate Red Velvet: Add 2 ounces of melted and cooled unsweetened chocolate to the batter for a richer chocolate flavor.
- Spiced Red Velvet: Add 1/2 teaspoon of ground cinnamon and 1/4 teaspoon of ground nutmeg to the dry ingredients for a warm, spiced version.
- Gluten-Free Red Velvet: Substitute the all-purpose flour with a gluten-free all-purpose flour blend. Be sure to add 1 teaspoon of xanthan gum to the dry ingredients for binding.
- Vegan Red Velvet: Replace the buttermilk with non-dairy buttermilk (made by adding 1 tablespoon of apple cider vinegar to non-dairy milk). Use a flax egg (1 tablespoon of ground flaxseed mixed with 3 tablespoons of water, let sit for 5 minutes) in place of each egg. Use a vegan cream cheese and vegan butter for the frosting.
FAQs (Frequently Asked Questions)
Q: Why is vinegar used in Red Velvet Cake?
A: The vinegar helps to tenderize the cake and enhance the flavor of the cocoa powder, creating a subtle tang. It also reacts with the baking soda to create a light and airy texture.
Q: Can I use a different type of frosting?
A: Absolutely! While cream cheese frosting is traditional, you can also use a classic buttercream, chocolate frosting, or even a whipped cream frosting.
Q: Why is my Red Velvet Cake dry?
A: Overbaking is the most common cause of dry cake. Make sure to check for doneness with a toothpick, and avoid overmixing the batter.
Q: Can I make this cake ahead of time?
A: Yes, the cake layers can be baked a day or two in advance and stored in the refrigerator, well-wrapped. The frosting can also be made ahead and stored in the refrigerator.
Q: What makes this cake red?
A: The red color traditionally comes from a reaction between the cocoa powder and acidic ingredients like buttermilk and vinegar, although modern recipes typically use red food coloring to enhance the color.
Final Thoughts
Now it’s your turn to create a slice of heaven! Don’t be intimidated by the list of ingredients – each one plays a crucial role in creating the unique flavor and texture of a true Southern Red Velvet Cake. Bake this for a special occasion, or simply to brighten someone’s day. And most importantly, don’t forget to share the love (and the recipe) with your friends and family! Share your baking results and any adaptations in the comments, so we can all learn from each other. Pair with a strong cup of coffee or a glass of sweet tea for the ultimate Southern indulgence. Happy baking!