
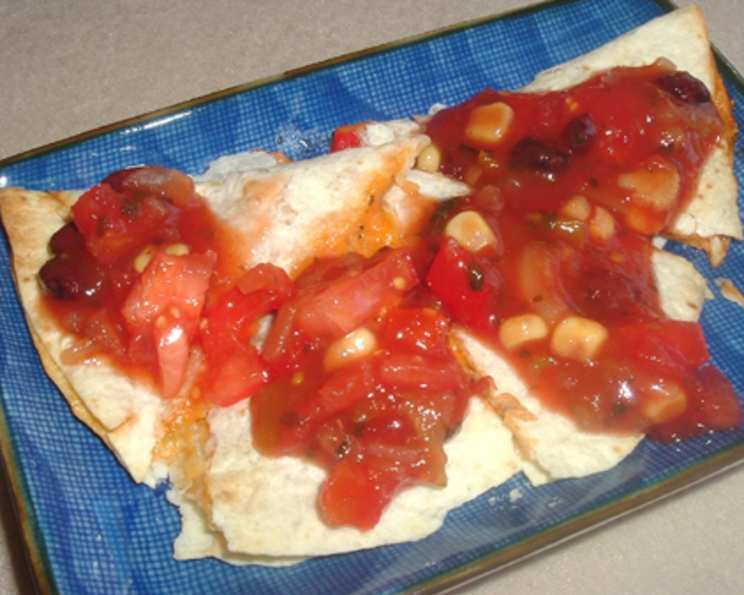
Southwest Chicken Quesadillas: A Taste of the Sun
I remember my first visit to Santa Fe like it was yesterday. The earthy aroma of roasting chiles hung in the air, weaving its way through the vibrant colors of the local market. Every corner held a new culinary adventure, but it was the humble quesadilla, bursting with Southwestern flavors, that truly captured my heart. It was more than just a snack; it was a taste of the landscape, a warm embrace of the culture. These quesadillas evoke those memories, bringing the sunshine and spice of the Southwest right into my kitchen.
Recipe Overview
- Prep Time: 15 minutes
- Cook Time: 10 minutes
- Total Time: 25 minutes
- Servings: 4
- Dietary Type: Adaptable
Ingredients
- 1 cup cooked chicken, finely shredded
- 1/2 cup salsa, plus additional for serving
- 1/4 teaspoon salt
- 1/4 teaspoon fresh ground black pepper
- 2 tablespoons mayonnaise
- 2 teaspoons chili powder
- 8 (8 inch) flour tortillas
- 1 1/2 cups jalapeno jack cheese or 1 1/2 cups monterey jack cheese, shredded
- 8 sprigs fresh cilantro, minced
- Sour cream, if desired, for topping
Equipment Needed
- 2 Baking Sheets
- Heavy-Duty Aluminum Foil
- Medium Mixing Bowl
- Spatula
Instructions
- Preheat your oven to 450°F (232°C). This high heat ensures the tortillas get nice and crispy.
- Line two baking sheets with heavy-duty aluminum foil. Don’t skip this step – it makes cleanup a breeze.
- Spray the foil-lined baking sheets with Crisco No-Stick Cooking Spray. This prevents the quesadillas from sticking and helps them achieve a beautiful golden-brown color.
- In a medium mixing bowl, combine the shredded chicken, salsa, salt, pepper, mayonnaise, chili powder, and minced cilantro. Mix well until all ingredients are evenly distributed. This is your flavorful Southwestern filling. The mayonnaise might seem unusual, but it adds moisture and richness to the chicken mixture.
- Arrange 4 of the flour tortillas on the prepared baking sheets. Make sure they are evenly spaced to allow for proper air circulation.
- Top each tortilla with the chicken mixture, spreading it evenly across the surface. Be generous, but avoid overfilling, as this can make the quesadillas difficult to handle.
- Sprinkle the shredded cheese (either jalapeno jack or monterey jack) evenly over the chicken mixture. The cheese will melt beautifully, binding the filling together.
- Top with the remaining 4 tortillas, pressing closed gently. This helps the quesadillas stay intact during baking.
- Bake for 5 minutes.
- Remove the baking sheets from the oven. Using a spatula, carefully turn the quesadillas over. This ensures even browning on both sides.
- Return to the oven and bake for 5 minutes more, or until the tortillas are golden brown and the cheese is melted and bubbly. Keep a close eye on them, as baking times may vary depending on your oven.
- Let the quesadillas stand for 2 minutes before cutting. This allows the cheese to set slightly, making them easier to cut and serve.
- Cut each quesadilla into quarters. This makes them perfect for sharing or for individual servings.
- Serve immediately with additional salsa and sour cream, if desired. A dollop of guacamole would also be a fantastic addition!
Expert Tips & Tricks
- Spice it up: For an extra kick, add a pinch of cayenne pepper or a dash of hot sauce to the chicken mixture.
- Make it vegetarian: Substitute the chicken with black beans, corn, and bell peppers for a delicious vegetarian option.
- Crispy tortillas: For even crispier tortillas, brush them lightly with melted butter or olive oil before baking.
- Cheese variations: Experiment with different types of cheese, such as pepper jack, cheddar, or Oaxaca cheese.
- Make ahead: The chicken mixture can be prepared ahead of time and stored in the refrigerator for up to 2 days. This makes quesadillas a quick and easy weeknight meal.
Serving & Storage Suggestions
Serve these quesadillas immediately while they are hot and the cheese is melted and gooey. Garnish with a sprinkle of fresh cilantro and a dollop of sour cream or guacamole. For a more substantial meal, serve alongside a side salad or a bowl of black bean soup.
Leftover quesadillas can be stored in an airtight container in the refrigerator for up to 3 days. Reheat them in a skillet over medium heat or in a microwave until heated through. For best results, reheat in a skillet to maintain the crispy texture of the tortillas.
While these quesadillas are best enjoyed fresh, they can also be frozen for longer storage. To freeze, wrap each quesadilla individually in plastic wrap and then place them in a freezer-safe bag or container. They can be stored in the freezer for up to 2 months. To reheat, thaw the quesadillas in the refrigerator overnight and then reheat as described above.
Nutritional Information
| Nutrient | Amount per Serving | % Daily Value |
|---|---|---|
| Calories | 608.8 kcal | N/A |
| Calories from Fat | 239 g | 39% |
| Total Fat | 26.6 g | 40% |
| Saturated Fat | 11.2 g | 56% |
| Cholesterol | 65.9 mg | 21% |
| Sodium | 1372.8 mg | 57% |
| Total Carbohydrate | 62.5 g | 20% |
| Dietary Fiber | 4.6 g | 18% |
| Sugars | 4 g | 15% |
| Protein | 29.2 g | 58% |
Note: Nutritional information is an estimate and may vary based on specific ingredients and portion sizes.
Variations & Substitutions
- Gluten-Free: Use gluten-free tortillas for a gluten-free version of this recipe.
- Dairy-Free: Substitute the cheese with a dairy-free cheese alternative. Ensure the mayonnaise is also dairy-free.
- Spicy Chicken: Marinate the chicken in a spicy chipotle marinade before cooking for an extra kick of flavor.
- Southwestern Veggie: Add diced bell peppers, corn, and black beans to the chicken mixture for a heartier and more colorful quesadilla.
- Breakfast Quesadillas: Scramble some eggs and add them to the filling for a delicious breakfast quesadilla.
FAQs (Frequently Asked Questions)
Q: Can I use rotisserie chicken for this recipe?
A: Absolutely! Rotisserie chicken is a great shortcut for this recipe. Simply shred the chicken and use it in the filling.
Q: Can I make these quesadillas in a skillet instead of baking them?
A: Yes, you can. Heat a skillet over medium heat, add a small amount of oil, and cook the quesadillas for a few minutes per side until golden brown and the cheese is melted.
Q: Can I use different types of salsa?
A: Definitely! Experiment with different types of salsa to customize the flavor of your quesadillas. Mild, medium, or hot salsa all work well.
Q: Can I add other vegetables to the filling?
A: Yes, feel free to add other vegetables such as diced onions, bell peppers, or corn to the filling.
Q: How do I prevent the tortillas from getting soggy?
A: Make sure to not overfill the quesadillas and bake them at a high temperature to ensure the tortillas get crispy. Also, avoid adding too much moisture to the filling.
Final Thoughts
These Southwest Chicken Quesadillas are a versatile and delicious dish that is perfect for any occasion. Whether you’re looking for a quick and easy weeknight meal or a crowd-pleasing appetizer, these quesadillas are sure to be a hit. So, gather your ingredients, fire up your oven, and get ready to enjoy a taste of the Southwest! I encourage you to give this recipe a try and let me know what you think. And don’t be afraid to experiment with different variations and substitutions to create your own signature quesadilla. Happy cooking!