
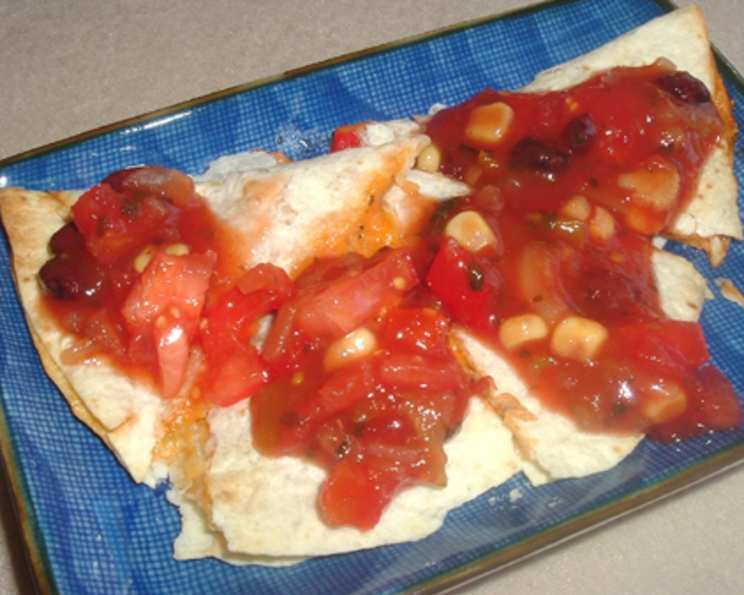
Southwest Chicken Quesadillas: A Taste of Sunshine
I can still recall the aroma that filled my tiny apartment kitchen the first time I made these quesadillas. It was a chilly autumn evening, and the spicy scent of chili powder mingled with the comforting aroma of melting cheese created the most wonderful atmosphere. As a broke college student, it was an inexpensive yet delicious way to treat myself, a little pocket of sunshine in a busy week. Now, years later, I still crave that same comforting taste, and I’m delighted to share this simple, satisfying recipe with you.
Recipe Overview
- Prep Time: 10 minutes
- Cook Time: 10 minutes
- Total Time: 20 minutes
- Servings: 4
- Dietary Type: Adaptable (see variations)
Ingredients
- 1 cup cooked chicken, finely shredded
- 1/2 cup salsa, plus additional for serving
- 1/4 teaspoon salt
- 1/4 teaspoon fresh ground black pepper
- 2 tablespoons mayonnaise
- 2 teaspoons chili powder
- 8 (8 inch) flour tortillas
- 1 1/2 cups jalapeno jack cheese or 1 1/2 cups monterey jack cheese, shredded
- 8 sprigs fresh cilantro, minced
- Sour cream, if desired, for topping
Equipment Needed
- 2 Baking Sheets
- Heavy-duty aluminum foil
- Medium Mixing Bowl
- Spatula
Instructions
-
Preheat your oven to 450°F. Line two baking sheets with heavy-duty aluminum foil. Spray the foil generously with non-stick cooking spray; this will ensure your quesadillas don’t stick and brown evenly.
-
In a medium mixing bowl, combine the shredded cooked chicken, salsa, salt, pepper, mayonnaise, chili powder, and minced cilantro. Mix well until all ingredients are evenly distributed. This mixture is the heart and soul of your quesadillas, so give it a good stir!
-
Arrange 4 tortillas on the prepared baking sheets. Spread the chicken mixture evenly over the tortillas, leaving a little room around the edges. Try not to overload them, as it will make them harder to fold and bake.
-
Sprinkle the shredded jalapeno jack cheese or monterey jack cheese evenly over the chicken mixture. The cheese will melt and bind everything together, creating that irresistible cheesy pull.
-
Top each quesadilla with the remaining 4 tortillas. Gently press closed to help seal the quesadillas. This will prevent the filling from spilling out during baking.
-
Bake for 5 minutes. Remove the baking sheets from the oven.
-
Carefully turn each quesadilla with a spatula. Be gentle so you don’t tear the tortilla. This ensures even browning on both sides.
-
Return the baking sheets to the oven and bake for 5 minutes more, or until the quesadillas are browned and the cheese is melted and bubbly. Keep a close eye on them towards the end to prevent burning.
-
Let the quesadillas stand for 2 minutes before cutting them. This allows the cheese to cool slightly and the filling to set, making them easier to handle.
-
Cut each quesadilla into quarters and serve immediately. Garnish with additional salsa and sour cream, if desired.
Expert Tips & Tricks
- Chicken Prep Shortcut: Use rotisserie chicken for an even quicker prep time. Simply shred the meat and you’re ready to go.
- Cheese Perfection: For a more intense flavor, try a blend of cheeses like cheddar, pepper jack, and Oaxaca.
- Spice Level Adjustment: Adjust the amount of chili powder to your preference. For a milder flavor, use less; for a spicier kick, use more or add a pinch of cayenne pepper.
- Crispy Tortillas: Brushing the tortillas with a little melted butter or olive oil before baking can enhance their crispiness.
- Make Ahead: Prepare the chicken mixture in advance and store it in the refrigerator for up to 24 hours. This makes assembly even faster when you’re ready to bake.
Serving & Storage Suggestions
Serve these quesadillas hot off the baking sheet for the best flavor and texture. The melted cheese and warm filling are simply irresistible. Offer a variety of toppings, such as salsa, sour cream, guacamole, and chopped tomatoes, so everyone can customize their quesadillas.
Leftovers can be stored in an airtight container in the refrigerator for up to 3 days. To reheat, bake in a preheated oven at 350°F (175°C) for about 10 minutes, or until heated through. You can also reheat them in a skillet over medium heat, flipping occasionally, until warm and crispy. Microwaving is an option, but the tortillas may become slightly soggy. They are best when eaten fresh, so try to consume them soon after making.
Nutritional Information
| Nutrient | Amount per Serving | % Daily Value |
|---|---|---|
| Calories | 608.8 kcal | N/A |
| Calories from Fat | 239 g | 39% |
| Total Fat | 26.6 g | 40% |
| Saturated Fat | 11.2 g | 56% |
| Cholesterol | 65.9 mg | 21% |
| Sodium | 1372.8 mg | 57% |
| Total Carbohydrate | 62.5 g | 20% |
| Dietary Fiber | 4.6 g | 18% |
| Sugars | 4 g | N/A |
| Protein | 29.2 g | 58% |
Note: Nutritional information is an estimate and may vary based on specific ingredients and portion sizes.
Variations & Substitutions
- Gluten-Free: Use gluten-free tortillas for a gluten-free version.
- Vegetarian: Substitute the chicken with black beans, pinto beans, or a mix of roasted vegetables like corn, bell peppers, and zucchini.
- Vegan: Replace the chicken with plant-based chicken substitute, use vegan mayonnaise, and substitute the cheese with your favorite dairy-free shredded cheese.
- Spicier: Add diced jalapenos, a dash of hot sauce, or a pinch of cayenne pepper to the chicken mixture for extra heat.
- Different Cheese: Experiment with other cheeses like pepper jack, cheddar, or a Mexican cheese blend.
- Extra Veggies: Add diced onions, bell peppers, or tomatoes to the chicken mixture for added flavor and nutrients.
FAQs (Frequently Asked Questions)
Q: Can I use different types of salsa?
A: Absolutely! Feel free to use your favorite type of salsa, whether it’s mild, medium, hot, or even a fruit salsa for a sweeter twist.
Q: Can I grill these quesadillas instead of baking them?
A: Yes, you can grill them! Grill over medium heat for about 3-4 minutes per side, or until the tortillas are golden brown and the cheese is melted.
Q: How can I prevent the tortillas from getting soggy?
A: Avoid overfilling the quesadillas and make sure the baking sheet is well-greased. Baking them at a high temperature also helps to crisp the tortillas.
Q: Can I freeze these quesadillas?
A: Yes, you can freeze them after they’ve been baked and cooled. Wrap them individually in plastic wrap and then place them in a freezer bag. They can be stored in the freezer for up to 2 months. Reheat in the oven until warmed through.
Q: What’s the best way to keep the quesadillas warm if I’m serving them at a party?
A: Keep them warm in a preheated oven at a low temperature (around 200°F) or in a warming drawer. You can also use a slow cooker on the “warm” setting, but be sure to place a layer of paper towels underneath to absorb any excess moisture.
Final Thoughts
These Southwest Chicken Quesadillas are more than just a simple recipe; they’re a passport to a warm, flavorful escape. I encourage you to gather your ingredients, preheat your oven, and embark on this delicious adventure. Don’t hesitate to experiment with different variations and make it your own! Feel free to share your feedback and experiences with this recipe – I’d love to hear how it turns out for you. Consider pairing it with a refreshing margarita or a crisp Mexican beer for the ultimate fiesta! Enjoy!