
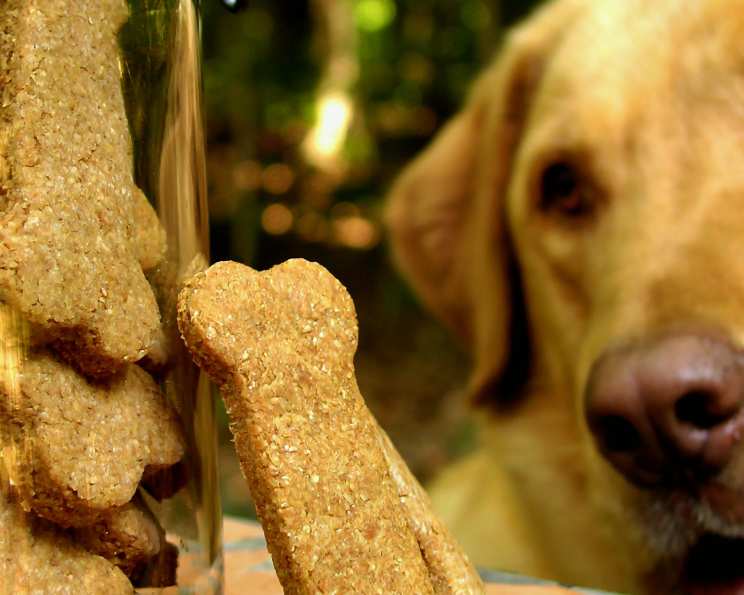
Special Occasion Dog Bones / Biscuits: A Tail-Wagging Treat
My old golden retriever, Buddy, wasn’t just a pet; he was family. Every year on his birthday, instead of store-bought treats, I’d bake him a batch of these special dog biscuits. The aroma of peanut butter and warm flour would fill the kitchen, and Buddy would sit patiently, tail thumping a steady rhythm against the floor, his eyes glued to the oven. It wasn’t just a biscuit; it was a symbol of our bond, a testament to the unconditional love he gave me every single day, and seeing him devour one always filled me with joy.
Recipe Overview
- Prep Time: 15 minutes
- Cook Time: 20 minutes
- Total Time: 35 minutes
- Servings: Varies
- Yield: Approximately 18 biscuits, depending on size of cookie cutters
- Dietary Type: Suitable for most dogs, consult your vet if your dog has specific dietary restrictions or allergies.
Ingredients
- 2 cups whole wheat flour
- 1 tablespoon baking powder
- 1 cup unsalted natural-style peanut butter
- 1 cup skim milk
- 1 tablespoon brown sugar
Equipment Needed
- Large mixing bowl
- Medium mixing bowl
- Cookie sheets
- Measuring cups and spoons
- Rolling pin
- Cookie cutters (bone-shaped, people-shaped, or any desired shape)
- Wire racks
Instructions
- Preheat your oven to 375 degrees F (190 degrees C). Lightly grease your cookie sheets to prevent sticking.
- In a large mixing bowl, whisk together the whole wheat flour and baking powder. This ensures the baking powder is evenly distributed, helping the biscuits rise slightly. Set aside this dry ingredient mixture.
- In a medium bowl, combine the unsalted natural-style peanut butter, skim milk, and brown sugar. Use a sturdy spoon or spatula to mix these ingredients together until they are well combined and relatively smooth. The brown sugar adds a touch of sweetness that dogs seem to love.
- Gradually add the dry ingredient mixture (the flour and baking powder) to the wet ingredient mixture (peanut butter, milk, and brown sugar). Stir until the dough is well blended. The dough will be quite thick and may require some effort to mix thoroughly.
- Lightly flour a clean, flat surface, such as a countertop or cutting board. Turn the dough out onto this floured surface. Knead the dough gently until it forms a smooth ball. Kneading helps to develop the gluten in the flour, which will give the biscuits a slightly firmer texture. Be careful not to over-knead, as this can make the biscuits tough.
- Using a rolling pin, roll out the dough to a thickness of approximately 1/4 inch. Aim for a uniform thickness so that the biscuits bake evenly.
- Use your favorite cookie cutters to cut the dough into shapes. Bone-shaped cutters are classic, but you can use any shape you like, such as people, stars, or even simple circles.
- Place the cut-out biscuit shapes onto the prepared cookie sheets, spacing them about 2 inches apart. This allows for proper air circulation and prevents the biscuits from sticking together during baking.
- Bake in the preheated oven for approximately 20 minutes, or until the biscuits are lightly brown. The baking time may vary slightly depending on your oven, so keep a close eye on them.
- Remove the cookie sheets from the oven and transfer the biscuits to wire racks to cool completely. This prevents them from becoming soggy.
Expert Tips & Tricks
- Choose the right peanut butter: Always use unsalted, natural-style peanut butter that does not contain xylitol, which is toxic to dogs. Check the ingredient list carefully.
- Customize the flavor: Add a pinch of cinnamon or a tablespoon of chopped parsley to the dough for added flavor and health benefits.
- Adjust the consistency: If the dough is too dry, add a little more milk, one tablespoon at a time, until it reaches the desired consistency. If it’s too sticky, add a little more flour.
- Make ahead: The dough can be made ahead of time and stored in the refrigerator for up to 2 days. Let it come to room temperature before rolling out.
- Prevent burning: If the bottoms of the biscuits are browning too quickly, place another cookie sheet underneath the baking sheet to insulate them from the direct heat.
Serving & Storage Suggestions
Allow the biscuits to cool completely before serving them to your dog. These treats are best given in moderation as part of a balanced diet.
- Storage: Store the cooled biscuits in an airtight container at room temperature for up to a week, or in the refrigerator for up to two weeks. For longer storage, freeze them in a freezer-safe bag or container for up to three months.
- Serving: Serve as a reward, training treat, or special snack. Always supervise your dog while they are eating, and ensure they have access to fresh water.
- Reheating (if frozen): Thaw the biscuits at room temperature before serving. You can also warm them slightly in the oven or microwave for a few seconds to enhance their aroma.
Nutritional Information
Please note that these values are estimates and may vary based on specific ingredients and portion sizes.
| Nutrient | Amount per Serving | % Daily Value (Dog) |
|---|---|---|
| Calories | 54 kcal | Varies |
| Total Fat | 3g | Varies |
| Saturated Fat | 0.1g | Varies |
| Cholesterol | 0.3mg | Varies |
| Sodium | 69mg | Varies |
| Total Carbohydrate | 11g | Varies |
| Dietary Fiber | 1.4g | Varies |
| Sugars | 0.8g | Varies |
| Protein | 2.3g | Varies |
Note: Daily values for dogs vary greatly depending on size, breed, age, and activity level. Consult your veterinarian for specific nutritional recommendations.
Variations & Substitutions
- Gluten-Free: Substitute the whole wheat flour with a gluten-free blend specifically formulated for baking. Be sure to check that all ingredients are gluten-free.
- Dairy-Free: While the recipe calls for skim milk, you can easily substitute it with unsweetened almond milk, oat milk, or even water.
- Flavor Boost: Add a tablespoon of unsweetened applesauce or pumpkin puree to the dough for added moisture and flavor.
- Savory Biscuits: Omit the brown sugar and add a pinch of garlic powder or dried rosemary for a savory twist.
FAQs (Frequently Asked Questions)
Q: Are these biscuits safe for all dogs?
A: While the ingredients are generally safe for most dogs, it’s always best to consult with your veterinarian before introducing new foods into your dog’s diet, especially if they have any allergies or health concerns.
Q: Can I use regular peanut butter instead of natural-style peanut butter?
A: It’s best to use unsalted, natural-style peanut butter to avoid added sugars, salt, and potentially harmful additives like xylitol.
Q: How long will these biscuits stay fresh?
A: When stored properly in an airtight container, these biscuits will stay fresh for up to a week at room temperature, two weeks in the refrigerator, or three months in the freezer.
Q: Can I add other ingredients to the dough?
A: Yes, you can customize the recipe by adding small amounts of other dog-friendly ingredients, such as shredded carrots, cooked sweet potato, or flaxseed meal.
Q: What if my dog is allergic to wheat?
A: Substitute the whole wheat flour with a gluten-free flour blend. Ensure that all other ingredients are also gluten-free to accommodate your dog’s dietary needs.
Final Thoughts
These special occasion dog bones are more than just a treat; they’re a way to show your furry friend how much you care. The simple act of baking something homemade, filled with wholesome ingredients and love, creates a unique bond that store-bought treats simply can’t replicate. Don’t be afraid to experiment with different shapes, flavors, and variations to create a treat that your dog will absolutely adore. So, preheat that oven, gather your ingredients, and get ready to make some tail-wagging magic in your kitchen! Happy baking!