
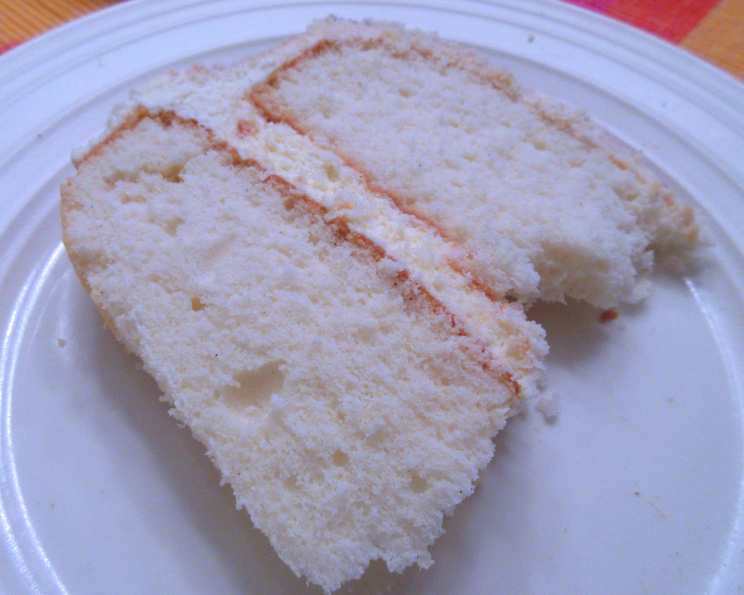
The Quintessential Special-Occasion White Cake
There’s something undeniably magical about a perfectly baked white cake. For me, it instantly transports me back to childhood birthday parties. I remember the hushed anticipation as the cake, adorned with brightly colored candles, was carried into the room. The sweet scent of vanilla and almond filled the air, promising joy and celebration. More than just a dessert, it was a centerpiece of happiness.
Recipe Overview
- Prep Time: 30 minutes
- Cook Time: 20-25 minutes
- Total Time: 2 hours 10 minutes
- Servings: 14-16
- Yield: One 2-layer cake
- Dietary Type: Not specified (contains dairy and eggs)
Ingredients
- 3/4 cup shortening
- 1 1/2 cups sugar
- 1/2 teaspoon vanilla extract
- 1/2 teaspoon almond extract
- 2 1/2 cups cake flour
- 2 teaspoons baking powder
- 1/4 teaspoon salt
- 1 cup cold water
- 4 egg whites
For the Frosting:
- 2 cups shortening
- 6 cups confectioners’ sugar
- 1 teaspoon almond extract
- 1 teaspoon vanilla extract
- 1/4 teaspoon salt
- 2-3 tablespoons milk
Equipment Needed
- Large mixing bowl
- Electric mixer
- Measuring cups and spoons
- Two 9-inch round baking pans
- Spatula
- Wire racks
Instructions
-
Preheat your oven to 350°F (175°C). This is crucial for even baking.
-
Prepare your baking pans: Grease and flour two 9-inch round baking pans. This prevents the cake from sticking and ensures easy removal. A light dusting of flour after greasing is key.
-
Cream Together: In a large mixing bowl, cream together 3/4 cup of shortening and 1 1/2 cups of sugar until the mixture is light and fluffy. This process incorporates air, which contributes to the cake’s tender texture. Use an electric mixer on medium speed and allow at least 5 minutes for proper creaming.
-
Add Extracts: Beat in 1/2 teaspoon of vanilla extract and 1/2 teaspoon of almond extract. These extracts enhance the flavor profile and add a touch of sophistication. Don’t skip this step!
-
Combine Dry Ingredients: In a separate bowl, whisk together 2 1/2 cups of cake flour, 2 teaspoons of baking powder, and 1/4 teaspoon of salt. Whisking ensures the ingredients are evenly distributed, preventing lumps and ensuring a consistent rise.
-
Alternate Wet and Dry: Gradually add the dry ingredients to the creamed mixture, alternating with 1 cup of cold water. Begin and end with the dry ingredients. Beat just until combined. Overmixing can develop the gluten in the flour, resulting in a tough cake. Be gentle and patient.
-
Whip Egg Whites: In another mixing bowl (make sure it’s clean and dry!), beat 4 egg whites on high speed until stiff peaks form. Stiff peaks mean the egg whites hold their shape when the beaters are lifted.
-
Fold in Egg Whites: Gently fold the beaten egg whites into the batter. This step is crucial for creating a light and airy cake. Use a spatula and avoid overmixing; gently cut and fold until just combined.
-
Pour into Pans: Divide the batter evenly between the prepared baking pans. An easy way to ensure even layers is to weigh the batter in each pan.
-
Bake: Bake at 350°F (175°C) for 20-25 minutes, or until a toothpick inserted into the center comes out clean. Baking times can vary depending on your oven. Start checking for doneness around 20 minutes. If the top is browning too quickly, tent the pans loosely with foil.
-
Cool: Cool the cakes in the pans for 10 minutes before inverting them onto wire racks to cool completely. This prevents the cakes from sticking and allows them to retain their shape.
-
Prepare Frosting: While the cakes are cooling, prepare the frosting. In a large mixing bowl, beat 2 cups of shortening, 6 cups of confectioners’ sugar, 1 teaspoon of almond extract, 1 teaspoon of vanilla extract, and 1/4 teaspoon of salt until light and fluffy. Again, using an electric mixer will make this process easier.
-
Adjust Consistency: Add 2-3 tablespoons of milk, one tablespoon at a time, until you achieve your desired frosting consistency. You may need more or less milk depending on the humidity.
-
Assemble the Cake: Place one cooled cake layer on a serving plate. Spread with 1 cup of frosting.
-
Top and Frost: Top with the remaining cake layer. Spread the remaining frosting over the top and sides of the cake.
Expert Tips & Tricks
-
Room Temperature Ingredients: While the recipe calls for cold water, ensuring your shortening is at room temperature will help create a smoother, more cohesive batter.
-
Cake Flour is Key: Don’t substitute all-purpose flour for cake flour. Cake flour has a lower protein content, which results in a more tender cake.
-
Don’t Overbake: Overbaking is the enemy of a moist cake. Use a toothpick to check for doneness, and remove the cake from the oven as soon as the toothpick comes out clean or with just a few moist crumbs attached.
-
Level the Layers: If your cake layers are uneven, use a serrated knife to level them before frosting. This will create a more professional-looking cake.
-
Crumb Coat: Before applying the final layer of frosting, apply a thin “crumb coat” to seal in any loose crumbs. Chill the cake for 15-20 minutes before applying the final frosting layer.
-
Frosting Consistency: Adjust the amount of milk in the frosting to achieve your desired consistency. For a smoother frosting, beat it for a few extra minutes.
Serving & Storage Suggestions
Serve this beautiful white cake as the centerpiece of any special occasion. It pairs perfectly with fresh berries or a scoop of vanilla ice cream.
Store leftover cake in an airtight container at room temperature for up to 3 days, or in the refrigerator for up to a week. For longer storage, wrap individual slices tightly in plastic wrap and freeze for up to 2 months. Thaw in the refrigerator before serving.
Nutritional Information
| Nutrient | Amount per Serving | % Daily Value |
|---|---|---|
| Calories | 736.3 kcal | N/A |
| Calories from Fat | 365 g | 50% |
| Total Fat | 40.6 g | 62% |
| Saturated Fat | 10.2 g | 50% |
| Cholesterol | 0.3 mg | 0% |
| Sodium | 153.1 mg | 6% |
| Total Carbohydrate | 92.2 g | 30% |
| Dietary Fiber | 0.4 g | 1% |
| Sugars | 72 g | 288% |
| Protein | 3.1 g | 6% |
Note: Daily values are based on a 2,000 calorie diet.
Variations & Substitutions
-
Lemon Zest: Add the zest of one lemon to the batter for a bright, citrusy twist.
-
Almond Extract Boost: Increase the amount of almond extract for a more pronounced almond flavor.
-
Different Extracts: Experiment with other extracts, such as orange or coconut.
-
Sprinkles: Decorate the cake with your favorite sprinkles for a festive touch.
-
Fillings: Add a layer of fruit preserves or cream filling between the cake layers.
-
Vegan Adaptation: This recipe is challenging to make truly vegan without significant changes, but you can experiment with egg-replacers and vegan shortening. Be aware the texture and flavor will differ.
FAQs (Frequently Asked Questions)
Q: Why is cake flour important for this recipe?
A: Cake flour has a lower protein content than all-purpose flour, which results in a more tender and delicate cake crumb.
Q: Can I use butter instead of shortening?
A: While you can substitute butter, the cake may not be as light and fluffy. Shortening provides a more tender crumb.
Q: How do I prevent my cake from sticking to the pan?
A: Grease and flour the baking pans thoroughly. Alternatively, use parchment paper to line the bottom of the pans.
Q: My frosting is too thick. What can I do?
A: Add milk, one tablespoon at a time, until you reach your desired consistency.
Q: How can I make the cake layers bake more evenly?
A: Use baking strips wrapped around the outside of the pans. These help to insulate the pans and prevent the edges from baking faster than the center.
Final Thoughts
This special-occasion white cake is more than just a recipe; it’s an invitation to create memories. Whether you’re celebrating a birthday, anniversary, or simply a joyful moment, this cake is sure to be a crowd-pleaser. Don’t be afraid to experiment with variations and make it your own. And most importantly, enjoy the process of baking and sharing this delicious treat with those you love. Happy baking!