
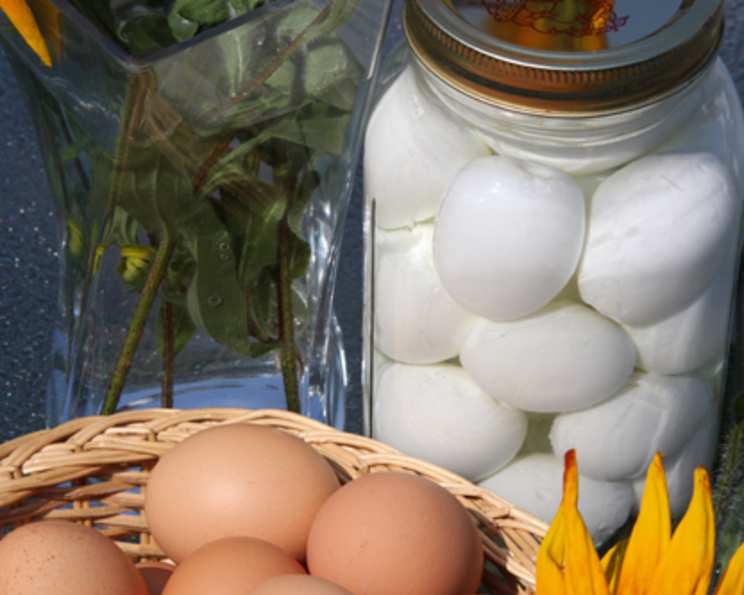
Spiced Pickled Eggs: A Culinary Dive into Flavorful Preservation
The aroma of vinegar and spices always brings me back to my grandmother’s pantry. Jars lined the shelves, each filled with colorful fruits and vegetables, meticulously preserved for the colder months. But it wasn’t just the jams and jellies that captivated me; it was the jars of pickled eggs, their yolks gleaming like golden gems suspended in a tangy, spiced brine. Those eggs, a staple at family gatherings, were a testament to her resourcefulness and a delicious expression of love. They were a simple yet satisfying treat that I always looked forward to, and that memory is what inspires me to share this recipe with you today.
Recipe Overview
- Prep Time: 20 minutes
- Cook Time: 20 minutes
- Total Time: 8 days 20 minutes (includes pickling time)
- Yields: 12 eggs
- Dietary Type: Gluten-Free, Dairy-Free
Ingredients
- 12 extra large eggs
- 1 1⁄2 cups white vinegar
- 1 1⁄2 cups water
- 1 1⁄2 teaspoons salt
- 1 tablespoon pickling spices
- 1 garlic clove, crushed
- 1 bay leaf
Equipment Needed
- Large pot
- Medium pot
- Cheesecloth
- Sterile jars or containers with lids
Instructions
- Prepare the Eggs: Gently place the eggs in a large pot. Cover them with cold water, ensuring the water level is about 2 inches above the eggs.
- Boil the Eggs: Bring the water to a full, rolling boil over high heat. Once boiling, immediately remove the pot from the heat source.
- Cook the Eggs: Cover the pot tightly with a lid and let the eggs stand in the hot water for exactly 15 minutes. This method ensures perfectly cooked yolks without the dreaded green ring.
- Cool and Peel: After 15 minutes, carefully remove the eggs from the hot water and immediately run them under cold water until they are cool enough to handle. Gently peel the eggs, being careful not to damage them.
- Prepare the Brine: In a medium pot, combine the white vinegar, water, and salt. Stir well to ensure the salt dissolves completely.
- Infuse with Spices: Place the pickling spices, crushed garlic clove, and bay leaf in a piece of cheesecloth. Gather the edges of the cheesecloth and tie it securely with kitchen twine to form a spice bag.
- Simmer the Brine: Add the spice bag to the pot with the vinegar mixture. Bring the mixture to a boil over medium heat, then reduce the heat to low, cover the pot, and simmer for 5 minutes. This allows the spices to fully infuse the brine.
- Remove the Spice Bag: After simmering, carefully remove the spice bag from the pot and discard it.
- Pack the Eggs: Transfer the peeled eggs to sterile jars or containers. Make sure the containers are clean and dry to prevent spoilage.
- Pour the Brine: Carefully pour the hot vinegar mixture over the eggs in the jars, ensuring that the eggs are completely submerged.
- Seal and Cool: Seal the jars tightly with their lids. Allow the jars to cool to room temperature.
- Refrigerate and Pickle: Once cooled, refrigerate the jars for at least 8 days before serving. This allows the eggs to fully absorb the flavors of the brine. The longer they sit, the more flavorful they become.
Expert Tips & Tricks
- Perfectly Peeled Eggs: To make peeling easier, add a teaspoon of baking soda to the water when boiling the eggs. The baking soda helps to separate the egg white from the shell.
- Sterilizing Jars: Sterilize the jars by boiling them in water for 10 minutes or running them through a hot cycle in the dishwasher. This step is crucial for preventing bacterial growth and ensuring the eggs stay fresh longer.
- Spice Bag Alternatives: If you don’t have cheesecloth, you can use a fine-mesh sieve or tea infuser to hold the spices while simmering the brine. Just make sure to remove the spices before pouring the brine over the eggs.
- Preventing Discoloration: To prevent the yolks from turning green, avoid overcooking the eggs. The 15-minute steeping method after boiling ensures a perfectly cooked yolk without discoloration.
- Flavor Enhancement: For an extra kick, add a pinch of red pepper flakes or a sliced jalapeno to the brine. This will add a touch of heat to the pickled eggs.
- Brine Reuse: While tempting, it’s generally not recommended to reuse the brine from pickled eggs. It can harbor bacteria even after refrigeration. Always make a fresh brine for each batch.
Serving & Storage Suggestions
Spiced pickled eggs are a versatile snack or appetizer. Serve them chilled, straight from the jar. They’re great on their own or sliced and added to salads, sandwiches, or deviled egg preparations. They make a fantastic addition to a charcuterie board.
Store the pickled eggs in the refrigerator in their brine for up to 3 months. Ensure the eggs remain submerged in the brine to maintain their quality and prevent spoilage. Do not freeze pickled eggs, as this will alter their texture and flavor.
Nutritional Information
| Nutrient | Amount per Serving | % Daily Value |
|---|---|---|
| Calories | 78.2 kcal | – |
| Calories from Fat | 42 g | 55% |
| Total Fat | 4.8 g | 7% |
| Saturated Fat | 1.6 g | 7% |
| Cholesterol | 186 mg | 62% |
| Sodium | 364.1 mg | 15% |
| Total Carbohydrate | 0.7 g | 0% |
| Dietary Fiber | 0 g | 0% |
| Sugars | 0.3 g | 1% |
| Protein | 6.3 g | 12% |
Note: Nutritional information is an estimate and may vary based on specific ingredients and preparation methods.
Variations & Substitutions
- Spicy Pickled Eggs: Add sliced jalapeños or a pinch of cayenne pepper to the brine for a spicy kick.
- Sweet and Sour Pickled Eggs: Add a tablespoon of sugar to the brine for a sweeter flavor profile.
- Beet Pickled Eggs: Add a cup of beet juice to the brine for a beautiful pink color and earthy flavor.
- Herb Infused Pickled Eggs: Add fresh herbs like dill, thyme, or rosemary to the brine for an herbaceous twist.
- Different Vinegars: Experiment with different vinegars like apple cider vinegar or red wine vinegar for unique flavor variations. Note that malt vinegar is also an option but is not gluten-free.
FAQs (Frequently Asked Questions)
Q: How long do I need to wait before eating the pickled eggs?
A: For the best flavor, wait at least 8 days before eating the pickled eggs. This allows the flavors to fully develop and penetrate the eggs.
Q: Can I use smaller eggs for this recipe?
A: Yes, you can use smaller eggs, but adjust the cooking time accordingly. Reduce the steeping time by a minute or two for smaller eggs to avoid overcooking.
Q: My pickled eggs have a rubbery texture. What did I do wrong?
A: A rubbery texture usually indicates that the eggs were overcooked. Be careful not to overboil the eggs and follow the recommended steeping time.
Q: Can I add other vegetables to the pickling brine?
A: Yes, you can add other vegetables like onions, carrots, or peppers to the pickling brine. This will add extra flavor and texture to the pickled eggs.
Q: How do I know if my pickled eggs have gone bad?
A: Discard the pickled eggs if they have an unusual odor, discoloration, or if the brine appears cloudy or slimy. Always err on the side of caution when dealing with preserved foods.
Final Thoughts
Pickled eggs are more than just a snack; they’re a flavorful journey back to simpler times. This recipe, while straightforward, offers a canvas for creativity and personalization. Don’t be afraid to experiment with different spices, herbs, and vinegars to create your own unique signature pickled egg. Gather your ingredients, sterilize your jars, and embark on a culinary adventure that will delight your taste buds and impress your friends. And, of course, I would love to hear about your unique creations and any variations you try. Happy pickling!