
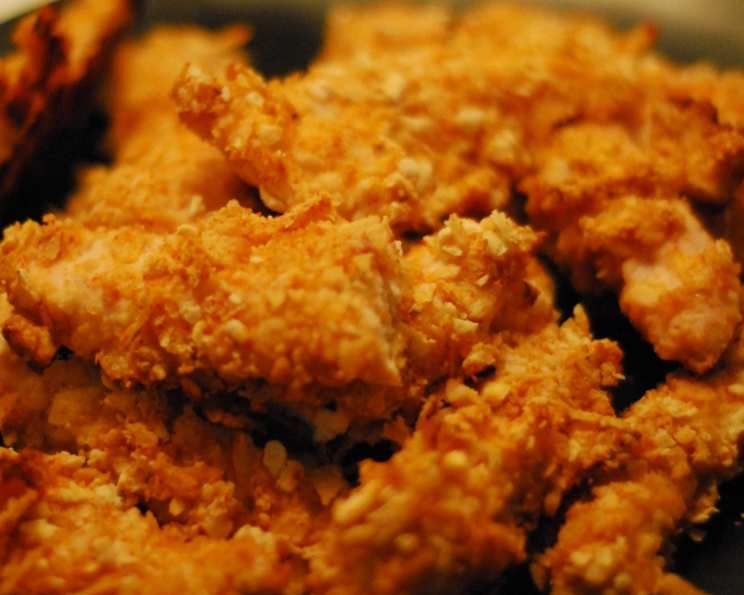
Spicy Chicken Fingers: A Kick of Flavor in Every Bite
Growing up, chicken fingers were a staple – a guaranteed crowd-pleaser at every family gathering. But for me, something was always missing. While everyone else was happily dipping their bland strips into ketchup, I yearned for a little zing, a little fire. One afternoon, rummaging through my mom’s spice cabinet, inspiration struck. A dash of cayenne here, a sprinkle of marjoram there, and a whole lot of crushed kettle chips later, these spicy chicken fingers were born. They quickly became my signature dish, and I’m thrilled to share the recipe with you.
Recipe Overview
- Prep Time: 15 minutes
- Cook Time: 25-30 minutes
- Total Time: 40-45 minutes
- Servings: 4
- Dietary Type: Can be adapted to Gluten-Free
Ingredients
- 4 chicken breasts (adjust quantity depending on the number of servings needed)
- 1 teaspoon cayenne pepper
- ½ teaspoon dried marjoram
- 20 saltine crackers
- 5 cups kettle chips
- Plain yogurt
- 1 cup Hellman’s mayonnaise
- ¼ cup honey
- ¼ cup yellow mustard
- Few dashes of cayenne pepper (for the sauce)
Equipment Needed
- Mixing bowls
- Large Ziploc bag
- Rolling pin
- Baking sheet
- Small bowl
Instructions
-
Begin by preheating your oven to 375°F (190°C). This ensures the chicken fingers cook evenly and achieve that perfect crispy texture.
-
Prepare the chicken breasts. If using frozen chicken, make sure they are fully defrosted. If using fresh, proceed directly to cleaning and trimming. Remove any excess fat or connective tissue from the chicken breasts. This will result in a more tender and enjoyable final product.
-
Cut the chicken breasts into strips. Aim for about 3 to 4 strips per breast, depending on the size you prefer. Ensure the strips are relatively uniform in size to promote even cooking.
-
In a mixing bowl, combine the dry spices: 1 teaspoon of cayenne pepper and ½ teaspoon of dried marjoram. Mix well to ensure even distribution of flavor. The cayenne pepper provides the heat, while the marjoram adds an earthy, aromatic note.
-
Prepare the cracker and chip mixture. Place the saltine crackers and kettle chips into a large Ziploc bag. Seal the bag and use a rolling pin to crush the crackers and chips into fine crumbs. The kettle chips add a wonderful salty crunch that elevates these chicken fingers. You can vary the flavor of the chips for different profiles.
-
Combine the crushed crackers/chips with the spices. Transfer the contents of the bag into the mixing bowl containing the cayenne pepper and marjoram. Mix thoroughly to ensure the cracker/chip mixture is evenly coated with the spices. This creates a flavorful and crispy breading.
-
Prepare the yogurt dipping station. In a small bowl, spoon out a generous amount of plain yogurt. This will act as the binder for the breading, ensuring it adheres well to the chicken.
-
Dip and coat the chicken. Take a few chicken strips and dip them into the plain yogurt, ensuring they are fully coated. Then, transfer the yogurt-covered chicken to the mixing bowl containing the cracker/chip mixture. Press the chicken into the mixture, ensuring it is completely coated on all sides.
-
Place the coated chicken fingers onto a baking sheet. Ensure the chicken fingers are not overcrowded on the baking sheet, as this can prevent them from crisping up properly.
-
Bake the chicken fingers in the preheated oven for 25 to 30 minutes, or until they are cooked through and crispy. The internal temperature of the chicken should reach 165°F (74°C). You can check doneness using a meat thermometer.
-
While the chicken fingers are baking, prepare the dipping sauce. In a separate bowl, combine 1 cup of Hellman’s mayonnaise, ¼ cup of honey, and ¼ cup of yellow mustard. Add a few dashes of cayenne pepper to the sauce for an extra kick. Whisk all ingredients together until smooth and well combined. Adjust the amount of honey or mustard to your preference.
-
Remove the chicken fingers from the oven and let them cool slightly before serving.
Expert Tips & Tricks
- For an even crispier texture, try lightly spraying the chicken fingers with cooking oil before baking.
- Don’t overcrowd the baking sheet; bake in batches if necessary.
- Feel free to experiment with different types of kettle chips for unique flavor variations. Salt and vinegar, BBQ, or even jalapeno kettle chips can add exciting twists.
- If you’re short on time, you can use pre-crushed crackers and chips, but freshly crushed will always provide the best texture.
- To ensure even cooking, flip the chicken fingers halfway through the baking time.
- For a gluten-free option, use gluten-free crackers and chips.
Serving & Storage Suggestions
Serve these spicy chicken fingers immediately while they’re warm and crispy, alongside the homemade dipping sauce. They are also delicious with a side of coleslaw, French fries, or a fresh salad.
Leftover chicken fingers can be stored in an airtight container in the refrigerator for up to 3 days. To reheat, bake them in a preheated oven at 350°F (175°C) for about 10-15 minutes, or until heated through and crispy again. Microwaving is not recommended as it can make them soggy. For longer storage, you can freeze the cooked chicken fingers for up to 2 months. Thaw them in the refrigerator overnight before reheating.
Nutritional Information
(Estimated per serving)
| Nutrient | Amount per Serving | % Daily Value |
|---|---|---|
| Calories | 450 kcal | 23% |
| Total Fat | 25g | 38% |
| Saturated Fat | 6g | 30% |
| Cholesterol | 110mg | 37% |
| Sodium | 400mg | 17% |
| Total Carbohydrate | 20g | 7% |
| Dietary Fiber | 1g | 4% |
| Sugars | 5g | 10% |
| Protein | 35g | 70% |
Variations & Substitutions
- Gluten-Free: Use gluten-free crackers and kettle chips.
- Extra Spicy: Add more cayenne pepper to the chicken mixture and a pinch to the yogurt. You could also incorporate a dash of hot sauce into the yogurt before dredging the chicken.
- Herb Infused: Add other dried herbs like thyme, oregano, or rosemary to the spice mixture.
- Cheese Lovers: Mix grated parmesan cheese into the cracker and chip mixture for a cheesy flavor.
- Sweet and Spicy: Add a pinch of brown sugar to the cracker and chip mixture for a touch of sweetness that balances the heat.
FAQs (Frequently Asked Questions)
Q: Can I use boneless, skinless chicken thighs instead of breasts?
A: Absolutely! Chicken thighs will result in a richer, more flavorful chicken finger. Just be sure to trim any excess fat.
Q: Can I prepare these ahead of time?
A: Yes, you can coat the chicken fingers with the cracker/chip mixture and store them in the refrigerator for up to 24 hours before baking.
Q: What if I don’t have kettle chips?
A: You can substitute potato chips or even cornflakes, but kettle chips provide the best flavor and texture.
Q: Can I bake these on a wire rack?
A: Yes, baking them on a wire rack set inside the baking sheet will promote even crisping all around.
Q: What other sauces go well with these chicken fingers?
A: Ranch dressing, BBQ sauce, sweet chili sauce, or even a simple honey mustard are all delicious options.
Final Thoughts
These spicy chicken fingers are more than just a quick and easy meal; they’re a flavor explosion in every bite. The combination of crispy kettle chips, savory spices, and tender chicken is simply irresistible. So, gather your ingredients, preheat your oven, and prepare to embark on a culinary adventure. I encourage you to try this recipe and make it your own by experimenting with different spices, chips, and sauces. Don’t be afraid to add your personal touch! And please, share your feedback – I’d love to hear what you think. Pair these spicy chicken fingers with a crisp, refreshing coleslaw and a cold glass of lemonade for the perfect meal!