
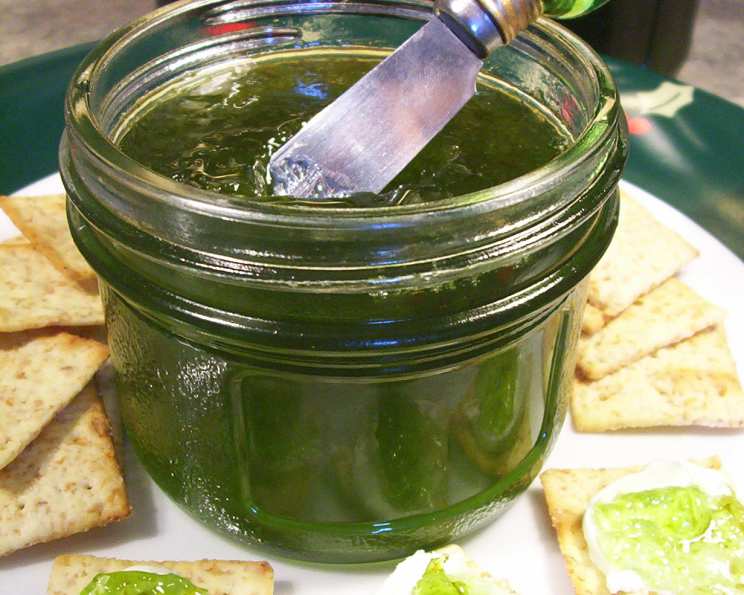
Spicy Jalapeno Pepper Jelly: A Sweet & Fiery Delight
The first time I tasted pepper jelly was at a small craft fair in the Appalachian mountains. I was a young culinary student, and the vibrant colors of the jars lined up on the table drew me in like a moth to a flame. I hesitantly tried a sample on a cracker, and the explosion of sweet followed by a lingering heat was a revelation. It was unlike anything I’d ever experienced, and I knew I had to learn how to make it myself. The combination was just intoxicating.
Recipe Overview
- Prep Time: 30 minutes
- Cook Time: 10 minutes
- Total Time: 40 minutes
- Yields: 6 1/2 pint jars
- Dietary Type: Vegetarian, Gluten-Free
Ingredients
- 1 1/2 cups red sweet peppers or 1 1/2 cups green sweet peppers, seeded, veins removed
- 1/4 cup jalapeno, seeded, veins removed (for extra heat, leave some seeds)
- 1 1/2 cups white vinegar
- 6 ounces liquid pectin
- 1 drop red food coloring or 1 drop green food coloring (optional)
- 6 1/2 cups sugar
Equipment Needed
- Food Processor
- Large Pot
- Measuring Cups and Spoons
- Sterilized Half-Pint Jars
- Canning Funnel
- Ladle
- Jar Lifter
Instructions
-
Prepare the Peppers: Thoroughly wash and dry your sweet peppers and jalapenos. Cut them into manageable pieces for the food processor. Remove the seeds and membranes from both the sweet peppers and the jalapenos. For a milder jelly, ensure all seeds are removed from the jalapeno. If you prefer a spicier jelly, leave a few seeds in.
-
Process the Peppers: Place the sweet peppers, jalapeno, and white vinegar into a food processor. Blend until the mixture is completely smooth, forming a vibrant pepper puree.
-
Combine and Heat: Pour the pepper mixture into a large, heavy-bottomed pot. Add the sugar.
-
Dissolve the Sugar: Place the pot over medium-high heat, and continuously stir the mixture until all the sugar has completely dissolved. This is a crucial step; undissolved sugar can lead to a grainy jelly.
-
First Boil: Once the sugar is dissolved, bring the mixture to a full rolling boil, one that cannot be stirred down. Boil for exactly 3 minutes, stirring constantly to prevent scorching.
-
Add Pectin: After 3 minutes, quickly stir in the liquid pectin. Make sure it is fully incorporated.
-
Second Boil: Return the mixture to a full rolling boil and boil hard for precisely 1 minute, stirring constantly. This step is critical for the jelly to set properly.
-
Remove From Heat: Take the pot off the heat. Any longer and you risk a rubbery jelly.
-
Skim the Foam: Use a spoon to carefully skim off any foam that has formed on the surface of the jelly. This step helps create a clearer, more visually appealing final product.
-
Add Food Coloring (Optional): If desired, add a single drop of red or green food coloring to enhance the color of the jelly. This is purely for aesthetic purposes and can be skipped if you prefer a more natural look.
-
Jarring: Carefully ladle the hot jelly into hot, sterilized half-pint jars, leaving approximately 1/4 inch of headspace at the top. This ensures a proper seal during the canning process. Use a canning funnel to help prevent spills and keep the jar rims clean.
-
Sealing: Wipe the rims of the jars clean with a damp cloth. Place sterilized lids on the jars and secure them with sterilized canning rings, tightening them fingertip-tight (not too tight).
-
Processing (Optional): For longer shelf life, process the filled jars in a boiling water bath canner for 10 minutes. If you live at a high altitude, you will need to adjust the processing time accordingly.
-
Cooling: Carefully remove the jars from the canner (if processed) using a jar lifter and place them on a towel-lined surface to cool completely. As the jars cool, you should hear a “pop” sound, indicating that the lids have sealed properly.
-
Check Seals: After the jars have cooled, check the seals by pressing down on the center of each lid. If the lid doesn’t flex or move, it’s properly sealed. Any unsealed jars should be refrigerated and used within a few weeks.
Expert Tips & Tricks
- Spice Level Adjustment: The amount of jalapeno used directly impacts the heat of the jelly. For a milder jelly, use even less jalapeno or remove all seeds and membranes. For a spicier jelly, leave some seeds in the jalapeno or even add a second jalapeno.
- Pectin Power: Use fresh, high-quality liquid pectin for the best results. Expired pectin may not set properly.
- Crystal Clear: To minimize crystal formation, ensure all sugar is completely dissolved before boiling and avoid overcooking the jelly.
- Prevent Scorching: Use a heavy-bottomed pot and stir the mixture constantly, especially during the boiling stages, to prevent scorching, which can affect the flavor and color of the jelly.
- Sterilization is Key: Proper sterilization of jars and lids is crucial for safe canning and long-term storage.
Serving & Storage Suggestions
Spicy jalapeno pepper jelly is incredibly versatile. Serve it with cream cheese and crackers for a classic appetizer, or use it as a glaze for grilled chicken or pork. It’s also delicious on sandwiches or as a condiment for tacos and quesadillas.
Properly sealed jars of jalapeno pepper jelly can be stored in a cool, dark place for up to a year. Once opened, store the jelly in the refrigerator for several weeks.
Nutritional Information
Note: Nutritional information is an estimate and can vary based on specific ingredients and portion sizes.
| Nutrient | Amount per Serving | % Daily Value |
|---|---|---|
| Calories | 250 kcal | 13% |
| Total Fat | 0g | 0% |
| Saturated Fat | 0g | 0% |
| Cholesterol | 0mg | 0% |
| Sodium | 1mg | 0% |
| Total Carbohydrate | 65g | 22% |
| Dietary Fiber | 0g | 0% |
| Sugars | 64g | – |
| Protein | 0g | 0% |
Variations & Substitutions
- Fruit Variations: Add other fruits like pineapple or mango for a tropical twist. Puree a cup of chopped fruit and add it to the pepper mixture before cooking.
- Different Peppers: Experiment with different types of peppers, such as habaneros or serranos, for varying levels of heat. Be careful, as some peppers are significantly hotter than jalapenos.
- Apple Cider Vinegar: Substitute apple cider vinegar for white vinegar for a slightly sweeter, more complex flavor.
- No Food Coloring: Omit the food coloring for a more natural appearance. The color of the jelly will depend on the color of the peppers used.
FAQs (Frequently Asked Questions)
Q: Can I use powdered pectin instead of liquid pectin?
A: Liquid and powdered pectin react differently in recipes. It’s best to stick to liquid pectin for this particular jelly.
Q: My jelly didn’t set. What went wrong?
A: There are several reasons why your jelly might not have set. Common causes include not boiling it long enough, using expired pectin, or inaccurate measurements.
Q: How do I know if the jars are properly sealed?
A: After the jars have cooled, press down on the center of the lid. If it doesn’t flex or move, it’s properly sealed. You should also hear a “pop” sound as the jars cool, indicating a successful seal.
Q: Can I halve this recipe?
A: Yes, you can halve all the ingredients. Be sure to use a smaller pot and keep a close eye on the cooking time.
Q: How long will the jelly last once opened?
A: Once opened, store the jelly in the refrigerator. It should last for several weeks, as long as it’s properly stored and shows no signs of spoilage.
Final Thoughts
Creating your own spicy jalapeno pepper jelly is a rewarding experience that brings a touch of homemade warmth to your table. Don’t be afraid to experiment with different peppers or fruits to create your signature blend. Whether you’re serving it as an appetizer, using it as a glaze, or gifting it to friends and family, this jelly is sure to impress with its unique balance of sweet and spicy flavors. Get in the kitchen and try it! I’d love to know what you come up with.