
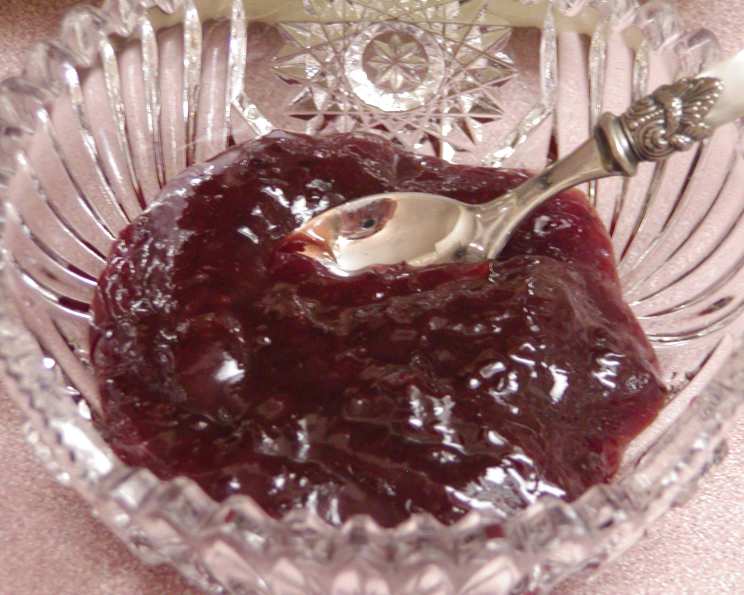
Spicy Pepper Plum Jam: A Sweet Heat Sensation
I’ll never forget the first time I tasted plum jam with a kick. I was volunteering at a local farm during plum season, and one of the farmers, a fiery woman named Maria, handed me a small jar. “Try this,” she said, a glint in her eye. “It’ll wake you up!” One taste, and I was hooked. The initial sweetness of the plum, followed by the slow burn of chili, was an unexpected delight. It transformed a simple piece of toast into an exciting culinary adventure. That’s the magic of this Spicy Pepper Plum Jam, a combination that continues to surprise and delight.
Recipe Overview
- Prep Time: 20 minutes
- Cook Time: 45 minutes
- Total Time: 1 hour 5 minutes
- Yields: Approximately 8 pints
- Dietary Type: Vegan
Ingredients
- 8 cups plums, pitted
- 3 Thai peppers
- ½ cup water
- 6 cups sugar
Equipment Needed
- Blender
- Large pot
- Sterilized jars (8 pints)
- Canning equipment (jar lifter, large pot for water bath)
Instructions
-
Begin by preparing the plums. Thoroughly wash and pit 8 cups of fresh plums. Any variety of plum will work, but those with deep red flesh tend to create the most visually stunning jam.
-
Next, prepare the peppers. Carefully wash 3 fresh Thai peppers. These little peppers pack a punch, so handle them with care, especially if you’re sensitive to heat. You can adjust the number of peppers depending on your desired spice level. For a milder jam, remove the seeds and membranes from the peppers before using. For a real fiery kick, leave them intact.
-
In a blender, combine the pitted plums, Thai peppers, and ½ cup of water. Blend until smooth. This mixture will form the base of your jam.
-
Transfer the blended mixture to a large, heavy-bottomed pot. A heavy-bottomed pot will help prevent the jam from scorching as it cooks.
-
Add 6 cups of sugar to the pot. The sugar not only sweetens the jam but also acts as a preservative.
-
Over medium heat, bring the mixture slowly to a boil, stirring constantly. It is crucial to stir continuously at this stage to ensure the sugar dissolves completely and to prevent the mixture from sticking to the bottom of the pot.
-
Once the sugar is dissolved and the mixture is boiling, cook rapidly until it reaches the gelling point. This is where the magic happens! As the jam cooks, it will thicken and darken in color.
-
As the jam thickens, stir it frequently to prevent sticking. The more frequently you stir, the less likely the jam is to burn on the bottom of the pot. Keep an eye on the jam’s consistency.
-
To test for the gelling point, place a small spoonful of the jam on a chilled plate. Let it sit for a minute or two. If the jam wrinkles when you push it with your finger, it’s ready. Alternatively, you can use a candy thermometer. The gelling point is usually reached around 220°F (104°C).
-
Once the jam has reached the gelling point, remove it from the heat.
-
Carefully pour the hot jam into sterilized jars, leaving ¼ inch of headspace at the top. Headspace is essential for proper sealing during the canning process.
-
Wipe the rims of the jars clean with a damp cloth to ensure a good seal.
-
Adjust the lids and rings on the jars, making sure they are snug but not too tight.
-
Process the filled jars in a boiling water bath for 15 minutes. This ensures that the jars are properly sealed and the jam is shelf-stable.
-
After processing, carefully remove the jars from the water bath using a jar lifter and place them on a towel-lined surface to cool.
-
As the jars cool, you should hear a popping sound as the lids seal. Once the jars are completely cool, check the seals by pressing down on the center of each lid. If the lid doesn’t flex, it’s properly sealed. If the lid flexes, the jar isn’t sealed and should be reprocessed with a new lid or stored in the refrigerator and used within a few weeks.
Expert Tips & Tricks
- Spice Level Adjustment: For a milder jam, remove the seeds and membranes from the Thai peppers. For a spicier jam, use more peppers or add a pinch of cayenne pepper.
- Fruit Variation: Feel free to experiment with different types of plums or even add other fruits like peaches or nectarines for a unique flavor combination.
- Foam Removal: As the jam cooks, foam may form on the surface. Skim off any foam with a spoon for a clearer, more visually appealing final product.
- Jar Sterilization: Sterilize jars by boiling them in water for 10 minutes before filling. This ensures that the jam is safe to store at room temperature.
- Consider adding a splash of lemon juice to brighten the flavor and aid in setting.
Serving & Storage Suggestions
This Spicy Pepper Plum Jam is incredibly versatile. It’s delicious spread on toast, biscuits, or crackers. It can also be used as a glaze for grilled meats, particularly pork or chicken. Try serving it with cream cheese or goat cheese for a delightful appetizer.
Store unopened jars of jam in a cool, dark place for up to a year. Once opened, store in the refrigerator for several weeks.
Nutritional Information
| Nutrient | Amount per Serving | % Daily Value |
|---|---|---|
| Calories | 656 kcal | N/A |
| Calories from Fat | 4g | 1% |
| Total Fat | 0.5g | 0% |
| Saturated Fat | 0g | 0% |
| Cholesterol | 0mg | 0% |
| Sodium | 1.9mg | 0% |
| Total Carbohydrate | 168.8g | 56% |
| Dietary Fiber | 2.3g | 9% |
| Sugars | 166.1g | 664% |
| Protein | 1.2g | 2% |
Nutritional information is an estimate and may vary based on specific ingredients and preparation methods.
Variations & Substitutions
- Other Peppers: Experiment with different types of chili peppers, such as jalapeños or habaneros, for varying levels of heat and flavor.
- Vinegar Addition: Add a tablespoon of apple cider vinegar to the jam for a slightly tangy flavor.
- Spice Additions: Incorporate other spices like ginger, cinnamon, or star anise for a more complex flavor profile.
- Lower Sugar Version: While sugar is essential for preservation, you can reduce the amount slightly and use a sugar substitute like pectin to help the jam set. Be aware that this may affect the shelf life.
FAQs (Frequently Asked Questions)
Q: Can I use frozen plums for this recipe?
A: Yes, you can use frozen plums. Thaw them completely and drain any excess liquid before blending.
Q: How do I know if my jars are properly sealed?
A: After processing and cooling, the lids should be concave and not flex when pressed. If a lid flexes, the jar is not properly sealed and should be reprocessed or stored in the refrigerator.
Q: How long will the jam last?
A: Properly sealed jars of jam can be stored in a cool, dark place for up to a year. Once opened, store in the refrigerator for several weeks.
Q: Can I reduce the amount of sugar in the recipe?
A: While you can reduce the sugar slightly, remember that it acts as a preservative. Reducing it too much may affect the jam’s shelf life and consistency. Consider using pectin to help the jam set if you reduce the sugar.
Q: What can I do if my jam doesn’t set properly?
A: If your jam is too runny, you can try re-cooking it. Add a tablespoon of lemon juice and cook for a few more minutes, testing for the gelling point again. Alternatively, you can simply use the jam as a sauce or syrup.
Final Thoughts
This Spicy Pepper Plum Jam is more than just a condiment; it’s an experience. The sweet and spicy combination is truly addictive, and the homemade touch makes it even more special. Don’t be intimidated by the canning process – it’s easier than you think, and the reward is well worth the effort. So gather your ingredients, put on some music, and get ready to create a jam that will tantalize your taste buds and impress your friends and family. I encourage you to try this recipe and share your creations and feedback! This jam pairs wonderfully with grilled cheese, artisanal crackers, or even as a unique addition to a cheese board. Enjoy!