
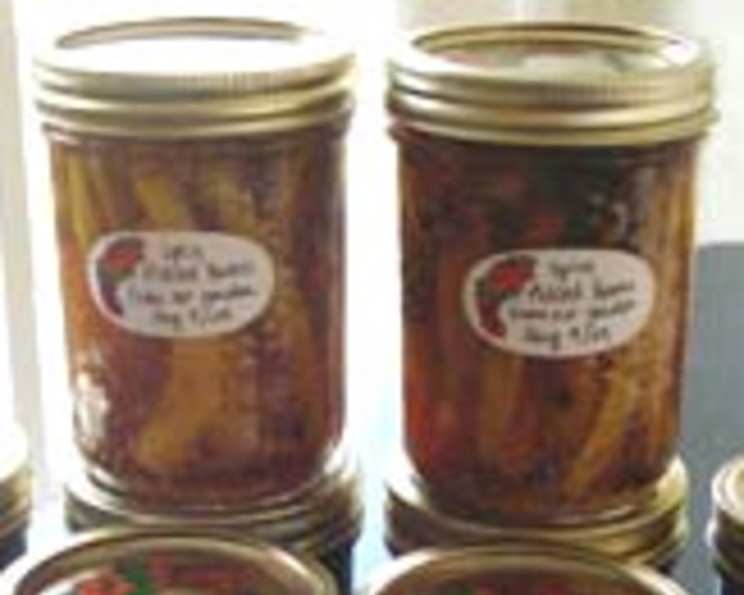
Spicy Pickled Beans: A Blue Ribbon Recipe
My grandmother’s pantry was a magical place, filled with jars of vibrant colors, each holding a treasure trove of preserved goodness. Among the jewel-toned jams and relishes, a jar of pickled green beans always stood out. The slight kick of heat, the satisfying crunch, and the vinegary tang were an irresistible combination. This recipe, a slightly spicier version of her classic, evokes those cherished memories and brings a touch of homemade goodness to any meal. I even made these for our local state fair and won a blue ribbon. These go great with Bloody Mary’s!
Recipe Overview
- Prep Time: 30 minutes
- Cook Time: 5 minutes
- Total Time: 30 minutes (plus 24 hours marinating)
- Servings: 16
- Yields: 2 Pints
- Dietary Type: Vegan, Gluten-Free
Ingredients
- 2 quarts water
- 1 tablespoon salt
- ½ lb green beans, trimmed
- ½ lb wax beans, trimmed
- 1 ¼ cups red wine vinegar (5% acidity)
- ½ cup sugar
- ½ cup cider vinegar
- ½ cup vodka
- 2 tablespoons mustard seeds
- 1 tablespoon black peppercorns
- 2 teaspoons fennel seeds
- 1-2 teaspoons crushed red pepper flakes
- 4 garlic cloves
- 4 fresh dill sprigs
- 2 bay leaves
Equipment Needed
- Large saucepan
- Medium saucepan
- Large bowl
- Pint jars (optional, for canning)
- Boiling water bath canner (optional, for canning)
- Jar lifter (optional, for canning)
Instructions
-
Begin by preparing an ice bath. Fill a large bowl with ice and water; set aside.
-
In a large saucepan, bring 2 quarts of water and 1 tablespoon of salt to a vigorous boil. This salty water helps to season the beans from the inside out.
-
Add the trimmed green beans and wax beans to the boiling water. Cook for 4 minutes, or until the beans are crisp-tender. You want them to retain some bite; avoid overcooking, as they will soften further during the pickling process.
-
Immediately drain the beans and plunge them into the prepared ice bath. This crucial step halts the cooking process and preserves their vibrant color and satisfying crunch. Allow the beans to cool completely in the ice bath. This usually takes about 10-15 minutes.
-
While the beans are chilling, prepare the pickling brine. In a medium saucepan, combine 1 ¼ cups of red wine vinegar, ½ cup of sugar, ½ cup of cider vinegar, ½ cup of vodka, 2 tablespoons of mustard seeds, 1 tablespoon of black peppercorns, 2 teaspoons of fennel seeds, and 1-2 teaspoons of crushed red pepper flakes. Adjust the amount of red pepper flakes to your desired level of spiciness.
-
Bring the brine to a boil over medium heat. Stir continuously until the sugar is completely dissolved. This usually takes about 1 minute. Reduce the heat slightly to prevent scorching.
-
Once the beans are completely cooled and drained, you have two options: you can either marinate them in a bowl in the refrigerator or can them for longer-term storage.
- Marinating (Refrigerator Pickling): Drain the beans thoroughly. Place the cooled beans in a large bowl. Pour the hot brine over the beans, ensuring they are fully submerged. Add the 4 garlic cloves, 4 fresh dill sprigs, and 2 bay leaves. Cover the bowl and marinate in the refrigerator for at least 24 hours before serving. The longer they marinate, the more flavorful they become.
- Canning (Boiling Water Bath): If you prefer to can the beans for longer storage, pack the drained and cooled beans into sterilized pint jars, leaving about ½ inch of headspace. Remove the bay leaves from the brine. Pour the hot brine into the jars, again leaving ½ inch of headspace. Gently tap the jars on the counter to remove any trapped air bubbles. Wipe the rims of the jars clean with a damp cloth. Place sterilized lids on the jars and screw on the bands until fingertip tight. Process the jars in a boiling water bath for 15 minutes. After processing, carefully remove the jars from the canner using a jar lifter and place them on a towel-lined surface to cool completely. You should hear a “pop” as the jars seal. Check the seals by pressing down on the center of each lid; it should not flex.
Expert Tips & Tricks
- Brine Adjustment: Taste the brine before pouring it over the beans. Adjust the sugar or vinegar to your preference for sweetness and tanginess.
- Spice Level: Adjust the amount of crushed red pepper flakes to customize the spice level. For a milder flavor, use only 1 teaspoon or omit them altogether.
- Bean Freshness: Use the freshest beans possible for the best flavor and texture.
- Jar Sterilization: Proper jar sterilization is crucial for safe canning. Follow the guidelines provided by your canner manufacturer or the USDA.
Serving & Storage Suggestions
These Spicy Pickled Beans are incredibly versatile. Serve them as a zesty appetizer, a crunchy side dish, or a vibrant addition to a cheese and charcuterie board. They are also a fantastic garnish for Bloody Marys or other cocktails.
- Marinated Beans (Refrigerator Pickled): Store the marinated beans in the refrigerator for up to 2 weeks.
- Canned Beans: Properly canned beans can be stored in a cool, dark place for up to 1 year. Once opened, refrigerate and consume within 1-2 weeks.
Nutritional Information
Note: Nutritional information is an estimate and may vary based on specific ingredients and portion sizes.
| Nutrient | Amount per Serving | % Daily Value |
|---|---|---|
| Calories | 60 kcal | 3% |
| Total Fat | 0.5g | 1% |
| Saturated Fat | 0g | 0% |
| Cholesterol | 0mg | 0% |
| Sodium | 441mg | 18% |
| Total Carbohydrate | 9.3g | 3% |
| Dietary Fiber | 1.3g | 5% |
| Sugars | 6.6g | 26% |
| Protein | 1g | 1% |
Variations & Substitutions
- Spicier Beans: Add a sliced jalapeño or serrano pepper to the brine for extra heat.
- Different Herbs: Experiment with other fresh herbs, such as thyme or oregano, in addition to or instead of dill.
- Different Vinegars: Try using white wine vinegar or rice vinegar for a slightly different flavor profile.
- Garlic Infusion: Roast the garlic cloves before adding them to the jars for a mellow, sweeter garlic flavor.
- Other Vegetables: This pickling brine works well with other vegetables, such as carrots, asparagus, or okra. Adjust the cooking time accordingly.
FAQs (Frequently Asked Questions)
Q: Can I use frozen green beans or wax beans for this recipe?
A: While fresh beans are ideal, you can use frozen beans in a pinch. However, they may be slightly softer in texture after pickling. Be sure to thaw and drain them thoroughly before cooking.
Q: Do I have to use vodka in the brine?
A: The vodka helps to preserve the color and texture of the beans. However, you can omit it or substitute it with more vinegar if preferred. Keep in mind that this may slightly alter the final flavor and texture.
Q: How long do the beans need to marinate before they are ready to eat?
A: The beans should marinate for at least 24 hours for the flavors to fully develop. However, they will continue to improve with time, and they can be stored in the refrigerator for up to 2 weeks.
Q: Can I skip the boiling water bath if I plan to store the beans in the refrigerator?
A: Yes, if you plan to store the beans in the refrigerator, you can skip the boiling water bath. However, the beans will only last for about 2 weeks in the refrigerator.
Q: My pickled beans are too spicy! Is there anything I can do?
A: If your pickled beans are too spicy, you can try adding a little more sugar to the brine to balance the heat. You can also serve them with a creamy dip or sauce to help cool down the spice.
Final Thoughts
I hope this recipe inspires you to create your own batch of Spicy Pickled Beans and experience the joy of preserving fresh, seasonal flavors. Whether you serve them as a simple snack or a sophisticated garnish, these vibrant beans are sure to impress. Don’t be afraid to experiment with different variations and spice levels to create a recipe that perfectly suits your taste. Share your creations and feedback, and most importantly, enjoy the process! These pair wonderfully with a summer BBQ or a well-made charcuterie board, making them a versatile addition to your culinary repertoire.