
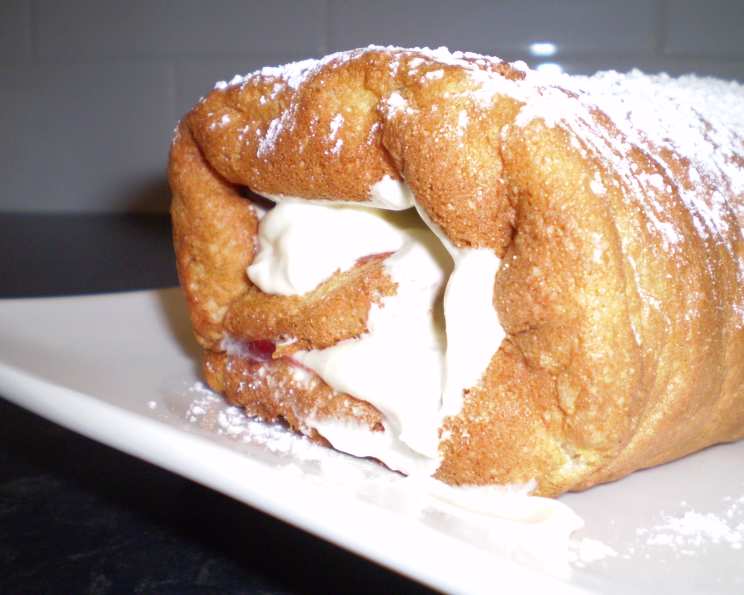
The Irresistible Charm of a Homemade Sponge Cake Roll
The first time I encountered a sponge cake roll, it was a revelation. My grandmother, a woman who could coax magic from the simplest ingredients, presented it with a flourish. The delicate swirl of cream, peeking out from the golden sponge, looked like a painted masterpiece. But the real magic happened when I took a bite. The airy cake, the rich cream, and the burst of fresh strawberries – it was a symphony of textures and flavors that instantly transported me to a place of pure joy. I knew then that this was a dessert I wanted to master.
Recipe Overview
- Prep Time: 30 minutes
- Cook Time: 20 minutes
- Total Time: 50 minutes
- Servings: 12
- Yields: 1 cake roll
- Dietary Type: Not Gluten-Free
Ingredients
For the Cake:
- ¾ cup flour
- 2 teaspoons baking powder
- ½ teaspoon salt
- 4 large eggs, separated
- ½ cup sugar
- 2 teaspoons vanilla extract
For the Sweetened Cream:
- 1 cup whipping cream
- 2 tablespoons powdered sugar
- ½ teaspoon any flavoring (vanilla, almond, or lemon extract work beautifully)
- Fresh strawberries (optional), for garnish
Equipment Needed
- Jelly roll pan
- Parchment paper
- Small bowl
- Large bowl
- Electric mixer
- Sifter
- Rubber spatula
- Cooling rack
Instructions
-
Begin by preheating your oven to 350°F (175°C). Ensuring your oven is properly preheated is crucial for the cake to rise correctly.
-
Prepare your jelly roll pan by lining the bottom with parchment paper, allowing it to overhang on the sides for easy removal later. Then, grease the parchment paper to prevent the cake from sticking. A well-prepared pan is the key to a perfect roll.
-
In a small bowl, sift together the flour, baking powder, and salt. Sifting aerates the dry ingredients, resulting in a lighter, more tender cake.
-
In a separate, larger bowl, beat the egg yolks, sugar, and vanilla extract until the mixture is pale yellow and slightly thickened. This process incorporates air and creates a stable base for the batter.
-
In another clean, dry bowl, beat the egg whites with an electric mixer until stiff peaks form. Be careful not to overbeat the egg whites, as this can make them dry and difficult to incorporate. The peaks should stand up straight when you lift the beaters.
-
Gently fold the yolk mixture into the egg whites, being careful not to deflate the whites. Then, gradually fold in the flour mixture until just combined. Avoid overmixing, as this will develop the gluten in the flour and result in a tough cake.
-
Pour the batter evenly into the prepared jelly roll pan and bake for 20 minutes, or until the cake is golden brown and springs back lightly when touched. Keep a close eye on the cake during the last few minutes of baking to prevent it from overbaking.
-
Once baked, cool the cake in the pan for 5 minutes. Then, unmold the cake onto a clean kitchen towel (or another sheet of parchment paper). Carefully roll the cake into a roll, starting from the short side, with the parchment paper still attached. This step helps the cake to retain its shape and prevents it from cracking when you add the cream.
-
Refrigerate the rolled cake for 5 minutes. This brief chilling period helps set the shape of the roll.
-
While the cake is chilling, prepare the sweetened cream. In a chilled bowl, beat the whipping cream on low speed until frothy. Then, add the powdered sugar and flavoring, and continue beating until soft peaks form. Be careful not to overwhip the cream, as this can turn it into butter. Chilling the bowl and beaters beforehand helps the cream whip up more quickly and easily.
-
Carefully unroll the cooled cake and spread evenly with the sweetened cream, leaving a small border around the edges.
-
Roll the cake back up carefully and tightly.
-
If desired, frost the outside of the cake roll with more sweetened cream and garnish with fresh strawberries.
Expert Tips & Tricks
- For an extra moist cake, brush the cooled cake with a simple syrup (equal parts sugar and water, heated until the sugar dissolves) before adding the cream.
- To prevent cracking, make sure the cake is still slightly warm when you roll it up the first time. The warmth makes it more pliable.
- If the cake cracks slightly, don’t worry! The cream will help to hold it together, and you can always cover any imperfections with extra frosting and decorations.
- Experiment with different fillings. Try using chocolate ganache, fruit preserves, or even a layer of Nutella.
- For a more intense flavor, add a tablespoon of espresso powder to the batter or a splash of liqueur to the cream.
- Ensure your eggs are at room temperature. Room temperature eggs whip up to a greater volume, resulting in a lighter cake.
- Don’t open the oven door frequently while baking. Opening the door can cause the temperature to fluctuate, which can affect the cake’s rise.
- Use a serrated knife for clean slices. This will help prevent the cake from being crushed.
- To level the ends of the cake roll, trim them off with a sharp knife before serving.
Serving & Storage Suggestions
Serve the sponge cake roll chilled or at room temperature. It’s best enjoyed within 1-2 days of making it, as the cake can become soggy over time. Store leftovers in an airtight container in the refrigerator. You can also freeze the cake roll for up to 1 month. Thaw it in the refrigerator overnight before serving. The strawberries are best added just before serving to prevent them from making the cream soggy.
Nutritional Information
| Nutrient | Amount per Serving | % Daily Value |
|---|---|---|
| Calories | 161.2 kcal | N/A |
| Calories from Fat | 81 kcal | 51% |
| Total Fat | 9.1 g | 13% |
| Saturated Fat | 5.1 g | 25% |
| Cholesterol | 97.7 mg | 32% |
| Sodium | 188.5 mg | 7% |
| Total Carbohydrate | 16.6 g | 5% |
| Dietary Fiber | 0.2 g | 0% |
| Sugars | 9.9 g | 39% |
| Protein | 3.3 g | 6% |
Variations & Substitutions
- Gluten-Free: Substitute the all-purpose flour with a gluten-free blend. Be sure to add a binder like xanthan gum to help with the structure.
- Dairy-Free: Use a dairy-free whipping cream alternative, such as coconut cream or almond-based whipping cream. Ensure your flavoring is also dairy-free.
- Chocolate Sponge Cake: Add 2 tablespoons of unsweetened cocoa powder to the flour mixture for a chocolatey twist.
- Lemon Sponge Cake: Add the zest of one lemon to the batter and use lemon extract in the cream filling.
- Seasonal Variations: Use seasonal fruits like raspberries, blueberries, or peaches instead of strawberries.
FAQs (Frequently Asked Questions)
Q: Why did my cake crack when I rolled it?
A: The cake might have been too dry. Make sure to roll it while it’s still slightly warm and use a moist towel or parchment paper. Avoid overbaking.
Q: Can I make this cake roll ahead of time?
A: Yes, you can make the cake roll a day in advance. Store it in the refrigerator, tightly wrapped, until ready to serve. Add the final frosting and garnish just before serving.
Q: What can I use instead of whipping cream?
A: You can use mascarpone cheese, pastry cream, or a stabilized whipped cream alternative.
Q: How do I prevent the bottom of the cake from sticking to the pan?
A: Make sure to grease the parchment paper well and use a non-stick jelly roll pan.
Q: My egg whites won’t whip to stiff peaks. What am I doing wrong?
A: Make sure your bowl and beaters are clean and dry. Even a small amount of grease can prevent the egg whites from whipping properly. Also, ensure there are no traces of egg yolk in the whites.
Final Thoughts
This sponge cake roll recipe is more than just a dessert; it’s an invitation to create a moment of pure indulgence. Don’t be intimidated by the rolling process – with a little practice and these helpful tips, you’ll be creating stunning cake rolls in no time. Feel free to experiment with different flavors and fillings to make it your own. And most importantly, share your creation with loved ones and savor the joy of homemade goodness. I encourage you to try this recipe and leave a comment below letting me know how it turned out for you. Perhaps pair it with a light and refreshing glass of Moscato d’Asti!