
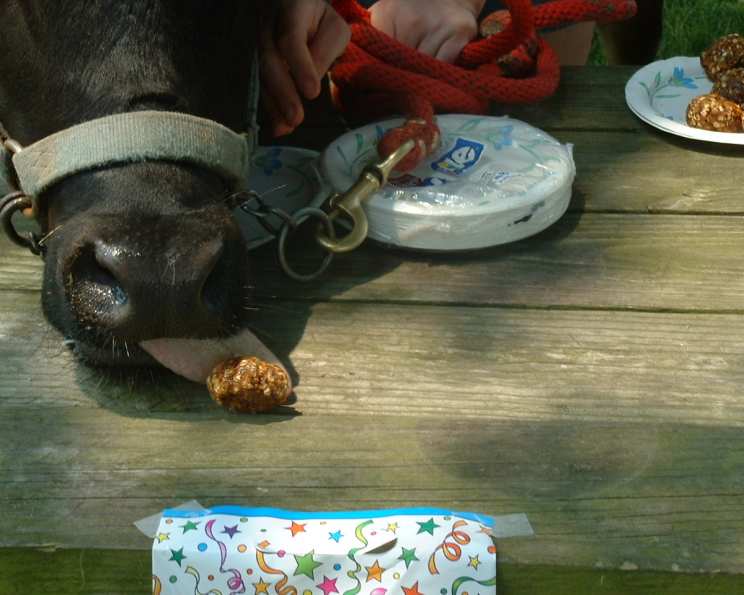
Sport and Misty’s Horse Cookies: A Recipe for Happy Hooves
My grandmother, a woman whose hands were as comfortable in the garden as they were kneading dough, always said the way to any heart – human or animal – was through their stomach. I remember, as a little girl, the sheer joy on my pony, Comet’s, face whenever Grandma would sneak him a homemade apple. It wasn’t just the taste; it was the love and care baked right in. These Sport and Misty’s Horse Cookies remind me of those moments, a simple act of kindness that speaks volumes to our equine companions.
Recipe Overview
- Prep Time: 10 minutes
- Cook Time: 15-20 minutes
- Total Time: 25-30 minutes
- Yields: 12-15 cookies
- Dietary Type: Animal Treat
Ingredients
- 1 cup horse oats or 1 cup uncooked oatmeal
- 1 cup flour
- 1 cup shredded carrot
- 1 teaspoon salt
- 1 1/2 tablespoons sugar
- 2 tablespoons vegetable oil
- 1/4 cup water
- 1/4 cup molasses (or mix two teaspoons of sugar to every five teaspoons of pancake syrup and stir in)
Equipment Needed
- Large Mixing Bowl
- Measuring Cups and Spoons
- Cookie Sheet
- Pam or Cooking Spray
Instructions
-
Preheat your oven to 350°F (175°C). This is a crucial step, as even baking ensures the cookies are cooked through without burning.
-
In a large mixing bowl, combine all ingredients in the order listed. Start with the oats (or oatmeal) and continue layering in the flour, shredded carrot, salt, sugar, vegetable oil, water, and finally the molasses (or pancake syrup mixture). Adding the wet ingredients last helps to bind everything together more effectively.
-
Use your hands or a sturdy spoon to thoroughly mix all the ingredients until well combined. The mixture should be slightly sticky but hold its shape when pressed. If the dough seems too dry, add a tiny splash more water, a teaspoon at a time, until it reaches the right consistency. If it’s too wet, add a tablespoon of flour.
-
Lightly grease a cookie sheet and spray it with Pam or another non-stick cooking spray. This is essential to prevent the cookies from sticking and making them easier to remove after baking.
-
Form the dough into small or medium-sized balls. The size will depend on the size of your horse’s mouth and preferences. About 1-inch to 1.5-inch balls are a good starting point.
-
Place the dough balls onto the prepared cookie sheet, leaving a little space between each cookie to allow for even baking.
-
(Optional) For extra happy horses, you can sprinkle a tiny bit of honey on top of each cookie before baking. A little goes a long way!
-
Bake in the preheated oven for 15-20 minutes. Keep a close eye on them to make sure they don’t burn. The cookies are done when they are lightly golden brown around the edges and firm to the touch. Baking time may vary slightly depending on your oven.
-
Remove the cookie sheet from the oven and let the cookies cool completely on the sheet before transferring them to a wire rack to cool completely. This prevents them from breaking apart while they are still soft.
Expert Tips & Tricks
-
Carrot Prep: Ensure the carrots are finely shredded. Large chunks of carrot can make the cookies difficult to bind. A food processor with a shredding attachment makes quick work of this.
-
Molasses Substitute: If you don’t have molasses or pancake syrup, try using applesauce for a slightly sweeter, fruitier flavor. Use the same amount as the molasses in the original recipe.
-
Oven Hot Spots: Rotate the cookie sheet halfway through baking to ensure even browning, especially if your oven tends to have hot spots.
-
Texture Control: For a chewier cookie, bake for the shorter end of the time range. For a crispier cookie, bake for the full 20 minutes or even slightly longer, keeping a close watch to avoid burning.
-
Storage Matters: Allow the cookies to completely cool before storing. Warm cookies trap moisture, leading to mold growth.
Serving & Storage Suggestions
These horse cookies are best served as a special treat in moderation. Offer them to your horse after a good workout, during training sessions as a reward, or simply as a sign of affection. Remember, treats should only be a small part of your horse’s overall diet.
To store the cookies, place them in an airtight container. They will keep at room temperature for up to a week, in the refrigerator for up to two weeks, or in the freezer for up to three months. If freezing, allow the cookies to thaw completely before serving.
Nutritional Information
Please note that this is an estimate. Actual nutritional values may vary.
| Nutrient | Amount per Serving |
|---|---|
| Calories | 150 kcal |
| Protein | 3g |
| Total Fat | 4g |
| Carbohydrates | 25g |
| Fiber | 2g |
| Sugar | 7g |
Variations & Substitutions
-
Grain-Free Option: Substitute the flour with almond flour or coconut flour for a grain-free version. You may need to adjust the amount of liquid slightly to achieve the right consistency.
-
Flavor Boost: Add a teaspoon of cinnamon or a pinch of ground ginger to the dough for a warm, spicy flavor.
-
Applesauce Surprise: Incorporate a 1/2 cup of unsweetened applesauce for a boost of moisture and natural sweetness.
-
Herbal Infusion: Add a tablespoon of dried herbs like peppermint or chamomile, which are often enjoyed by horses.
-
Peanut Butter Delight: Mix in a tablespoon or two of natural peanut butter (xylitol-free, as xylitol is toxic to animals) for a protein boost and added flavor.
FAQs (Frequently Asked Questions)
Q: Can I use different types of flour?
A: Yes, you can experiment with different flours, such as whole wheat or oat flour. Keep in mind that this might affect the texture and baking time.
Q: My horse has allergies. Can I modify this recipe?
A: Absolutely. Review the ingredients carefully and substitute any potential allergens with suitable alternatives. For example, if your horse is sensitive to oats, try using rice bran. Always consult with your veterinarian regarding any dietary concerns.
Q: Can I add fruit to these cookies?
A: Yes, small pieces of apple or banana can be added. Dice them finely and mix them well into the dough.
Q: How often should I give my horse these cookies?
A: Treats should only be given in moderation. Limit your horse to one or two cookies per day, depending on their size and activity level.
Q: My cookies are coming out too hard. What am I doing wrong?
A: Overbaking is the most common cause of hard cookies. Reduce the baking time by a few minutes, and make sure your oven temperature is accurate. Also, ensure you aren’t overmixing the dough, which can develop the gluten and lead to a tougher cookie.
Final Thoughts
These Sport and Misty’s Horse Cookies are more than just a recipe; they are a way to connect with your equine friend on a deeper level. So, preheat your oven, gather your ingredients, and prepare to bake a batch of happiness. I encourage you to try this recipe and tailor it to your horse’s specific tastes. Share your creations and experiences, and let’s continue to find joy in the simple act of caring for these magnificent creatures. Happy baking!