
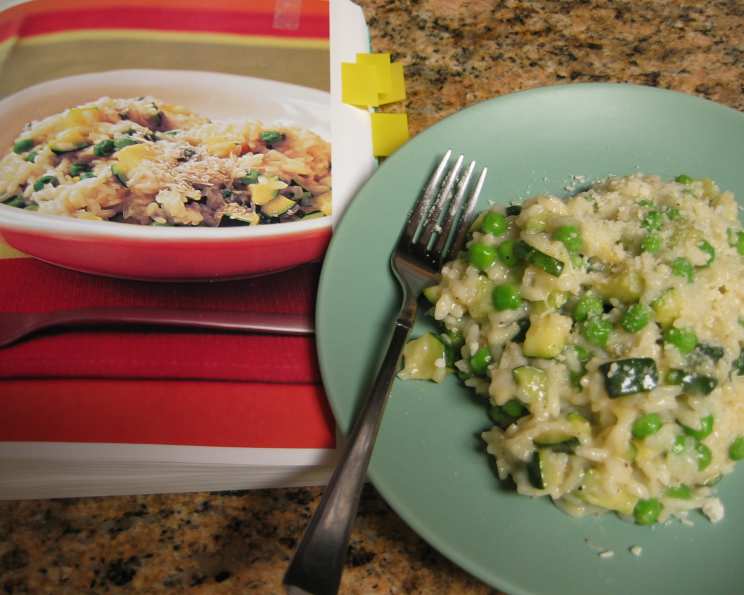
Spring Risotto With Peas and Zucchini
The scent of risotto always takes me back to my Nonna’s kitchen. I can almost see her now, standing over the stove, patiently stirring a pot of what seemed like magic. The air, thick with the aroma of simmering broth and Parmesan, promised comfort and warmth. While she made many variations, her spring risotto, bursting with the fresh flavors of peas and zucchini, was always my favorite – a taste of sunshine after a long winter. This recipe is my humble attempt to recreate that magic and share a little bit of Nonna’s love with you.
Recipe Overview
- Prep Time: 15 minutes
- Cook Time: 35 minutes
- Total Time: 50 minutes
- Servings: 6
- Dietary Type: Vegetarian
Ingredients
- 2 (14 1/2 ounce) cans reduced-sodium chicken broth
- 3 tablespoons butter
- 1-2 large zucchini, cut into 1/2-inch cubes (1 pound)
- Coarse salt, to taste
- Pepper, to taste
- 1⁄2 cup finely chopped onion
- 1 1⁄2 cups Arborio rice
- 1⁄2 cup dry white wine
- 1 cup frozen peas, thawed
- 1⁄2 cup grated Parmesan cheese, plus more for serving
Equipment Needed
- Small saucepan
- 3-quart saucepan
- Slotted spoon
Instructions
-
Begin by heating the chicken broth and 2 1/2 cups of water in a small saucepan over low heat. It’s crucial to keep the broth warm throughout the cooking process; this ensures the rice cooks evenly and absorbs the liquid properly, resulting in a creamy texture. Maintain a gentle simmer.
-
While the broth is heating, melt 2 tablespoons of butter in a 3-quart saucepan over medium heat. Add the cubed zucchini. Season generously with coarse salt and pepper. Cook, stirring often, until the zucchini is golden and slightly softened, about 8 to 10 minutes. Using a slotted spoon, transfer the cooked zucchini to a plate and set aside. This prevents the zucchini from becoming mushy later on.
-
Reduce the heat to medium-low in the same saucepan. Add the finely chopped onion and cook until it becomes soft and translucent, approximately 5 minutes. Be sure to stir occasionally to prevent burning. Season the onion with 1 teaspoon of salt and 1/4 teaspoon of pepper. This layering of flavors at each stage is what makes the risotto so delicious.
-
Raise the heat to medium. Add the Arborio rice to the saucepan and cook, stirring constantly, until the rice grains become translucent around the edges. This step, called toasting the rice, usually takes about 3 minutes. Toasting helps the rice release its starch gradually, contributing to the creamy texture of the risotto.
-
Pour in the dry white wine and cook, stirring frequently, until the wine is completely absorbed by the rice. This should take around 2 minutes. The wine adds acidity and depth of flavor to the risotto.
-
Now comes the critical part of making risotto: slowly adding the warm broth. Ladle in 1 cup of hot broth at a time, stirring constantly until almost all the liquid is absorbed before adding the next cup. This gradual addition of broth, coupled with continuous stirring, is what coaxes the starch out of the Arborio rice and creates the signature creamy texture. Continue this process until the rice is tender but still firm to the bite (al dente), about 25 to 30 minutes in total.
-
Once the rice is cooked to your liking, add the cooked zucchini and the thawed peas. Cook until the peas are bright green and heated through, about 2 minutes.
-
Remove the saucepan from the heat. Stir in the remaining 1 tablespoon of butter and 1/2 cup of grated Parmesan cheese. The butter adds richness, and the Parmesan contributes a savory, umami flavor and further enhances the creamy texture.
-
Serve immediately, topped with more Parmesan cheese. Risotto is best enjoyed fresh, as it tends to thicken as it cools.
Expert Tips & Tricks
- Warm Broth is Key: Always ensure your broth is simmering gently. Cold broth will lower the temperature of the rice and disrupt the cooking process.
- Stirring is Essential: Continuous stirring coaxes the starch from the Arborio rice, creating the creamy texture that defines risotto. Don’t skip this step!
- Taste as You Go: Start tasting the rice after about 20 minutes of cooking. You want it to be al dente – tender but with a slight bite.
- Don’t Overcook: Overcooked risotto will be mushy. Aim for a creamy consistency where the rice grains still retain some structure.
- Wine Choice: Use a dry white wine like Pinot Grigio or Sauvignon Blanc. Avoid sweet wines.
- Vegetable Variations: Feel free to experiment with other spring vegetables like asparagus or fava beans.
Serving & Storage Suggestions
Serve the risotto immediately while it’s hot and creamy. Garnish with additional grated Parmesan cheese and a sprinkle of fresh herbs like parsley or basil for added freshness and visual appeal.
Leftover risotto can be stored in an airtight container in the refrigerator for up to 2 days. To reheat, add a splash of broth or water and gently warm it in a saucepan over low heat, stirring frequently. You can also microwave it in short bursts, stirring in between, to prevent it from drying out. Be aware that the texture will change slightly upon reheating; it won’t be quite as creamy as when freshly made. Freezing is not recommended as it significantly alters the texture.
Nutritional Information
| Nutrient | Amount per Serving | % Daily Value |
|---|---|---|
| Calories | 337 kcal | – |
| Calories from Fat | 84 g | 25% |
| Total Fat | 9.4 g | 14% |
| Saturated Fat | 5.4 g | 27% |
| Cholesterol | 22.6 mg | 7% |
| Sodium | 243.6 mg | 10% |
| Total Carbohydrate | 48.5 g | 16% |
| Dietary Fiber | 3.2 g | 12% |
| Sugars | 3.2 g | – |
| Protein | 11.3 g | 22% |
Note: Nutritional information is an estimate and can vary based on specific ingredients and portion sizes.
Variations & Substitutions
- Vegan Risotto: Substitute vegetable broth for chicken broth, use olive oil instead of butter, and omit the Parmesan cheese or use a plant-based Parmesan alternative. Nutritional yeast can also add a cheesy flavor.
- Gluten-Free: Risotto is naturally gluten-free as long as you use gluten-free broth and wine.
- Seasonal Vegetables: Adapt the recipe to use other seasonal vegetables. In the fall, try butternut squash and sage; in the winter, consider adding mushrooms and truffle oil.
- Protein Boost: Add cooked shrimp, chicken, or sausage to make it a more substantial meal.
- Herbs: Experiment with different herbs like thyme, rosemary, or chives to enhance the flavor.
FAQs (Frequently Asked Questions)
Q: Can I use regular rice instead of Arborio rice?
A: While you can use other types of rice, Arborio rice is specifically chosen for its high starch content, which is essential for creating the creamy texture of risotto. Using other rice varieties will result in a different consistency.
Q: How do I know when the risotto is cooked properly?
A: The rice should be tender but still firm to the bite (al dente). The risotto should have a creamy consistency, not soupy or dry.
Q: Can I make risotto ahead of time?
A: Risotto is best served immediately. If you need to prepare it in advance, cook it until it’s slightly underdone, then spread it out on a baking sheet to cool quickly. Store it in the refrigerator and finish cooking it with a bit more broth when you’re ready to serve.
Q: What can I do if my risotto is too thick?
A: If your risotto becomes too thick, simply stir in a little more warm broth until it reaches your desired consistency.
Q: Can I freeze leftover risotto?
A: Freezing risotto is not recommended as it can significantly alter the texture, making it mushy upon thawing. It’s best enjoyed fresh or within a day or two of making it.
Final Thoughts
This Spring Risotto with Peas and Zucchini is more than just a recipe; it’s a celebration of fresh, seasonal flavors and a comforting reminder of home. I encourage you to give it a try, embrace the stirring process, and don’t be afraid to adapt it to your own taste. Whether you’re a seasoned chef or a beginner cook, this dish is sure to impress. Share your creations and feedback – I’d love to hear about your risotto adventures! Consider pairing it with a crisp glass of Pinot Grigio and a simple green salad for a complete and satisfying meal. Buon appetito!