
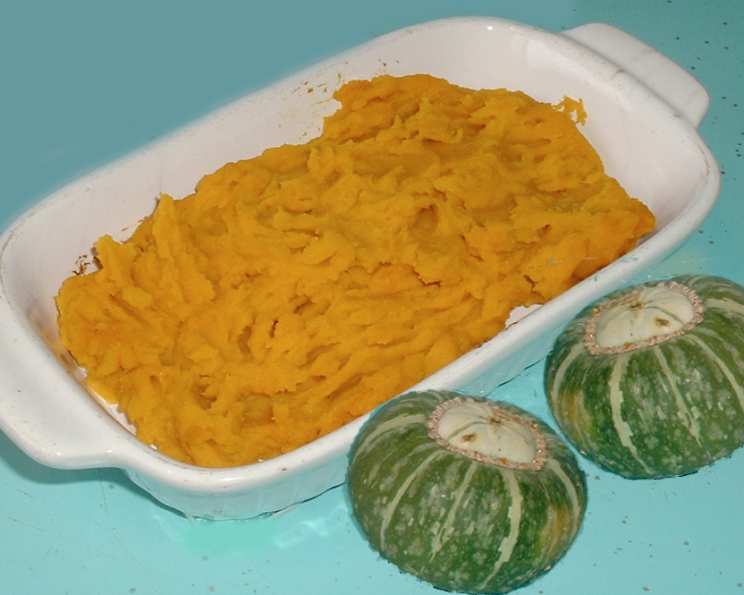
Mastering the Art of Squashed Squash: A Simple Yet Sublime Delight
The first time I truly appreciated the humble squash, I was a struggling student, and a friend, a seasoned gardener, gifted me a behemoth of a Hubbard squash. It sat on my tiny kitchen counter for days, intimidating me with its sheer size. Finally, driven by hunger and a desire to not waste such a generous gift, I took the plunge. The simple, butter-kissed, nutmeg-scented mash that emerged from that squash was a revelation. It was comfort food elevated, a reminder that even the simplest ingredients, treated with care, can yield extraordinary results.
Recipe Overview
- Prep Time: 5 minutes
- Cook Time: 8 minutes (microwave) or 45 minutes (oven)
- Total Time: 13 minutes (microwave) or 50 minutes (oven)
- Servings: 2
- Dietary Type: Vegetarian, Gluten-Free
Ingredients
- ½ lb small winter squash, such as Hubbard or Butternut
- 2 tablespoons unsalted butter, room temperature
- 1 pinch freshly grated nutmeg
- Salt and pepper to taste
- Optional: A splash of cream for added richness
Equipment Needed
- Fork or skewer
- Microwave-safe plate or Baking sheet
- Knife
- Mixing bowl
- Masher (potato masher or fork)
Instructions
-
Prepare the squash: The first step is to make sure the squash is ready for cooking. Use a fork or skewer to pierce the squash in several spots. This allows steam to escape during cooking and prevents the squash from exploding.
-
Cook the squash (Microwave Method): Place the prepared squash on a microwave-safe plate and cook on High until the squash is soft. This usually takes about 8 minutes, but the exact time can vary depending on the size and type of your microwave and squash. Check for doneness by piercing it with a fork – it should slide in easily.
-
Cook the squash (Oven Method): Preheat your oven to 400°F (200°C). Prepare the squash as described in step 1. Place the pierced squash on a baking sheet and roast for about 45 minutes, or until a fork easily pierces the flesh.
-
Cool and Prepare the Squash: Once the squash is cooked, let it cool slightly, just enough so you can handle it without burning yourself. Then, using a sharp knife, carefully cut the cooked squash in half.
-
Remove the Seeds: Scoop out and discard the seeds and any stringy bits from the center of each half of the squash. A spoon or ice cream scoop works well for this.
-
Scoop the Flesh: Now comes the good part. Scoop all the flesh from the squash halves into a mixing bowl. The flesh should be tender and easy to remove.
-
Add Butter and Nutmeg: Add the butter and nutmeg to the bowl with the squash flesh. Make sure the butter is at room temperature for easier mashing.
-
Mash the Squash: Using a masher (a potato masher works great) or a sturdy fork, mash the squash, butter, and nutmeg together until you reach your desired consistency. Some people prefer a smooth, creamy mash, while others like it a bit chunkier.
-
Season to Taste: Taste the mashed squash and add salt and pepper to taste. Remember that a little salt can go a long way in bringing out the natural sweetness of the squash.
-
Optional: Add Cream: If you’re feeling decadent, add a wee bit of cream while mashing for an extra layer of richness and flavor. A tablespoon or two should be enough.
-
Serve: Serve the squashed squash immediately while it’s still warm.
Expert Tips & Tricks
- Roasting Enhancements: To deepen the flavor of the roasted squash, toss it with a drizzle of olive oil, a sprinkle of dried herbs like thyme or rosemary, and a pinch of red pepper flakes before roasting.
- Microwave Shortcut: For an even faster cooking time in the microwave, cut the squash in half before microwaving. This will reduce the cooking time by a few minutes. Be extra careful when handling the hot squash after microwaving.
- Mashing Consistency: If your squash mash is too thick, add a tablespoon of milk or vegetable broth at a time until you reach your desired consistency.
Serving & Storage Suggestions
Serve the squashed squash as a side dish alongside roasted chicken, pork, or fish. It also makes a delicious vegetarian main course, especially when topped with a dollop of sour cream or plain yogurt. For a more elegant presentation, transfer the mashed squash to a serving bowl and garnish with a sprig of fresh herbs or a sprinkle of toasted nuts.
Leftover squashed squash can be stored in an airtight container in the refrigerator for up to 3 days. To reheat, microwave in short intervals, stirring occasionally, until heated through. You can also reheat it in a saucepan over low heat, adding a splash of milk or broth if needed to prevent it from drying out.
While it’s possible to freeze mashed squash, the texture may change slightly upon thawing. To freeze, spread the mashed squash in a single layer on a baking sheet and freeze until solid. Then, transfer the frozen squash to a freezer bag or container and store for up to 2 months. Thaw in the refrigerator overnight before reheating.
Nutritional Information
| Nutrient | Amount per Serving | % Daily Value |
|---|---|---|
| Calories | 141 kcal | 7% |
| Total Fat | 12g | 17% |
| Saturated Fat | 7g | 36% |
| Cholesterol | 31mg | 10% |
| Sodium | 6mg | 0% |
| Total Carbohydrate | 10g | 3% |
| Dietary Fiber | 2g | 6% |
| Sugars | 3g | N/A |
| Protein | 1g | 2% |
Note: Nutritional information is an estimate and can vary based on specific ingredients and preparation methods.
Variations & Substitutions
- Vegan Version: Substitute the butter with a vegan butter alternative or 2 tablespoons of olive oil. Omit the optional cream or replace it with a tablespoon of coconut cream for a richer flavor.
- Spice It Up: Add a pinch of cayenne pepper or a dash of smoked paprika for a touch of heat.
- Herby Twist: Incorporate fresh herbs like sage, thyme, or rosemary for a more savory flavor profile. Chop the herbs finely and add them to the squash while mashing.
- Sweet Treat: For a sweeter version, add a drizzle of maple syrup or honey to the mashed squash.
- Fall Flavors: Cinnamon, ginger, and allspice make delicious complements to the nutmeg, especially when serving around the holidays.
FAQs (Frequently Asked Questions)
Q: Can I use other types of winter squash for this recipe?
A: Absolutely! While Hubbard and Butternut are excellent choices, you can also use other winter squash varieties like acorn, kabocha, or even pumpkin. Just adjust the cooking time accordingly.
Q: How do I know when the squash is cooked through?
A: The best way to check for doneness is to pierce the squash with a fork. If the fork slides in easily and the flesh feels soft, it’s ready.
Q: Can I make this ahead of time?
A: Yes, you can cook the squash ahead of time and store the cooked flesh in the refrigerator for up to 2 days. When ready to serve, simply mash it with the butter, nutmeg, and seasonings.
Q: What if I don’t have fresh nutmeg?
A: Ground nutmeg can be used as a substitute. Use about 1/4 teaspoon of ground nutmeg for every pinch of freshly grated nutmeg.
Q: My squash is too watery. What can I do?
A: If your squash is too watery, you can drain off some of the excess liquid after cooking it. You can also roast the squash for a bit longer to help evaporate some of the moisture.
Final Thoughts
Squashed squash, in its simplicity, offers a profound connection to the earth and the seasons. It’s a dish that whispers of cozy evenings, crackling fireplaces, and the warmth of shared meals. I encourage you to try this recipe, to experiment with different squash varieties and flavor combinations, and to make it your own. Don’t be afraid to add a personal touch – a sprinkle of your favorite spice, a dollop of something creamy, or a scattering of toasted nuts. Most importantly, savor each bite and share this simple yet sublime delight with those you love.