
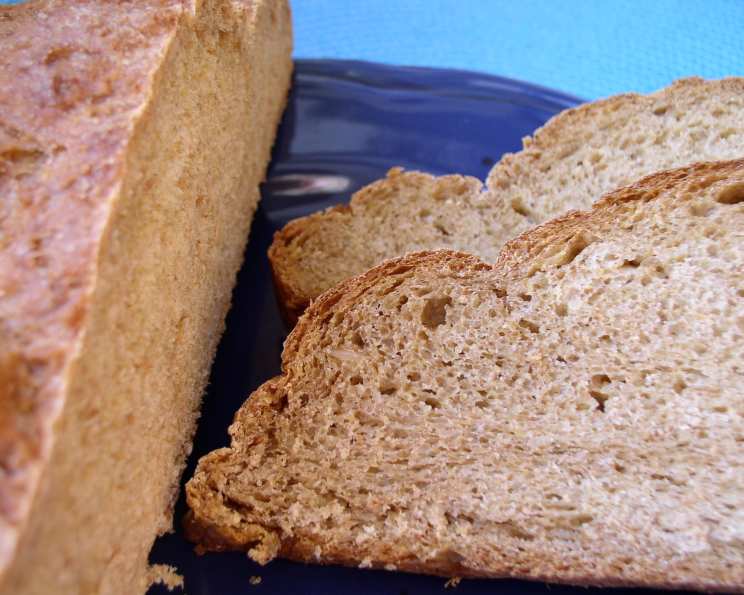
The Soulful Simplicity of Squaw Bread
The aroma alone transports me back to autumns spent at my grandmother’s farm. I remember the earthy scent of damp leaves mingling with the sweet, slightly nutty fragrance emanating from her kitchen. It was the scent of Squaw Bread baking, a comforting staple always present during harvest season. Grandma swore it was the perfect complement to everything from hearty stews to a simple smear of butter and honey. The dark, dense slices, rich with grains and the subtle sweetness of molasses, were more than just bread; they were a taste of home, a warm embrace on a cool day, and a testament to her resourceful and loving nature.
Recipe Overview
- Prep Time: 30 minutes
- Cook Time: 45 minutes
- Total Time: 3 hours 15 minutes (including rising time)
- Yields: 4 loaves
- Serves: 32
- Dietary Type: Vegetarian
Ingredients
- 1 cup cornmeal
- 1 cup natural bran
- 1 cup oatmeal
- 1 cup gluten flour
- 3 cups whole wheat flour
- 4-6 cups unbleached flour
- 3 (1/4 ounce) packages yeast
- 2/3 cup honey (or 1/3 cup honey and 1/3 cup molasses for a darker color)
- 2 teaspoons salt
- 4 cups boiling water
- 1 cup warm water
- 1/4 cup butter
Equipment Needed
- Large mixing bowl
- Measuring cups and spoons
- Two large cookie sheets
- Mixing Spoon
- Clean kitchen towel
- Wire cooling rack
Instructions
- Begin by dissolving the yeast in the warm water in a small bowl. Give it a gentle stir and let it sit for about 5-10 minutes until it becomes foamy, which indicates that the yeast is active.
- In a large mixing bowl, pour the boiling water over the cornmeal and oatmeal. Let this mixture stand and cool down completely. This allows the grains to soften and absorb the water, contributing to the bread’s moist texture. This process typically takes 20-30 minutes.
- Once the cornmeal and oatmeal mixture has cooled to lukewarm, add the honey (or honey and molasses blend), butter, and salt to the yeast mixture. Stir well to combine all the ingredients thoroughly.
- Next, stir in the bran, followed by the whole wheat flour. Mix until a shaggy dough begins to form.
- Now, add the cooled cereal mixture to the dough. Mix until combined.
- Gradually add the unbleached flour, one cup at a time, until the mixture becomes stiff enough to knead. You may not need all 6 cups; the amount of flour needed can vary depending on the humidity and the type of flour used. Aim for a dough that is slightly sticky but still manageable.
- Turn the dough out onto a lightly floured surface and knead for 10 to 20 minutes. Kneading develops the gluten in the flour, which gives the bread its structure and chewy texture. The dough should become smooth and elastic.
- Place the kneaded dough in a lightly oiled bowl, turning to coat all sides. Cover the bowl with a clean kitchen towel and let it rise in a warm place for 2 hours, or until it has doubled in size.
- After the first rise, punch down the dough to release the air. This step helps to even out the texture of the bread.
- Divide the dough into four equal portions and shape each portion into a loaf.
- Place the loaves onto two lightly greased and floured cookie sheets, ensuring they have enough space to expand during the second rise.
- Cover the loaves with a clean kitchen towel and let them rise for 1 hour, or until they have almost doubled in size.
- Preheat your oven to 350 degrees Fahrenheit (175 degrees Celsius).
- Bake the loaves in the preheated oven for 45 minutes, or until they are golden brown and sound hollow when tapped on the bottom. Be careful not to underbake the loaves, as this moist, heavy bread needs sufficient baking time to cook through.
- Remove the loaves from the oven and transfer them to a wire cooling rack to cool completely before slicing and serving.
Expert Tips & Tricks
- For a richer flavor and darker color, substitute half of the honey with molasses. The molasses also adds a depth of flavor that complements the other grains.
- If your kitchen is cold, you can create a warm environment for the dough to rise by placing the bowl in a slightly warmed oven (turned off) or near a warm stovetop.
- If you find the dough too sticky to knead, lightly flour your hands and the work surface. Avoid adding too much flour, as this can make the bread dry.
- To check for doneness, insert a wooden skewer into the center of a loaf. If it comes out clean, the bread is done.
- For a softer crust, brush the tops of the loaves with melted butter immediately after removing them from the oven.
Serving & Storage Suggestions
Squaw bread is incredibly versatile and can be enjoyed in various ways. Serve it warm with a generous slather of butter, honey, or your favorite jam. It’s also delicious as a side to soups, stews, or chili. For a savory option, try it with cream cheese and smoked salmon or as part of a sandwich with your favorite fillings.
To store, wrap the cooled loaves tightly in plastic wrap or place them in an airtight container. At room temperature, Squaw bread will stay fresh for 2-3 days. In the refrigerator, it will last for up to a week. For longer storage, you can freeze the loaves for up to 3 months. Thaw completely before slicing and serving. Reheat slices in a toaster or oven for a warm, comforting treat.
Nutritional Information
| Nutrient | Amount per Serving | % Daily Value |
|---|---|---|
| Calories | 173.5 kcal | N/A |
| Calories from Fat | 20 g | 12% |
| Total Fat | 2.3 g | 3% |
| Saturated Fat | 1 g | 5% |
| Cholesterol | 3.8 mg | 1% |
| Sodium | 164.8 mg | 6% |
| Total Carbohydrate | 32.7 g | 10% |
| Dietary Fiber | 3 g | 12% |
| Sugars | 6.2 g | 25% |
| Protein | 7.2 g | 14% |
Variations & Substitutions
- For a slightly sweeter bread, increase the amount of honey or add a tablespoon of brown sugar to the dough.
- Experiment with different types of flour. Spelt flour or rye flour can add unique flavors and textures to the bread.
- Add nuts and seeds for extra crunch and nutrition. Sunflower seeds, pumpkin seeds, or chopped walnuts are great additions. Stir them into the dough before the first rise.
- For a gluten-free version, try using a gluten-free flour blend specifically designed for bread making. You may need to adjust the amount of liquid to achieve the desired dough consistency.
FAQs (Frequently Asked Questions):
Q: Why is it called Squaw Bread?
A: The name “Squaw Bread” has controversial origins and is considered offensive by many Indigenous people. It’s best to be aware of the term’s history and consider using alternative names like “Dark Bread” or “Harvest Bread.”
Q: Can I use a stand mixer to knead the dough?
A: Yes, you can use a stand mixer with a dough hook attachment. Knead on medium speed for about 8-10 minutes, or until the dough is smooth and elastic.
Q: What if my dough doesn’t rise?
A: Make sure your yeast is fresh and active. Also, ensure the dough is placed in a warm environment. If the dough still doesn’t rise, the yeast might be old or the temperature may not be warm enough.
Q: Can I freeze the baked loaves?
A: Yes, Squaw bread freezes well. Wrap the cooled loaves tightly in plastic wrap and then in foil or place them in a freezer-safe bag. They can be frozen for up to 3 months.
Q: What’s the best way to reheat frozen Squaw Bread?
A: Thaw the frozen loaf completely at room temperature. You can then slice and toast individual slices, or warm the entire loaf in a preheated oven at 300°F (150°C) for about 10-15 minutes.
Final Thoughts
Baking Squaw Bread is more than just following a recipe; it’s an act of connecting with tradition and creating something wholesome and nourishing. Whether you’re a seasoned baker or just starting out, I encourage you to give this recipe a try. Embrace the process, experiment with variations, and most importantly, share the delicious results with loved ones. Don’t hesitate to adjust the recipe to suit your personal preferences and please let me know how it turns out! Perhaps serve with a hearty bowl of chili or a dollop of homemade apple butter, and enjoy the warmth and comfort this exceptional bread brings.