
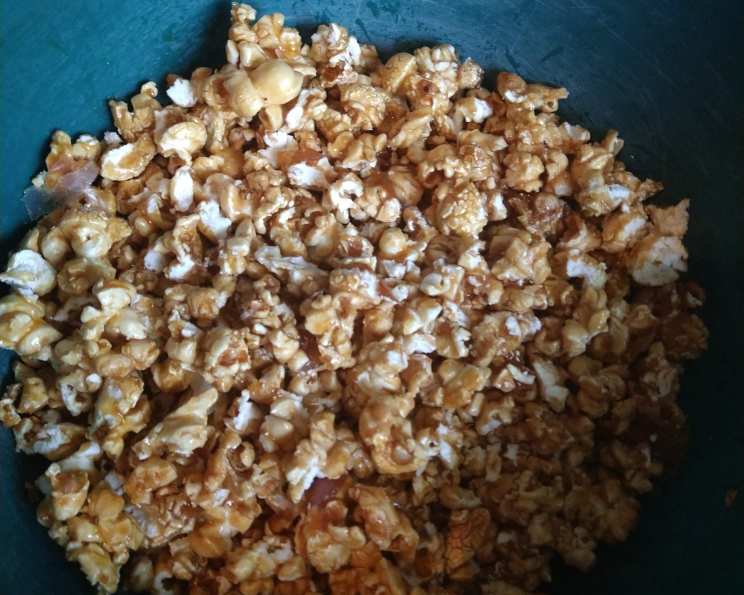
State Fair Blue Ribbon Caramel Corn
The aroma of caramel corn instantly transports me back to childhood summers. I can almost feel the sticky sweetness coating my fingers as I devoured a bag of this golden treat at the county fair. The air buzzed with excitement, the sounds of carnival games and laughter echoing around me. It wasn’t just the caramel corn; it was the experience, the joy, and the pure, unadulterated happiness of a perfect summer day. Years later, I wanted to recreate that magic, that perfect bite of crispy, buttery caramel corn, but I was often met with sticky, rainy-day failures. This recipe, adapted for our Pacific Northwest climate, is my answer to that sweet, nostalgic craving.
Recipe Overview
- Prep Time: 15 minutes
- Cook Time: 44 minutes
- Total Time: 59 minutes
- Yields: About 2 gallons
- Serves: 12
- Dietary Type: Vegetarian
Ingredients
- 2/3 cup popcorn kernels, popped (About 1/3 cup unpopped kernels at a time works well with a Whirly Pop)
- 1 cup nuts (optional, pecans are particularly delicious)
- 2 cups brown sugar
- 1/2 cup light corn syrup
- 1 cup unsalted butter, plus extra for greasing pans or cooking spray
- 1/4 teaspoon kosher salt (up to 1/2 teaspoon if you prefer a saltier caramel)
- 1/2 teaspoon vanilla extract
- 1/2 teaspoon baking soda
Equipment Needed
- Air popper or Whirly Pop (or large pot with lid)
- Roasting pan
- 4-5 cup heavy-bottomed saucepan
- Two large sheet pans
- Waxed paper
- Large spoon or spatula
Instructions
-
Preheat your oven to 275°F (135°C).
-
Pop the popcorn using your preferred method. Be sure to pick out any unpopped kernels (also known as “old maids”). Nobody wants to bite into a hard kernel in their caramel corn!
-
If using nuts, spread them with the popped popcorn in a roasting pan and place in the preheated oven to keep warm. This will also help toast the nuts slightly, enhancing their flavor.
-
Grease two large sheet pans generously with butter or cooking spray. This prevents the caramel corn from sticking and makes cleanup much easier.
-
In a 4-5 cup heavy-bottomed saucepan, combine the brown sugar, butter, corn syrup, and salt.
-
Place the saucepan over low heat and stir constantly until the sugar is completely melted and the mixture is smooth.
-
Increase the heat to medium and continue to stir constantly. Bring the mixture to a rolling boil (a boil that continues even while stirring).
-
Boil the caramel for exactly 4 minutes, stirring constantly. This is crucial for achieving the right texture. Don’t be tempted to shorten or lengthen the boiling time.
-
Remove the saucepan from the heat.
-
Immediately add the baking soda and vanilla extract to the caramel mixture.
-
Stir vigorously to ensure the baking soda is thoroughly incorporated. The mixture will foam up significantly – this is normal! The baking soda is what gives the caramel corn its light and airy texture.
-
Pour the hot caramel over the warm popcorn and nuts in the roasting pan.
-
Gently stir the popcorn and nuts with the caramel until everything is evenly coated. Be careful not to break the popcorn into small pieces; gentle stirring is key.
-
Divide the caramel corn evenly between the two prepared sheet pans. Spread it out in a single layer on each pan.
-
Bake for 40 minutes, stirring every 15 minutes. Do not skip the stirring! This ensures even cooking and prevents the caramel corn from sticking together in large clumps.
-
Remove the sheet pans from the oven and allow the caramel corn to cool completely on waxed paper at room temperature. This may take an hour or two.
-
Once cooled, store the caramel corn in two zip-lock gallon baggies to maintain freshness.
Expert Tips & Tricks
- Invest in a good candy thermometer, especially if you’re new to making caramel. While this recipe doesn’t explicitly require one, it can be a helpful tool to ensure accuracy. The caramel should reach the soft-ball stage (around 235-240°F).
- Use a heavy-bottomed saucepan to prevent the caramel from scorching.
- Don’t overcook the caramel. Overcooked caramel will be hard and brittle.
- Work quickly once you add the baking soda and vanilla. The reaction happens fast, and you want to incorporate it evenly before it sets.
- If your caramel corn is too sticky, it likely wasn’t cooked long enough. You can try returning it to the oven for a few more minutes, but be careful not to burn it.
- For a deeper caramel flavor, try using dark brown sugar instead of light brown sugar.
- Add a pinch of cayenne pepper to the caramel for a subtle kick.
Serving & Storage Suggestions
Serve your state fair blue ribbon caramel corn in individual bags for a fun and festive treat, or pile it high in a bowl for sharing. It’s delicious on its own, but also pairs well with a scoop of vanilla ice cream or a sprinkle of sea salt.
Store the cooled caramel corn in airtight containers or zip-lock bags at room temperature for up to a week. For longer storage, you can freeze it for up to 2 months. Just be sure to thaw it completely before serving. Reheating isn’t usually necessary, but if you prefer, you can warm it slightly in a low oven (200°F/95°C) for a few minutes.
Nutritional Information
(Estimated per serving, based on 12 servings)
| Nutrient | Amount per Serving | % Daily Value |
|---|---|---|
| Calories | 384 kcal | 19% |
| Total Fat | 21 g | 32% |
| Saturated Fat | 11 g | 52% |
| Cholesterol | 41 mg | 13% |
| Sodium | 186 mg | 7% |
| Total Carbohydrate | 50 g | 16% |
| Dietary Fiber | 1 g | 4% |
| Sugars | 40 g | 159% |
| Protein | 2 g | 4% |
Note: Nutritional information is an estimate and may vary depending on specific ingredients and portion sizes.
Variations & Substitutions
- Gluten-Free: This recipe is naturally gluten-free as long as you use gluten-free vanilla extract.
- Vegan: Substitute the unsalted butter with a vegan butter alternative. Be sure to choose one that melts and browns well.
- Nut-Free: Omit the nuts entirely. You can add other toppings like pretzels or chocolate chips after baking.
- Spice it Up: Add a pinch of cayenne pepper or chili flakes to the caramel for a spicy kick.
- Chocolate Caramel Corn: Drizzle melted chocolate over the cooled caramel corn for an extra decadent treat.
- Seasonal Flavors: Add pumpkin pie spice in the fall or peppermint extract during the holidays.
FAQs (Frequently Asked Questions)
Q: Why is my caramel corn sticky instead of crispy?
A: The caramel probably wasn’t cooked long enough to reach the correct temperature. Make sure you boil it for the full 4 minutes.
Q: Can I use microwave popcorn for this recipe?
A: While you can, it’s not recommended. Air-popped popcorn or popcorn made in a Whirly Pop will yield a crispier result. Also, avoid using flavored microwave popcorn as it will clash with the caramel flavor.
Q: How do I prevent the caramel corn from sticking together?
A: Stirring frequently during baking is crucial. Make sure to spread the caramel corn in a single layer on the baking sheets and stir every 15 minutes.
Q: Can I make this recipe ahead of time?
A: Yes, you can make it a day or two in advance. Store it in an airtight container at room temperature.
Q: What if I don’t have brown sugar?
A: You can make your own brown sugar by combining 1 cup of granulated sugar with 1 tablespoon of molasses.
Final Thoughts
This State Fair Blue Ribbon Caramel Corn recipe is more than just a sweet treat; it’s a trip down memory lane, a taste of pure joy, and a chance to create new memories with loved ones. Don’t be afraid to experiment with different flavors and toppings to make it your own. I encourage you to give this recipe a try, share it with friends and family, and let me know what you think. Happy popping!