
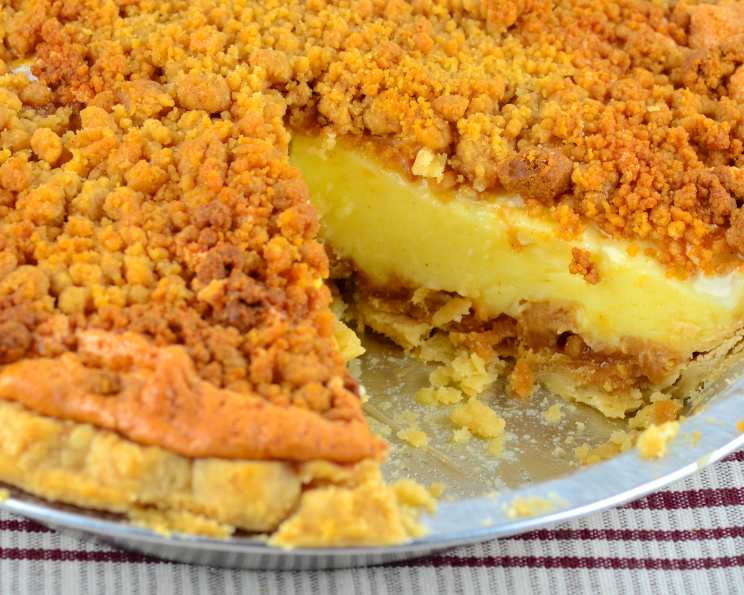
State Fair Winner Peanut Butter Cream Pie
My earliest memories are filled with the aroma of peanut butter and the gentle hum of the oven, a direct result of my grandfather’s unwavering dedication to his prize-winning peanut butter cream pie. I can still picture him meticulously layering the filling, his hands weathered and strong, a testament to years spent perfecting this very recipe. It wasn’t just a pie; it was a symbol of love, perseverance, and the simple joys of a family gathered around a table. To this day, a slice of this pie instantly transports me back to those cherished moments.
Recipe Overview
- Prep Time: 20 minutes
- Cook Time: 30 minutes
- Total Time: 50 minutes
- Servings: 8-10
- Yield: 1 pie
- Dietary Type: Not specified (contains dairy, eggs, and gluten)
Ingredients
- 1 pie shell, baked
- ½ cup creamy peanut butter
- 1 cup powdered sugar
- ¼ cup cornstarch
- ⅔ cup sugar
- ¼ teaspoon salt
- 2 cups milk, SCALDED (bring milk just to a boil)
- 3 eggs, separated
- 2 tablespoons butter or 2 tablespoons margarine
- ¼ teaspoon vanilla
- 6 tablespoons sugar
Equipment Needed
- Pie dish
- Medium bowl
- Small bowl
- Double boiler or saucepan and heatproof bowl
- Whisk
- Spatula
- Mixer
Instructions
-
Begin by preparing your pie shell according to its recipe instructions. Ensure it’s fully baked and allowed to cool completely before moving on. A pre-made, store-bought crust works wonderfully as well.
-
In a mixing bowl, combine the ½ cup of creamy peanut butter and the 1 cup of powdered sugar. Use a pastry blender or your fingers to cut the peanut butter into the powdered sugar until the mixture resembles coarse pie dough. It should be crumbly but hold together slightly when pressed.
-
Take half of the peanut butter-powdered sugar mixture and gently press it into the bottom of your cooled pie shell. This creates a delicious peanut butter base for the cream filling.
-
In a medium bowl, whisk together the ¼ cup cornstarch, ⅔ cup sugar, and ¼ teaspoon salt. Gradually whisk in the 2 cups of scalded milk, making sure there are no lumps. The hot milk will help the dry ingredients dissolve smoothly.
-
In a separate, smaller bowl, thoroughly beat the 3 egg yolks until they are light and slightly frothy. This will help them incorporate into the milk mixture without curdling.
-
Temper the egg yolks by slowly pouring a small amount of the hot milk mixture over the beaten egg yolks, whisking constantly. This gradual addition of heat prevents the yolks from cooking prematurely.
-
Pour the tempered egg yolk mixture back into the remaining milk mixture in the medium bowl.
-
Now, transfer the entire mixture to a double boiler. If you don’t have a double boiler, you can create one by placing a heatproof bowl over a saucepan of simmering water, ensuring the bottom of the bowl doesn’t touch the water. Cook, stirring constantly, until the mixture thickens into a custard-like consistency. This may take about 10-15 minutes. The custard is ready when it coats the back of a spoon and a line drawn through it with your finger holds its shape.
-
Remove the custard from the heat and stir in the 2 tablespoons of butter (or margarine) and the ¼ teaspoon of vanilla extract. Stir until the butter is completely melted and the vanilla is incorporated.
-
Carefully pour the warm custard filling into the prepared pie shell, over the peanut butter base.
-
Now, prepare the meringue topping. In a clean, grease-free bowl, beat the 3 egg whites until soft peaks form. Gradually add the 6 tablespoons of sugar, one tablespoon at a time, beating well after each addition. Continue beating until stiff, glossy peaks form. The meringue should be firm enough to hold its shape.
-
Spread the meringue evenly over the peanut butter filling, creating a few decorative peaks with the back of a spatula.
-
Sprinkle the remaining peanut butter-powdered sugar mixture over the meringue topping. This adds a delightful textural contrast and intensifies the peanut butter flavor.
-
Bake the pie in a preheated oven at 325 degrees Fahrenheit for 30 minutes, or until the meringue is lightly browned and set. Watch carefully to prevent the meringue from burning.
-
Allow the pie to cool completely on a wire rack before serving. It can be served warm or cold, according to your preference. Many find the warm pie to be especially comforting.
Expert Tips & Tricks
- Preventing a Soggy Crust: To ensure a crisp crust, consider blind baking it with pie weights before adding the peanut butter base.
- Meringue Stability: Adding a pinch of cream of tartar to the egg whites before beating can help stabilize the meringue and prevent it from weeping.
- Peanut Butter Flavor Boost: For a more intense peanut butter flavor, try using natural peanut butter, but be aware that it may slightly alter the texture of the filling.
- Tempering Eggs Correctly: When tempering the egg yolks, add the hot milk very gradually and whisk vigorously to avoid scrambling the eggs.
- Make-Ahead Tip: The filling can be made a day in advance and stored in the refrigerator. Just be sure to give it a good whisk before pouring it into the pie shell.
Serving & Storage Suggestions
This peanut butter cream pie is delicious served on its own, but it also pairs well with a scoop of vanilla ice cream or a dollop of whipped cream. A sprinkle of chopped peanuts can also add a nice finishing touch.
Leftovers should be stored in the refrigerator, covered, for up to 3 days. The meringue may soften slightly over time, but the pie will still be delicious. While freezing is not recommended due to the meringue’s texture, the filling itself can be frozen separately.
Nutritional Information
| Nutrient | Amount per Serving | % Daily Value |
|---|---|---|
| Calories | 474.9 kcal | N/A |
| Calories from Fat | 202 g | N/A |
| Total Fat | 22.5 g | 34% |
| Saturated Fat | 7.4 g | 36% |
| Cholesterol | 85.9 mg | 28% |
| Sodium | 346.4 mg | 14% |
| Total Carbohydrate | 61.1 g | 20% |
| Dietary Fiber | 1.8 g | 7% |
| Sugars | 42.4 g | N/A |
| Protein | 9.8 g | 19% |
Note: Nutritional information is an estimate and may vary based on specific ingredients and portion sizes.
Variations & Substitutions
- Gluten-Free: Use a gluten-free pie crust to make this pie suitable for those with gluten sensitivities.
- Dairy-Free: While more challenging, substituting the milk with a rich plant-based milk like oat milk and using a dairy-free butter alternative can work. The butter substitute might slightly affect the custard’s richness.
- Chocolate Peanut Butter: Swirl a bit of melted chocolate into the peanut butter filling for a chocolate peanut butter twist.
- Salted Caramel: Drizzle salted caramel sauce over the finished pie for an extra layer of indulgence.
- Mini Pies: Make individual mini pies using muffin tins for a fun and portion-controlled dessert.
FAQs (Frequently Asked Questions)
Q: Can I use a no-bake pie crust for this recipe?
A: While a no-bake crust can be used, a baked crust is recommended for better structural integrity and overall texture.
Q: Why is my meringue weeping?
A: Overbaking, underbeating the egg whites, or high humidity can cause weeping. Make sure to beat the egg whites to stiff peaks and bake until just lightly browned.
Q: Can I make this pie ahead of time?
A: Yes, the filling can be made a day ahead and refrigerated. Add the meringue just before baking.
Q: How do I prevent the peanut butter mixture from clumping when I mix it with powdered sugar?
A: Make sure your peanut butter is at room temperature and use a pastry blender or your fingers to break up any large clumps.
Q: Can I substitute the cornstarch with flour?
A: While you can, cornstarch provides a clearer and glossier finish. If substituting, use twice the amount of flour.
Final Thoughts
This State Fair Winner Peanut Butter Cream Pie is more than just a recipe; it’s a slice of history, a taste of tradition, and a testament to the power of simple ingredients transformed into something truly extraordinary. Don’t be intimidated by the steps; each one is a building block towards creating a dessert that will impress your family and friends. So, gather your ingredients, preheat your oven, and embark on this culinary adventure. And once you’ve created your masterpiece, I encourage you to share it with loved ones, savor every bite, and perhaps even pass on the recipe to future generations. After all, the best recipes are those that are shared with love. Enjoy!