
The Art of Steamed Duck: A Culinary Journey
My grandmother, a woman whose kitchen was a sanctuary of warmth and intoxicating aromas, always said the best way to cook duck was to let it steam its way to perfection. I remember watching her, a tiny but mighty figure, carefully lowering a whole duck into a massive steamer, the fragrant steam swirling around her like a comforting embrace. The scent of ginger and green onions, infused into the succulent meat, is a memory etched in my culinary soul. It’s a taste of home, of family, and of simple, honest cooking that I’m thrilled to share with you today.
Recipe Overview
- Prep Time: 15 minutes
- Cook Time: 2 hours 0 minutes
- Total Time: 2 hours 15 minutes
- Servings: 2-4
- Yield: 1 whole duck
- Dietary Type: Omnivore
Ingredients
- 1 (4-5 lb) duck
- 4 green onions
- 2 garlic cloves
- 2 slices gingerroot (1/8 inch thick)
- 1 teaspoon soy sauce
- 1 tablespoon honey
Equipment Needed
- Deep-sided heatproof dish
- Steamer (large enough to fit the duck, possibly cut into quarters)
- Small plate (that fits inside the steamer with a 1-inch clearance)
- Meat thermometer
- Oven
Instructions
-
Begin by preparing the duck. Place it in a deep-sided heatproof dish. This is crucial, as the duck will release a significant amount of fat and moisture during the steaming process, and you’ll want to collect these valuable juices.
-
Next, stuff the cavity of the duck with the aromatic vegetables. Place the green onions, garlic cloves, and gingerroot inside the duck. These aromatics will infuse the meat with their subtle flavors as it steams.
-
Prepare the steamer. Place a small plate that fits comfortably inside the steamer, ensuring there’s about a 1-inch clearance for the steam to circulate freely. Lightly spray the plate with cooking spray (like Pam) to prevent the duck from sticking.
-
Position the duck on the plate within the steamer. Depending on the size of your steamer, you might need to cut the duck into quarters to ensure it fits properly. Don’t overcrowd the steamer; proper steam circulation is key.
-
Fill the bottom of the steamer with a generous amount of water. Bring the water to a vigorous boil. The steam is what will gently cook the duck to tender perfection.
-
Carefully steam the duck for approximately 1 1/2 hours (90 minutes), or until a meat thermometer inserted into the thickest part of the thigh registers 180-degrees F. It’s essential to monitor the water level in the steamer throughout the cooking process. You may need to add more water to the bottom as it evaporates to maintain a consistent steaming environment.
-
While the duck is steaming, preheat your oven to 450-degrees F (232-degrees C). This high heat will ensure a crispy, golden-brown skin during the roasting phase.
-
Once the duck has reached the desired internal temperature, carefully remove it from the steamer. Be mindful of the hot steam and any accumulated juices.
-
In a small saucepan or microwave-safe bowl, heat the soy sauce and honey together until they are well combined and slightly warmed. This creates a delicious glaze that will caramelize beautifully during roasting.
-
Generously brush the soy sauce and honey mixture over the entire surface of the duck. Ensure the skin is evenly coated for optimal browning and flavor.
-
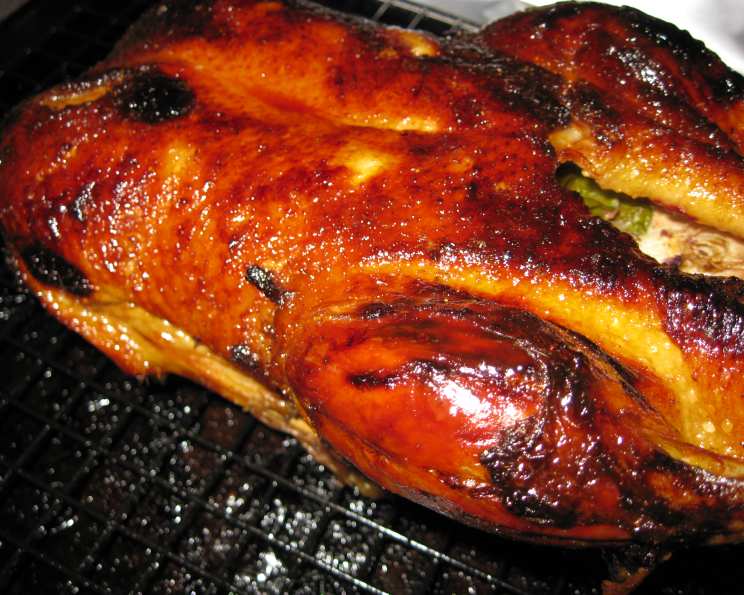
Roast the duck in the preheated oven for 20-30 minutes, or until the skin is deeply browned and wonderfully crisp. Keep a close eye on it to prevent burning.
-
Remove the roasted duck from the oven and let it rest for a few minutes before carving. Then, carefully cut the duck into serving pieces and serve immediately.
Expert Tips & Tricks
- Don’t discard the rendered duck fat! Strain it and save it for roasting vegetables (especially potatoes!), confiting garlic, or adding incredible flavor to your next batch of scrambled eggs. It’s liquid gold!
- For an even more intense flavor, marinate the duck with the green onions, garlic, ginger, soy sauce, and honey for at least 4 hours, or even overnight, before steaming.
- To ensure crispy skin, pat the duck dry with paper towels before steaming. This helps remove excess moisture that can hinder browning during the roasting phase.
- If you don’t have a steamer large enough, you can use a large pot with a steaming basket or even a makeshift steamer using a heat-safe rack placed inside the pot.
- If the duck skin starts to brown too quickly during roasting, tent it loosely with foil to prevent burning.
Serving & Storage Suggestions
Serve the steamed and roasted duck immediately while it’s hot and the skin is at its crispiest. Accompany it with steamed rice, stir-fried vegetables, or a simple green salad. Leftover duck can be stored in an airtight container in the refrigerator for up to 3 days. To reheat, you can gently warm it in a low oven (300-degrees F) until heated through, or briefly microwave it. Note that reheating may soften the skin. For longer storage, cooked duck can be frozen for up to 2 months. Thaw it overnight in the refrigerator before reheating.
Nutritional Information
| Nutrient | Amount per Serving | % Daily Value |
|---|---|---|
| Calories | 3717.9 kcal | N/A |
| Calories from Fat | 3215 g | 86% |
| Total Fat | 357.3 g | 549% |
| Saturated Fat | 120 g | 600% |
| Cholesterol | 690.1 mg | 230% |
| Sodium | 745.6 mg | 31% |
| Total Carbohydrate | 12.4 g | 4% |
| Dietary Fiber | 0.9 g | 3% |
| Sugars | 9.4 g | 37% |
| Protein | 105.5 g | 210% |
Note: Nutritional information is an estimate and can vary based on specific ingredients and portion sizes.
Variations & Substitutions
- For a spicier kick, add a pinch of red pepper flakes or a finely chopped chili pepper to the soy sauce and honey glaze.
- Experiment with different aromatics for stuffing the duck. Star anise, orange peel, or Sichuan peppercorns can add unique and delightful flavors.
- If you prefer a sweeter glaze, substitute maple syrup for the honey.
- For a richer flavor, use dark soy sauce instead of light soy sauce.
- Try adding a splash of rice wine vinegar to the glaze for a tangy counterpoint to the sweetness.
FAQs (Frequently Asked Questions)
Q: Why steam the duck before roasting?
A: Steaming helps to render out excess fat from the duck, resulting in a leaner, more tender meat. It also pre-cooks the duck, reducing the roasting time and ensuring a juicy final product.
Q: How do I know when the duck is fully cooked?
A: The best way to check for doneness is to use a meat thermometer. Insert it into the thickest part of the thigh, avoiding the bone. The internal temperature should reach 180-degrees F.
Q: Can I skip the roasting step and just steam the duck?
A: While you can technically eat the duck after steaming, roasting is crucial for achieving crispy, golden-brown skin. The high heat caramelizes the glaze and adds a delightful textural contrast to the tender meat.
Q: What should I do with the juices that accumulate during steaming?
A: Those juices are packed with flavor! Skim off the excess fat and use the remaining liquid as a base for a delicious sauce. You can thicken it with a cornstarch slurry or reduce it over heat for a more concentrated flavor.
Q: Can I prepare the duck ahead of time?
A: You can steam the duck a day in advance and store it in the refrigerator. Before roasting, allow it to come to room temperature for about 30 minutes. Then, brush with the glaze and roast as directed.
Final Thoughts
Steamed duck, prepared with care and infused with aromatic flavors, is a dish that transcends the ordinary. It’s a culinary adventure that pays homage to tradition while offering endless possibilities for personalization. So, gather your ingredients, embrace the process, and prepare to delight your senses with the exquisite taste and texture of this timeless classic. Don’t be afraid to experiment with variations and substitutions to create your own signature steamed duck. And most importantly, share your culinary masterpiece with loved ones and savor the joy of good food and good company.